background image

23

23

8

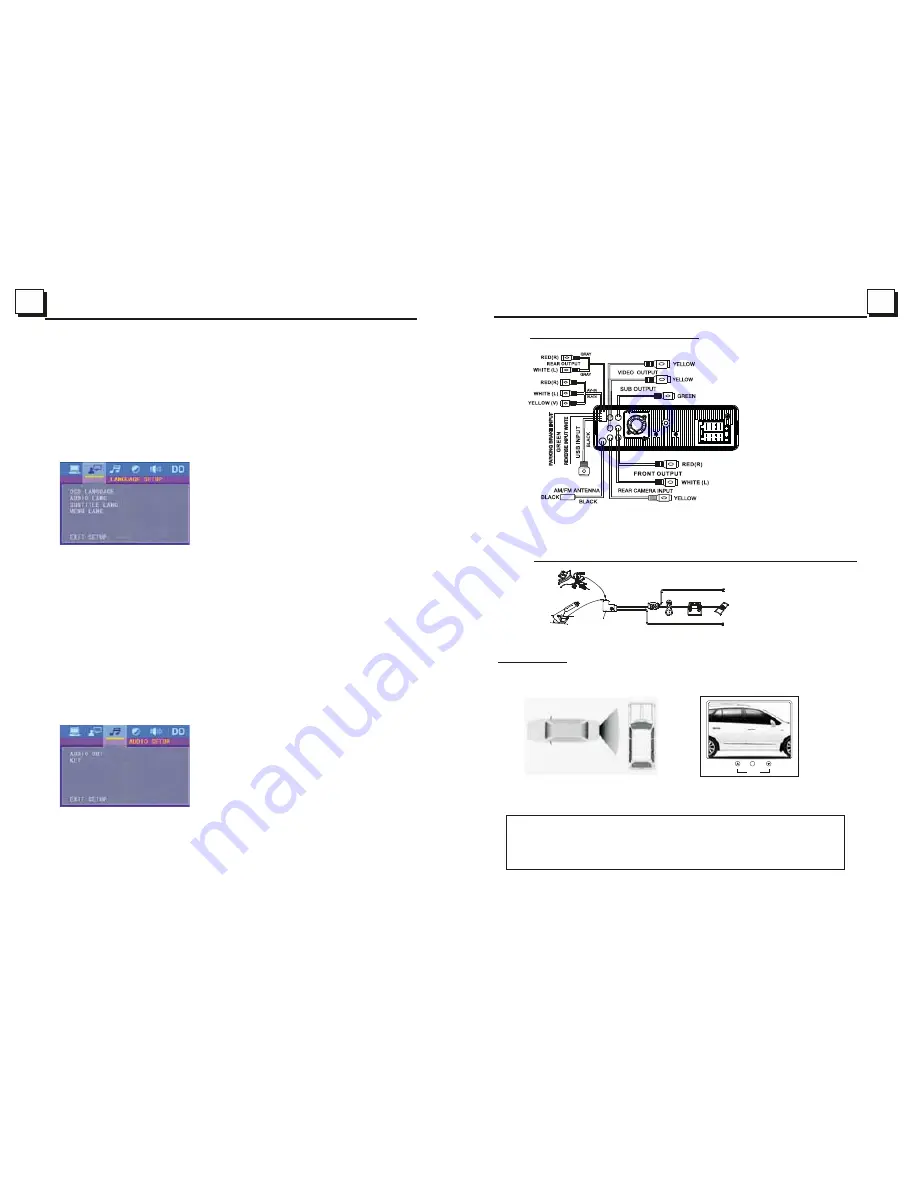
1.7  Description of the Rear Cabinet

Connecting the parking brake line to the parking brake system built in the car

Parking brake

Parking brake switch
(inside the car)

To metallic body or chassis of the car

Note:1. Parking wire must be connected, and the parking brake must be engaged in order for the monitor to work
          2. Use the clip end of the Ground wire provided by manufacturer to connect Mounting Screw, use the other end of the 
              Ground wire to connect the negative pole of the power source. Otherwise, the video on screen may have interference

.

Parking brake wires(Green)

Rear View Camera

 In any mode, the video signal will switch to camera mode (if applicable)when car is in reverse.
 After taking the car out of reverse, it will resume to its previous mode.

Analog on-site backup

Analog on-site backup

P I C

A N G L E

Warning:
Always check the surrounding environment. Objects might be reversed. The rear view
camera is  designed only to assist while reversing. Due to the limitations of the camera
angle and range, it may cause accidents if the driver relies solely on the reverse camera
and display.


.  

2. Select the RATING item and then press the > button to enter it, then use the 
    direction buttons to select your desired rating level, then press the OK button
    to confirm.
3. Select the PASSWORD item again and then press the > button to enter it, then 
    input the password, and then press the OK button to lock the new setting of 
    the rating level of the Parental Control. 

DEFAULT 

This item is for making all setup items change back to original status. 

4.24.2  LANGUAGE SETUP


OSD LANGUAGE  

This item is for selecting the language of the SYSTEM MENU and all operating
prompt interface displayed during playback.  

AUDIO LANG 

This item is for selecting a audio language.  

SUBTITLE LANG

This item is for selecting a subtitle language. 

MENU LANG

This item is for selecting a disc menu language.

4.24.3  AUDIO SETUP 


AUDIO OUT

there is only ANALOG mode, i.e. SPDIF/OFF, not optional.

KEY 

It is for selecting your desired basic music tone(from low to high).  

Содержание BV7336

Страница 1: ......

Страница 2: ...301 301 1 1 To ensure safety while driving and to comply with laws drivers should not watch video or operate the video device while driving...

Страница 3: ...bol located on the rear panel of the unit indicate this player is a class laser product only use weak laser and no hazardous radiation outside of the unit 1 Read through this instruction manual before...

Страница 4: ...ck in Zoom Mode 19 4 17 Change the Caption Language 19 4 18 Change the Audio Language 19 4 19 Program Playback 20 4 20 Playback the Picture CD in JPEG Format 20 4 21 Operation about file style of vide...

Страница 5: ...TION Ensure that the power switch is on Ensure that the power cable is not damaged or the fuse is not blown Ensure that the power is connected properly NO SOUND BUTPICTURE OK Ensure that the player au...

Страница 6: ...perature Fig 1 Fig 2 Fig 3 4 25 Parental Control Q After inserting DVD disc into disc compartment a dialogue window will appear asking for a password of 4 digits Why A This is because the disc movie y...

Страница 7: ...v BUTTON 9 SEL BUTTON 12 10 PTY BUTTON 13 SETUP BUTTON 14 MODE BUTTON 15 APS BUTTON 10 PLAY PAUSE BUTTON 11 NUMBER 0 9 10 10 BUTTONS 1 2 3 4 5 6 7 9 8 10 11 12 40 13 14 15 16 17 18 19 20 21 22 23 24...

Страница 8: ...video output HUE It is for adjusting the hue of the video output SATURATION It is for adjusting the saturation of the video output SHARPNESS It is for adjusting the sharpness of the video output 4 24...

Страница 9: ...is designed only to assist while reversing Due to the limitations of the camera angle and range it may cause accidents if the driver relies solely on the reverse camera and display 2 Select the RATING...

Страница 10: ...to select a desired mode of the setup item finally press the OK button to confirm it Press the button to return to the upper level Press the SETUP button again or use the direction buttons to highlig...

Страница 11: ...file sort icon press the or button to select the first JPEG file then press the v button to select the desired JPEG file finally press the OK or PLAY PAUSE button to display the JPEG picture in full...

Страница 12: ...title chapter track with desired sequence 4 Use the direction button to move cursor onto Play item then press the OK button to play the programmed titles chapters tracks in programmed order only press...

Страница 13: ...band press one of the Number buttons 1 6 5 STEREO MONO BUTTON Press the ST button on the remote control to select the STEREO or MONO sound mode for FM band 6 LOC BUTTON 1 When the signal of distant r...

Страница 14: ...tted 1 If the unit is in Disc Play mode it will switch to radio mode temporarily 2 Temporarily switch over to an EON linked station when EON detects a traffic announcement on that other program and TA...

Страница 15: ...R CD R W DVD R or DVD R W may not play 2 When dealing with CD R CD R W DVD R or DVD R W recording too high recording speed may result in poor signal quality and therefore it is recommendable to select...

Страница 16: ...ample 2 to play the 107 track chapter just press 1 and press 0 and then press 7 on the remote Note pressing and holding the 10 or 10 buttons will allow you to play the next 10 or last 10 chapter track...

Отзывы: