Introduction
5
Svens
k
a
N
e
d
e
rl
a
n
d
s
It
alian
o
Fran
çais
E
spaño
l
Deuts
c
h
D
an
sk
EnglishDansk
Deutsch
Italiano
Nede
rla
nds
Svens
k
a
F
ra
nçais
E
sp
añol
English
Auditioner
®
Playback System III User Guide
Minimum system requirements
We recommend the following minimum system requirements for running Bose
®
Modeler
®
Plus
software:
• Microsoft Windows XP Professional, Service Pack 1 (or later)
• Intel Pentium 4 850 MHz processor (or better)
• 256 MB of RAM available (512 MB RAM recommended)
• 100 MB of disk space available (500 MB recommended)
• CD-Rom Drive
• 1024x768 32-bit XGA color video display adapter, Open GL (or better)
• A USB hardware key (supplied with the software)
• 2 USB ports available for Bose Modeler hardware key and Auditioner playback system
Recommended computer configuration
We recommend the following computer configuration for Bose
®
Modeler
®
Plus software:
• A laptop running Microsoft Windows XP Pro that exceeds the minimum system require-
ments outlined above
• A scroll-wheel mouse (for example a USB mouse)
• This configuration may require three (3) USB connections. Therefore we recommend the
use of an off-the-shelf USB hub device if your computer does not have enough USB ports.
Getting additional help
If you need additional help using the Auditioner playback system, please refer to the follow-
ing:
•
The Modeler User Guide and Online Help
- Refer to these sources for help on the Mod-
eler software.
•
The Auditioner
®
Playback System III Software User Guide
- Refer to this source when
you are running the Auditioner features in Bose
®
Modeler
®
Plus software.
•
Bose Pro Web Site
- Check
http://pro.bose.com
for software updates, documentation
updates and answers to frequently asked questions.
Using Auditioner
®
Playback System III
14
Eng
lis
h
D
eu
ts
ch
Fr
anç
a
is
Da
ns
k
E
spa
ñ
ol
It
alian
o
Sven
sk
a
Ne
de
rla
nds
Da
nsk
Ita
lia
no
Sve
n
ska
De
ut
sc
h
N
ed
erlan
d
s
English
F
rançais
Espa
ño
l
Auditioner
®
Playback System III User Guide
Using Calibrate Mode
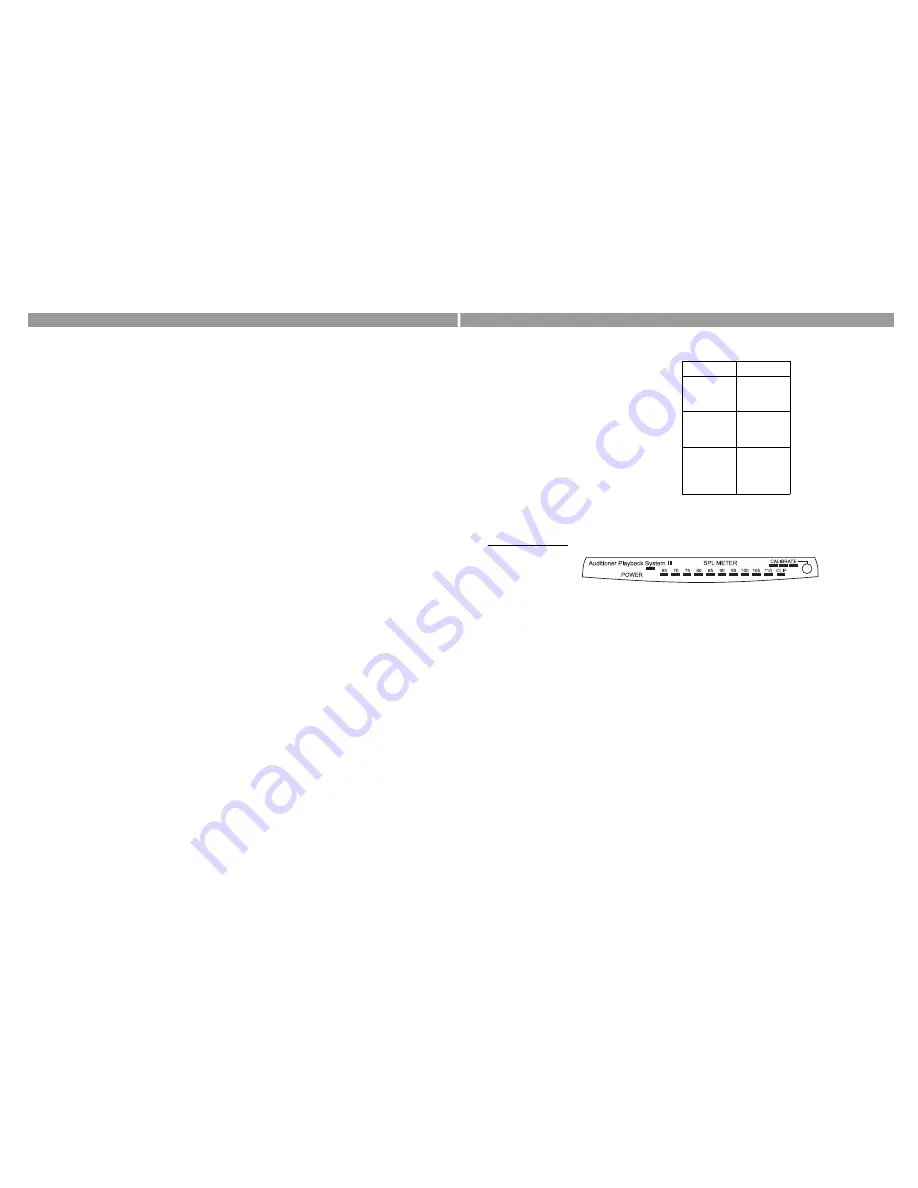
Figure 11
The Auditioner
®
Playback
System III LED display
When the Sound Pressure Level that you hear from the Auditioner playback system matches
the level of the original signal that you recorded, you have a "calibrated" signal. When you
play pre-recorded material from an analog source on the Auditioner playback system, you
need to take a series of steps (see below) to ensure that the level you hear is correctly
calibrated.
When the Auditioner playback system is connected to a digitally-transmitted signal, the
calibration is automatic. It is possible for your digital recording to lose calibration if you use
an analog playback device. Although the file itself will not lose calibration (because it is
digital), the audio device that you use (such as a portable CD player) might cause the
calibration to be lost. We recommend that you playback all digital files from the hard drive of
your computer using the USB connection to avoid losing calibration. If you must use an
analog CD player, we recommend that you record the provided calibration tone onto the CD
when you record your audio. The calibration tone can be found on the Bose
®
Modeler
®
Plus
software product CD.
Note:
The calibration display has a push button switch that provides a way to toggle between
Sound Pressure Level and calibration readings. The “up” position is calibrate mode, the
“down” position activates the SPL meter. For information on monitoring the Sound Pressure
Levels,
see
“Monitoring Sound Pressure Levels” on page 12.
Follow these steps to calibrate the Auditioner playback system when using an analog
playback device:
1.
In the Bose
®
Modeler
®
Plus software, record your audio to the hard drive as a .wav file.
2.
Record your .wav file to a normal audio CD. When you record the CD, you should include
the calibration tone file located on the Bose
®
Modeler
®
Plus software product CD. You
should record this calibration tone as the first track on the CD.
Table 1: LED Values
LED Color
dB SPL
Red
110
105
100
Yellow
95
90
85
Green
80
75
70
65
Содержание Auditioner Playback System III
Страница 1: ......


