background image

Electric Drives

and Controls

3

1

Bosch Rexroth AG

BT 6.00

1070080078 / 03

Assembly and Connection

3

Assembly and Connection

3.1

BT 6.00 

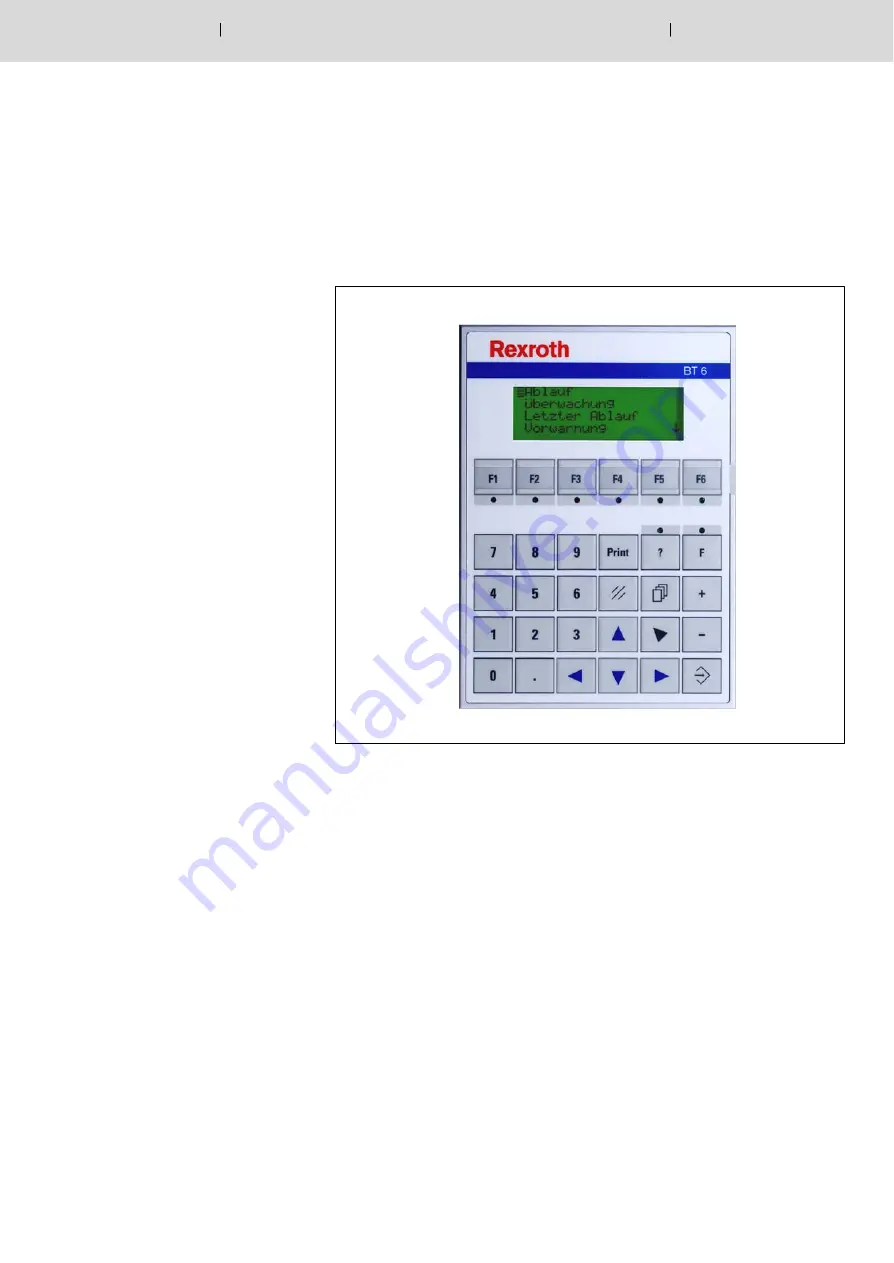
 Built-in unit

3.1.1

Dimensions and assembly

Weight :

ca. 0.6 kg

Location:

desk or hinged frame or control cabi-

net; sealed as per IP 65.

Orientation:

any orientation possible

Degree of protection

(as per EN 60529):

Front face: IP 65

Back face: IP 20

Operating temperature range: 0

_

C to +50

_

C

Storage temperature range:

20

_

C to +60

_

C

Climatic category:

Climatic category 3k3 to EN 60721,

condensation is not permitted.

Содержание Rexroth PS5000

Страница 1: ...S5000 PS6000 Operating and Diagnostic Terminal BT 6 00 1070080078 Edition 03 Comissioning Operating Instructions Electric Drives and Controls Pneumatics Service Linear Motion and Assembly Technologies Hydraulics ...

Страница 2: ... the contents thereof without express authority are forbidden Offenders are liable for the payment of damages All rights are reserved in the event of the grant of a patent or the registration of a utility model or design DIN 34 1 The specified data is for product description purposes only and may not be deemed to be guaranteed unless expressly confirmed in the contract All rights are reserved with...

Страница 3: ...erview 2 1 3 Assembly and Connection 3 1 3 1 BT 6 00 Built in unit 3 1 3 1 1 Dimensions and assembly 3 1 3 1 2 Connection 3 4 3 2 BT 6 00 Hand held programming terminal BT 6 00 HPG 3 7 3 2 1 Connection 3 8 4 Operation 4 1 4 1 Control elements of BT 6 Overview 4 2 4 2 Main menu items and their functionality Overview 4 4 4 3 Selection of main menu items and navigation in sublevels 4 6 4 4 Quick mode...

Страница 4: ... Drives and Controls Bosch Rexroth AG BT 6 00 1070080078 03 Contents 5 3 BT 6 Firmware version 5 3 5 3 1 Display firmware version 5 3 5 3 2 Load firmware version 5 4 A Annex A 1 A 1 Abbreviations A 1 A 2 Index A 2 ...

Страница 5: ... connecting or commissioning the products or programming the welding system Store this manual in a place to which all users have access at any time The contents of this manual refer to D the mechanical structure D the electrical connection and D the functionality of the control and diagnostic terminal BT 6 00 built in unit and BT 6 00 HPG manual programming terminal For the actual weld timers plea...

Страница 6: ...ersonal injury DANGER This symbol is used wherever insufficient or lacking compliance with in structions may result in personal injury CAUTION This symbol is used wherever insufficient or lacking compliance with in structions may result in damage to equipment or data files This symbol is used to draw the user s attention to special circum stances L This symbol is used if user activities are requir...

Страница 7: ...ltage network supplying e g residential build ings because it may interfere with other equipment in the environ ment DANGER Any use other than for the purpose indicated may result in per sonal injury of the user or third parties or in damage to equipment the workpiece to be welded or environmental damage Therefore our products must never be used for any other than their respective intended purpose...

Страница 8: ... party components in cluded The packaging materials are made of cardboard wood and polystyrene For environmental reasons please do not return any empty packagings to us They can be easily recycled The products are to be sent postage prepaid to the following address Bosch Rexroth AG Electric Drives and Controls Bürgermeister Dr Nebel Straße 2 D 97816 Lohr am Main Recycling Principal components of o...

Страница 9: ...tronic equipment Interventions in the hardware and software of our products unless de scribed otherwise in this manual are reserved to specialized personnel Tampering with the hardware or software ignoring warning signs at tached to the components or non compliance with the warning notes given in this manual can result in serious bodily injury or property dam age Only skilled persons as defined in...

Страница 10: ...h Rexroth AG BT 6 00 1070080078 03 Safety Instructions No entry for persons with cardiac pacemakers Danger Please note our comprehensive range of training courses More infor mation is available from our training center Phone 49 6062 78 600 ...

Страница 11: ...e and damage to property through inadequate degree of protection Therefore you must observe the information provided in the indi vidual sections applicable to the installation and assembly DANGER Danger of injuries and damage to property through inappropriate installation When installing the products and their wiring as well as their con trol elements it must be ensured that they are sufficiently ...

Страница 12: ...lts Therefore it is not permitted to use extension cables between the control station and the BT6 00 HPG CAUTION All connection or signal leads must be routed so as to prevent neg ative effects on device functions through capacitive or inductive interference In long cables interference is frequently injected and removed Power lines and control cables should be routed separately The influence of in...

Страница 13: ... issued by the Berufsgenos senschaft employers third party liability insurance association DANGER Due to the strong magnetic fields arising from resistance welding the function of cardiac pacemakers may be disturbed This may cause the death or considerable health damages Therefore these persons should avoid the welding system We recommend posting a warning to DIN 40023 at all entrances to factory ...

Страница 14: ...ded start fences light barri ers etc the risk of bruises can be considerably reduced CAUTION Danger of overheating in the event of incorrect or insufficient cool ing The temperature inside the housing must be within the specified limits 1 9 Retrofits and modifications by the operator DANGER Any changes made to the product may endanger the safety of the unit The possible consequences include death ...

Страница 15: ...otection when handling mod ules and components Avoid electrostatic discharge The following protective measures must be observed for modules and components sensitive to electrostatic discharge ESD D Personnel responsible for storage transport and handling must have training in ESD protection D ESD sensitive components must be stored and transported in the prescribed protective packaging D ESD sensi...

Страница 16: ...elding splashes Welding splashes have to be expected during operation of the welding plant This may result in eye injuries and burns Therefore wear protective goggles wear safety gloves wear flame retardant clothes DANGER Danger of injuries at sharp metal edges and danger of getting burnt by hot welded parts Therefore you should wear safety gloves CAUTION Strong magnetic fields The strong magnetic...

Страница 17: ...escribed corresponds to an application variant which is not covered by the provisions concerning end user prod ucts machines or systems based on its very nature Therefore it may only be operated as described above The evaluation of the electrical and mechanical safety the envi ronmental influences foreign bodies moisture must be carried out on the final product in encased state When installed in a...

Страница 18: ...l installed software is copyright protected The software may only be reproduced with the approval of Rexroth or in accordance with the license agreement of the respective manufacturer MS DOSr and Windowst are registered trademarks of Microsoft Corporation PROFIBUSr is a registered trademark of the PROFIBUS Nutzerorga nisation e V user organization INTERBUS Sr is a registered trademark of Phoenix C...

Страница 19: ...r and can be used in connection with the PS 5000 and PS 6000 series of weld timers It is intended for D stationary e g in the control panel of the welding station for hard ware refer to Section 3 1 from page 3 1 or D mobile operation for hardware refer to Sect 3 2 from page 3 7 The BT 6 00 supports the following functions D Display and reset of all faults currently active in the timer D Display an...

Страница 20: ...2 2 Electric Drives and Controls Bosch Rexroth AG BT 6 00 1070080078 03 Overview Notes ...

Страница 21: ...and assembly Weight ca 0 6 kg Location desk or hinged frame or control cabi net sealed as per IP 65 Orientation any orientation possible Degree of protection as per EN 60529 Front face IP 65 Back face IP 20 Operating temperature range 0_C to 50_C Storage temperature range 20_C to 60_C Climatic category Climatic category 3k3 to EN 60721 condensation is not permitted ...

Страница 22: ...ading angle of the LCD display is approx 90_ Remember how quickly the front panel can become dirty with a station ary inclined or horizontal installation max 90 degrees BT6 6 00 Optimum viewing angle 90 degrees L From the place the terminal is installed the operator s view of any mov ing machine elements must never be obstructed and he must be able to immediately operate the system s EMERGENCY STO...

Страница 23: ...0 with the 2 fastening clamps included in the delivery 1 Insert the terminal into the mounting cutout from the operating side 2 Engage the fastening clamps in the lateral recesses of the BT 6 00 housing 3 Tighten the threaded pins at the fastening clamps Front panel Foam rubber gasket Mounting surface 1 to 14 mm thick Threaded pin DIN 914 M 4x35 Fastening clamp Threaded pin DIN 914 M 4x35 ...

Страница 24: ... 6 firmware download X3 not used PE Threaded bolt for connecting the PE conductor S1 Recessed button for activating the bootstrap mode S1 The control terminal may be connected and disconnected while the timer is running Communication with the timer is automatically established when X2 has been linked if the BT 6 00 power supply X1 had previously been inter rupted If the BT 6 00 power supply had no...

Страница 25: ...le max 10 Power input 0 3 A Peak current 0 5 A Protection against polarity reversal Protective diode Fusing through semiconductor fuse self regen erating For more information refer to page 5 3 X1 24 VDC 0 VDC 1 2 3 The BT 6 00 can be supplied from e g the X5 power output of the weld timer If shielded cables are used connect the shield conductor to pin 1 The PE bolt is specifically provided for con...

Страница 26: ...trically stranded min core area of 0 25 mm2 Transmission rate 19200 bit s Parameter 8 data bits even parity 1 stop bit Transmission PS5000 block protocol with CRC16 1 2 3 RX TX 4 max 15 m BT6 6 00 X2 submin D 9 pin Shield continuity through a large area contact with the metal housing of the connectors 5 GND 6 7 8 9 PS 5000 PS 6000 X1 submin D 9 pin RX TX GND Socket Plug 2 3 5 4 6 7 8 Connection of...

Страница 27: ...e of protection IP 54 as per EN 60529 Operating temperature range 0_C to 40_C Storage temperature range 20_C to 60_C Climatic category Climatic category 3k3 to EN 60721 condensation is not permitted Connection using cable max length 1 5 m and 15 pole Sub D connector Connection to Schweisskoffer or directly to weld timer using additional adapter Part no adapter 1070 088 302 Fastening possibility us...

Страница 28: ...rated in the event of possible faults Therefore it is not permitted to use extension cables between the control station and the BT 6 00 HPG L Avoid installation places which are exposed to direct sunshine reduc tion of display legibility additional heat L Keep as far as possible away from sources of interference however at least 25cm L Do not take the manual programming terminal close to items tha...

Страница 29: ...miconductor fuse self regen erating For more information refer to page 5 3 Communication interface via pins 2 3 and 5 Type RS232C electrically isolated Transmission rate 19200 bit s Parameter 8 data bits even parity 1 stop bit Transmission PS5000 block protocol with CRC16 1 2 3 RX TX 4 5 GND 6 7 8 9 PS 5000 PS 6000 X1 submin D 9 pin Plug 1 2 3 4 5 6 7 8 9 Control station Socket 15 pin 10 11 12 13 ...

Страница 30: ...3 10 Electric Drives and Controls Bosch Rexroth AG BT 6 00 1070080078 03 Assembly and Connection Notes ...

Страница 31: ...e production process e g display modification of welding parame ters reset counters after electrode change display of I O signals pres ent etc CAUTION Possibility of damages to the system or the workpiece Do not change any data without reason All data will be transmitted online to the weld timer Incorrect data settings may cause dam ages to the system or the workpiece ...

Страница 32: ... of a main menu entry An integrated LED indicates the main menu entry activated by a per manent light Events assigned to such a sub level are signaled by a flashing LED e g Stepper status or Maximum electrode life in STEPPER sublevel The main menu options assigned to the individual function keys de pend on your timer type 3 Numerical keys including decimal point for input of numerical val ues In c...

Страница 33: ...tegrated LED is lit during parameter selection By pressing the key again you may jump directly to the selected parameter For more information on Quick Mode refer to page 4 7 ff 7 Delete Quit button Deletes numerical values and resets active faults timer is returned to Ready status 8 Return key Return to the main menu 9 Plus and minus keys Decrement or increment the value in the display field or ch...

Страница 34: ...rrent block hold time off time etc F1 function key for direct selection D Monitoring Options Activate deactivate current monitoring Display and change tolerance limits F2 function key for direct selection D Last sequence Options Information which schedule program ran last in the timer For all programs Display showing commanded actual current and mean heat value during last sequence F3 function key...

Страница 35: ...ptions Display and change of control mode D Sequence setup Options Display the timer type and firmware version Turn sequence inhibition on off globally for all schedules Turn weld internal on off globally for all schedules F6 function key for direct selection D Setup BT Options Display the control terminal type and firmware version Set the LCD contrast Set the language Display and change code numb...

Страница 36: ...ed and changed if necessary D In order to get to the next previous screen within a sublevel Use or key D In order to move the cursor by lines within a screen Use or key D To change data Set cursor to the line of the input field Then use numerical keys or keys D To confirm data changes Press key D To abort data changes Press key L You may press the key at any time in order to go back from any scree...

Страница 37: ... is necessary to select a certain welding program move the cursor with the or key to line 2 and set the desired number Use the number keys the keys or for this purpose 3 If you have used the number keys for selection press in order to display the selected number 4 Move the cursor to line 3 with the or key and enter the desired parameter number with the number keys or keys or An over view of the pa...

Страница 38: ...rrent rise 6 Upslope heat 7 2 Weld time Weld time 8 2 Heat Basic heating current 9 2 Cool time 10 Down slope time Current decrease time 11 Downslope heat 12 3 Weld time Post heating weld time 13 3 Heat Post heating current 14 3 Cool time 15 Hold time 16 Off time 17 Impulses 2 Weld time Impulses 18 Sequence mode Operating mode 19 Start inhibit sequence 20 Weld no weld sequence 21 1 Halfwave a Cool ...

Страница 39: ...Band 3 Wld 46 Repeat factor 3 Wld 47 Upper Tolerance 3 Wld 48 Lower Tolerance 3 Wld 49 Pressure Base Pressure 50 Pressure profile On Off 51 Only if pressure profile ON 1 Pressure time 52 1 Pressure value 53 2 Pressure time 54 2 Pressure value 55 3 Pressure time 56 3 Pressure value 57 4 Pressure time 58 4 Pressure value 59 5 Pressure time 60 5 Pressure value 61 6 Pressure time 62 6 Pressure value 6...

Страница 40: ...Commanded current 3 Wld 82 Actual current 3 Wld 83 heat 3 Wld 84 Correction Heat corr schedule 85 Pressure corr sched 86 Heat corr electrode 87 Pressure corr elect 88 Sequence setup Show type of timer 89 Weld no weld timer 90 Start Inhibit timer 91 Setup BT Show type of BT6 92 LCD contrast 93 Select language 94 Mains frequency 50 60 Hz 95 Regulation mode Reg mode 96 Reg 1 weld 97 Reg 2 weld 98 Reg...

Страница 41: ...an error is reset acknowledged the timer will start its program run immediately This may result in dangerous machine movements Therefore prior to error reset make sure that there is no one in the hazard area of the welding equipment D Press or to exit the error display The system returns to the previous screen displayed 4 5 2 Select system language L Proceed as follows to set the language 1 Press ...

Страница 42: ...e LCD contrast screen steps 1 to 3 you may also use Quick Mode and parameter number 93 For more informa tion on Quick Mode refer to page 4 7 ff 4 5 4 Inhibiting the Control Function change code numbers Parameter changes or the display of data can be inhibited with the help of code numbers max 4 digits Each existing main menu entry and the Change code number function can thus be protected separatel...

Страница 43: ...mber at this point enter the number and then press From that point onward access to the Change code number mode is only granted if this higher level code number is entered 9 Press key The next code number screen will be displayed Line 1 Changing key number Line 2 What is to be protected e g WELD SEQUENCE main menu entry Line 3 Read only 0 Line 4 Read Write 0 If no code number is required you have ...

Страница 44: ...ip dress request prewarning stepper status end of stepper maximum electrode life Number of remaining parts 4 Move the cursor up or down with the keys or If more than 3 electrodes counters are available the or keys will trigger the display of more electrodes if necessary If counters are to be reset after an electrode change proceed to 6 5 Press the key in order to leave the electrode display and re...

Страница 45: ...hedule that was last executed 4 In order to display the data of the last weld of a certain schedule en ter the desired schedule number in line 1 and press key The BT 6 will open a screen which contains the commanded current actual current and heat value of the last weld of this schedule If necessary the sequence data can be called up individually for the 1st 2nd and 3rd weld time by pressing the k...

Страница 46: ...tionally separated from the 2 digit signal numbers by the S character e g S00 S01 etc D ext the signals displayed are of the external type transmission via hardware I O This signal type is additionally characterized by an E input or an A output in front of the 2 digit signal numbers e g E00 A00 etc D int the signals displayed are of the internal type signal is generated internally by the timer Thi...

Страница 47: ...e BT 6 is not supplied with power at X1 for more than 1 minute because the battery is low or during battery change all code num bers input may be deleted Therefore check all your code numbers when you have replaced the battery Replacing the battery 1 Switch the unit off 2 Only for manual programming terminal Loosen the 4 fastening screws at the back side of the housing of the manual programming te...

Страница 48: ...ntenance Repair 11 Slightly hit a new buffer battery of the same type on a firm surface in order to destroy the internal oxide layer Then insert the new battery and secure it with a cable strap 12 Ensure correct polarity and reinsert the battery connector 4 on the connector pole 13 Put the housing carefully back on and screw the housing screws 1 and the threaded bolts of the interfaces 2 back in 1...

Страница 49: ... the most current firmware is installed on the BT 6 When the power supply is switched on BT 6 will display the firmware version for approx 2 seconds Normally updates are not necessary 5 3 1 Display firmware version You may display the firmware version if the BT 6 is switched on and prop erly connected to the weld timer L Proceed as follows 1 Press key 2 Move the cursor to the SETUP BT line with th...

Страница 50: ...sed 4 Insert the data carrier containing the firmware into your PC Select the path and file name of the firmware Firmware files have the file name extension hex 5 Click on load firmware command button You are prompted to set the bootstrap mode on the unit 6 Press the recessed key S1 on the back side of the BT 6 Thus the unit is switched from operating to bootstrap mode This condition is indicated ...

Страница 51: ...ontrols 5 5 Bosch Rexroth AG BT 6 00 1070080078 03 Maintenance 10 Connect the BT 6 to the weld timer Communication with the weld timer is automatically reestablished 11 Display the firmware version cf section 5 3 1 page 5 3 ...

Страница 52: ...5 6 Electric Drives and Controls Bosch Rexroth AG BT 6 00 1070080078 03 Maintenance Notes ...

Страница 53: ...ich the solenoid valve is not triggered Relevant for Repeat mode only P Periods mains cycles At 50 Hz mains frequency 1 P 20 ms PE Protective Earth PG Programming device welding computer PHA Phase angle shift PLC Programmable Logic Controller PSG Transformer rectifier unit for the PSI in verter series RA RO Relay output REPEAT Repeat mode Mode for manually operated systems only SING Single spot mo...

Страница 54: ...e update 5 4 Functionality 4 4 Fusing 3 5 3 9 5 3 G Grounding bracelet 1 11 H Hand held programming terminal 3 7 Hazardous materials 1 4 I I O signals 4 16 Installation 1 7 Installation depth 3 2 Intended use 1 3 Interfaces RS232 3 6 L Last weld 4 15 Location 3 1 M Main menu items 4 4 Maintenance 1 11 5 1 Modifications 1 2 Modifications by the operator 1 10 Modules sensitive to electrostatic disch...

Страница 55: ... AG BT 6 00 1070080078 03 Annex Signals 4 16 Spare parts 1 11 System language 4 11 T Temperature ranges 3 1 3 7 Test activities 1 11 Trademarks 1 14 Training center Phone 1 6 V Ventilation 3 2 W Weight 3 1 3 7 Welding splashes 1 12 X X1 3 5 X2 3 6 ...

Страница 56: ... Controls P O Box 13 57 97803 Lohr Germany Bgm Dr Nebel Str 2 97816 Lohr Germany Phone 49 0 93 52 40 50 60 Fax 49 0 93 52 40 49 41 service svc boschrexroth de www boschrexroth com Printed in Germany DOK PS6000 BT6 00 IB03 EN P 1070080078 ...

Отзывы: