background image

9

Cancelling the setting

Press the 

 Clock button. Press the - button until zero is 

shown on the display. Switch off the function selector.

Setting the cooking time if the clock is hidden

Press the 

0

 Clock button twice and make your settings as 

described in point 4.

If the oven is to switch on and off 

automatically

Please remember that easily spoiled foods must not be allowed 

to remain in the cooking compartment for too long.
Example in the picture: 3D hot air 

:

, 200 °C. It is 10:45. The 

meal takes 45 minutes to cook and should be ready at 12:45 .

1.

The function selector is used to set the type of heating.

2.

The temperature selector is used to set the temperature or 

grill setting.

3.

Press the 

0

 Clock button.

4.

Use the 

@

 or 

A

 button to set the cooking time.

5.

Press the 

0

 Clock button repeatedly until the 

y

 End symbol 

flashes.  

You can see in the display when the meal will be ready.

6.

Use the 

@

 button to set a later end time.  

The setting is adopted after a few seconds.  

The end time is shown in the display until the oven starts.

The cooking time has elapsed

A signal sounds. The oven switches off. Press the 

0

 button 

twice and switch off the function selector.

Note: 

You can make changes as long as the symbol is 

flashing. When the symbol lights up, the setting has been 

adopted.

Setting the clock

When the appliance is connected for the first time or after a 

power cut, the 

0

 symbol and three zeros flash in the display. 

Set the clock. The function selector must be switched off.

Setting procedure

1.

Press the 

0

 Clock button.  

12.00 appears in the display and the 

 symbol flashes.

2.

Use the + or - button to change the clock.  

After a few seconds, the time is saved. The 

0

 symbol goes 

out.

Changing from summer to winter time, for example

Press the 

0

 Clock button twice and change the time using the 

+ or - button.

PLQ

VHF

K

PLQ

PLQ

VHF

K

PLQ

Содержание HBN531.1B

Страница 1: ... en Instruction manual Built in oven HBN531 1B ...

Страница 2: ......

Страница 3: ...parts and services can be found at www bosch home com and in the online shop www bosch eshop com Important safety information Read these instructions carefully Only then will you be able to operate your appliance safely and correctly Retain the instruction manual and installation instructions for future use or for subsequent owners This appliance is only intended to be fully fitted in a kitchen Ob...

Страница 4: ...ury Scratched glass in the appliance door may develop into a crack Do not use a glass scraper sharp or abrasive cleaning aids or detergents Risk of electric shock Incorrect repairs are dangerous Repairs may only be carried out by one of our trained after sales engineers If the appliance is faulty unplug the mains plug or switch off the fuse in the fuse box Contact the after sales service Risk of e...

Страница 5: ... adjacent units could be damaged over time Very dirty door seal If the door seal is very dirty the appliance door will no longer close properly when the appliance is in use The fronts of adjacent units could be damaged Always keep the door seal clean Appliance door as a seat shelf or worktop Do not sit on the appliance door or place or hang anything on it Do not place any cookware or accessories o...

Страница 6: ...ds Caution do not cover the ventilation slots Otherwise the oven will overheat Positions Function Û Off The oven is switched off 3D hot air You can bake cakes pizza bis cuits small cakes and puff pastry on two levels at the same time A fan with a ring heating element on the back panel of the oven ensures that the heated air is dis tributed evenly 4 Hot air grilling Hot air grilling is particularly...

Страница 7: ...d the options for ordering them on the internet vary depending on the country Information regarding this can be found in the sales documents Not every optional accessory is suitable for every appliance When purchasing always quote the complete identification number E no of your appliance Oven door Additional safety precautions During long cooking times the oven door may become very hot If you have...

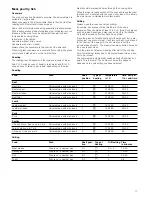
Страница 8: ...loth Setting the oven There are various ways in which you can set your oven Here we will explain how you can select the desired type of heating and temperature or grill setting You can select the cooking time and end time for your dish on the oven Types of heating and temperature Example in the picture 3D hot air heating 190 ºC 1 Use the function selector to select the required type of heating 2 U...

Страница 9: ... symbol flashes You can see in the display when the meal will be ready 6 Use the button to set a later end time The setting is adopted after a few seconds The end time is shown in the display until the oven starts The cooking time has elapsed A signal sounds The oven switches off Press the 0 button twice and switch off the function selector Note You can make changes as long as the symbol is flashi...

Страница 10: ...lean your oven correctly Notes Slight differences in the colours on the front of the oven are caused by the use of different materials such as glass plastic and metal Shadows on the door panel which look like streaks are caused by reflections made by the oven light Enamel is baked on at very high temperatures This can cause some slight colour variations This is normal and does not affect their fun...

Страница 11: ... Installing the frames 1 Insert the two hooks carefully into the upper holes Figure A B Incorrect assembly Never move the frame before the two hooks are fully anchored in the upper holes The enamel could be damaged and may break figure C 2 the two hooks must be inserted fully into the upper holes Now move the frame slowly and carefully downwards and insert in the lower holes figure D 3 Insert both...

Страница 12: ...e B Attaching the door Reattach the oven door in the reverse sequence to removal 1 When attaching the oven door ensure that both hinges are inserted straight into the opening figure A 2 The notch on the hinge must engage on both sides figure B 3 Fold back both locking levers figure C Close the oven door Risk of injury If the oven door falls out accidentally or a hinge snaps shut do not reach into ...

Страница 13: ...milarly qualified persons in order to avoid a hazard Replacing the bulb in the oven ceiling light If the bulb in the oven light fails it must be replaced Heat resistant 40 watt spare bulbs can be obtained from our after sales service or a specialist retailer Only use these bulbs Risk of electric shock Switch off the circuit breaker in the fuse box 1 Place a tea towel in the oven when it is cold to...

Страница 14: ...m This reduces the baking time for the second cake You can also place two loaf tins next to each other For longer cooking times you can switch the oven off 10 minutes before the end of the cooking time and use the residual heat to finish cooking Environmentally friendly disposal Dispose of packaging in an environmentally friendly manner Measures to be noted during transport Secure all mobile parts...

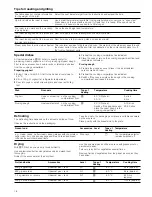
Страница 15: ...used and cakes do not brown so evenly If you wish to use silicone baking tins use the information and recipes provided by the manufacturer as a guide Silicone baking tins are often smaller than normal tins The amount of mixture and recipe instructions may differ Tables The tables show the ideal type of heating for the various cakes and pastries The temperature and baking time depend on the amount ...

Страница 16: ... dry When it is done make small holes in the cake using a cocktail stick Then drizzle fruit juice or an alcoholic beverage over it Next time select a temperature 10 degrees higher and reduce the baking time The bread or cake e g cheesecake looks good but is soggy on the inside sticky streaked with water Use slightly less fluid next time and bake for slightly longer at a lower temperature For cakes...

Страница 17: ...eat directly onto the wire grill If you are grilling just one piece of meat it will turn out best if you place it in the centre of the wire grill You should also insert the universal pan at level 1 The meat juices are collected here and the oven is kept clean Turn the pieces of meat and poultry after half of the cooking time indicated but turkey has to be placed breast side up and not to be turned...

Страница 18: ...extend the time How to tell when the roast is ready Use a meat thermometer available from specialist shops or carry out a spoon test Press down on the roast with a spoon If it feels firm it is ready If the spoon can be pressed in it needs to be cooked for a little longer The roast is too dark and the crackling is partly burnt Check the shelf height and temperature The roast looks good but the juic...

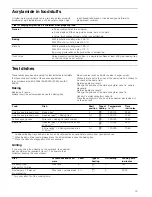
Страница 19: ... cooking times to a minimum Cook meals until they are golden brown but not too dark Large thick pieces of food contain less acrylamide Baking With top bottom heating max 200 C With 3D hot air or hot air max 180 C Biscuits With top bottom heating max 190 C With 3D hot air or hot air max 170 C Egg or egg yolk reduces the production of acrylamide Oven chips Spread evenly over the baking tray in a sin...

Страница 20: ...01 110395 9001098782 9001098782 Robert Bosch Hausgeräte GmbH Carl Wery Straße 34 81739 München Germany www bosch home com ...

Отзывы: