English |
23
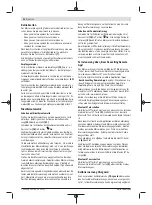
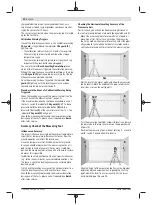
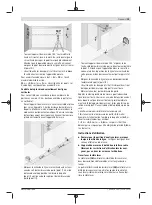
A
B
d
180°
– Turn the measuring tool 180° without adjusting the
height. Aim it at wall A such that the vertical laser line runs
through the already marked point
Ⅰ
. Allow the measuring
tool to level in and mark the point where the laser lines
cross on wall A (point
Ⅲ
).
– The discrepancy
d
between the two marked points
Ⅰ
and
Ⅲ
on wall A reveals the actual height deviation of the
measuring tool.
The maximum permitted deviation on the measuring dis-
tance of 2 ×
5
m =
10
m is as follows:
10
m × ±
0.2
mm/m = ±
2
mm. The discrepancy
d
between
points
Ⅰ
and
Ⅱ
must therefore amount to no more than
2
mm.
Checking the Levelling Accuracy of the Vertical Lines
For this check, you will need a door opening (on solid
ground) which has at least 2.5 m of space either side of the
door.
– Place the measuring tool 2.5 m away from the door open-
ing on a firm, flat surface (not on a tripod). Switch on the
measuring tool in the mode with automatic levelling. Se-
lect the operating mode for generating a vertical laser
plane directly in front of the measuring tool.
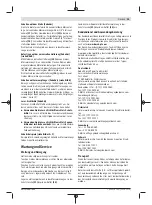
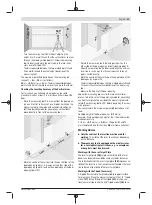
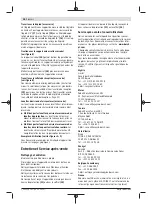
2,5 m
2,5 m
– Mark the centre of the vertical laser line on the floor of the
door opening (point
Ⅰ
), 5 m away on the other side of the
door opening (point
Ⅱ
) and on the upper edge of the door
opening (point
Ⅲ
).
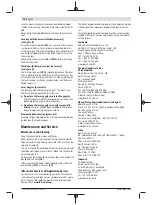
2 m
d
– Rotate the measuring tool 180° and position it on the
other side of the door opening, directly behind point
Ⅱ
.
Allow the measuring tool to level in and align the vertical
laser line in such a way that its centre passes through
points
Ⅰ
and
Ⅱ
exactly.
– Mark the centre of the laser line on the upper edge of the
door opening as point
Ⅳ
.
– The discrepancy
d
between the two marked points
Ⅲ
and
Ⅳ
reveals the actual vertical deviation of the measuring
tool.
– Measure the height of the door opening.
Repeat the measuring process for the two vertical laser
planes. To do this, select the operating mode for generating
a vertical laser plane to one side of the measuring tool and
rotate the measuring tool by 90° before beginning the meas-
uring process.
You can calculate the maximum permitted deviation as fol-
lows:
Doubled height of the door opening ×
0.2
mm/m
Example: At a door opening height of
2
m, the maximum de-
viation amounts to
2 ×
2
m × ±
0.2
mm/m = ±
0.8
mm. The points
Ⅲ
and
Ⅳ
must therefore be no further than
0.8
mm from each other.
Working Advice
u
Only the centre of the laser line must be used for
marking.
The width of the laser line changes depending
on the distance.
u
The measuring tool is equipped with a wireless inter-
face. Local operating restrictions, e.g. in aeroplanes
or hospitals, must be observed.
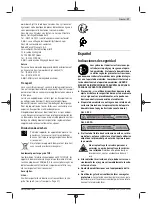
Working with the Laser Target Plate
The laser target plate
(28)
improves visibility of the laser
beam in unfavourable conditions and at greater distances.
The reflective half of the laser target plate
(28)
improves vis-
ibility of the laser line. The transparent half enables the laser
line to be seen from behind the laser target plate.
Working with the Tripod (Accessory)
A tripod offers a stable, height-adjustable support surface
for measuring. Place the measuring tool with the 1/4" tripod
mount
(17)
on the thread of the tripod
(32)
or a conven-
tional camera tripod. Use the 5/8" tripod mount
(18)
to se-
Bosch Power Tools
1 609 92A 5AZ | (16.10.2019)

