22
| English
chargeable battery or non-rechargeable batteries, an in-
ternal energy storage system provides continuous monitor-
ing by the sensors for 72 hours.
The sensors are activated when the measuring tool is started
up for the first time.
Calibration Warning Triggers
If one of the following events occurs, the calibration warning
CAL guard
is triggered and the indicator
CAL guard
(3)
lights up red:
– The calibration interval (every 12 months) has expired.
– The measuring tool was stored outside of the storage
temperature range.
– The measuring tool was subjected to a strong shock (e.g.
impact with the ground after being dropped).
You can refer to the
Bosch Levelling Remote App
to see
which of the three events triggered the calibration warning.
Without the app, the cause cannot be identified, as the indic-
ator
CAL guard
(3)
lighting up indicates merely that the lev-
elling accuracy needs to be checked.
Once the warning has been triggered, the indicator
CAL
guard
(3)
lights up until the levelling accuracy has been
checked and the indicator switched off.
Procedure in the Event of a Calibration Warning Being
Triggered
Check the levelling accuracy of the measuring tool (see "Ac-
curacy Check of the Measuring Tool", page 22).
If the maximum deviation has not been exceeded in any of
the tests, switch the indicator
CAL guard
(3)
off. To do so,
press and hold the receiver mode button
(5)
and the
Bluetooth®
button
(9)
at the same time for at least 3 s. The
indicator
CAL guard
(3)
will go out.
Should the measuring tool exceed the maximum deviation
during one of the tests, please have it repaired by a
Bosch
after-sales service.
Accuracy Check of the Measuring Tool
Influences on Accuracy
The largest influence is exerted by the ambient temperature.
In particular, temperature differences that occur from the
ground upwards can refract the laser beam.
Since the temperature stratification is greatest at ground
level, you should always mount the measuring tool on a tri-
pod for measuring distances of 20 m or more. In addition,
position the measuring tool in the centre of the work surface,
wherever this is possible.
In addition to external influences, device-specific influences
(e.g. falls or heavy impacts) can also lead to deviations. For
this reason, check the levelling accuracy each time before
beginning work.
First check the levelling accuracy of the horizontal laser line,
then the levelling accuracy of the vertical laser lines.
Should the measuring tool exceed the maximum deviation
during one of the tests, please have it repaired by a
Bosch
after-sales service.
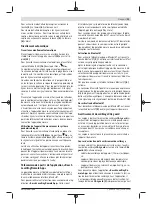
Checking the Horizontal Levelling Accuracy of the
Transverse Axis
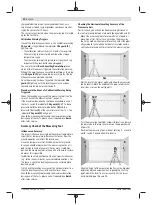
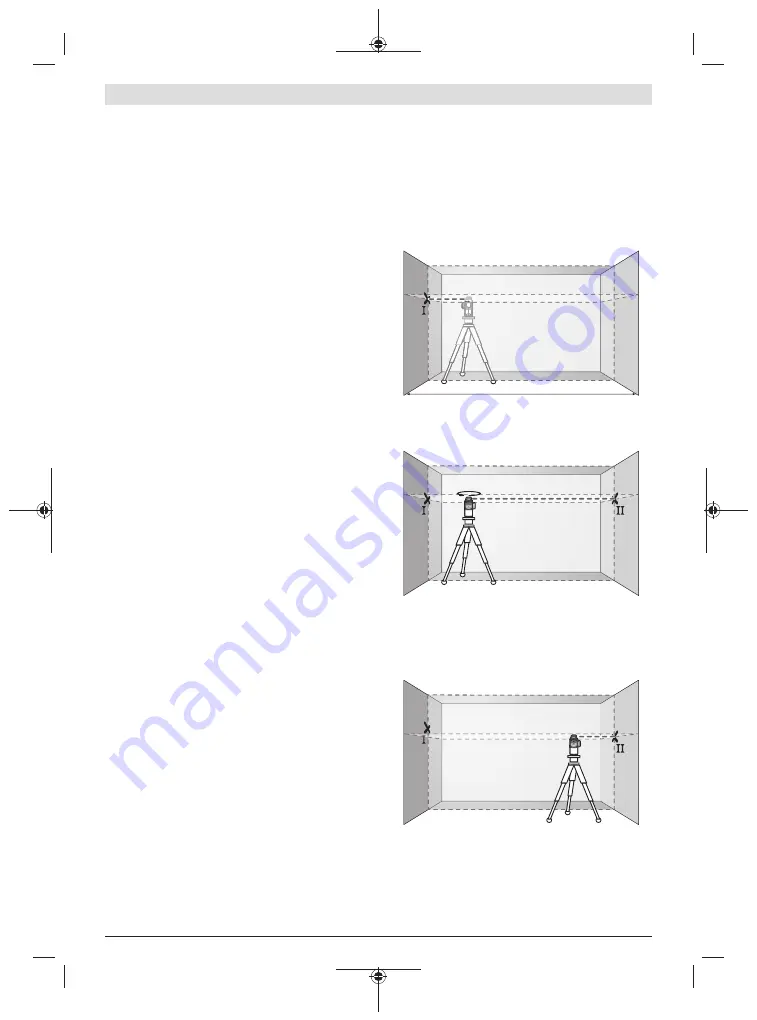
For this check, you will need a free measuring distance of
5
m on firm ground between two walls (designated A and B).
– Mount the measuring tool close to wall A on a tripod, or
place it on a firm, flat surface. Switch on the measuring
tool in the mode with automatic levelling. Select the oper-
ating mode for generating a horizontal laser plane and a
vertical laser plane directly in front of the measuring tool.
A
B
5 m
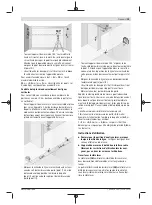
– Aim the laser at the closer wall A and allow the measuring
tool to level in. Mark the middle of the point at which the
laser lines cross on the wall (point I).
A
B
180°
– Turn the measuring tool 180°, allow it to level in and mark
the point where the laser lines cross on the opposite wall
B (point
Ⅱ
).
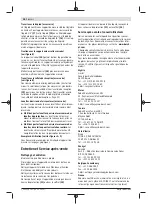
– Position the measuring tool – without rotating it – close to
wall B, switch it on and allow it to level in.
A
B
– Align the height of the measuring tool (using the tripod or
by placing objects underneath as required) so that the
point where the laser lines cross exactly hits the previ-
ously marked point
Ⅱ
on wall B.
1 609 92A 5AZ | (16.10.2019)
Bosch Power Tools

