-13-
Trigger "ON-OFF" Switch
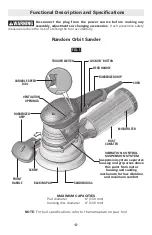
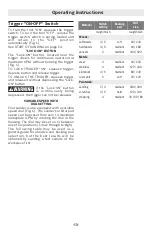
To turn the tool "ON" squeeze the trigger
switch. To turn the tool "OFF", release the
trigger switch, which is spring loaded and
w i l l r e t u r n t o t h e " O F F " p o s i t i o n
automatically (Fig. 1).
See START OF SANDING on page 14.
"LOCK-ON" BUTTON
The "Lock-ON" button, located near the
trigger allows for continuous operation at
maximum OPM without holding the trigger
(Fig. 1).
TO LOCK TRIGGER "ON": squeeze trigger,
depress button and release trigger.
TO UNLOCK THE TRIGGER: squeeze trigger
and release it without depressing the "Lock-
ON" button.
If the “Lock-ON” button
i s c o n t i n u o u s l y b e i n g
depressed, the trigger can not be released.
VARIABLE SPEED WITH
DIAL SETTING
Your sander is also equipped with a variable
speed dial (Fig. 1). The sander's orbital pad
speed can be preset from zero to maximum
nameplate OPM by rotating the dial in the
housing. The dial may be set on or between
any of six positions (1=low through 6=high).
T h e f o l l o w i n g t a b l e m a y b e u s e d a s a
general guide for abrasive and backing pad
s e l e c t i o n , b u t t h e b e s t r e s u l t s w i l l b e
obtained by sanding a test sample of the
workpiece first.
Operating Instructions
Material
Switch
setting
Backing
pad
Grit
size
rough/finish
rough/finish
Woods:
softwoods
4 / 6
soft
60 / 240
hardwoods
4 / 6
medium
60 / 180
veneers
4
medium
240 / 320
Metals:
steel
4
medium
60 / 240
stainless
4
medium
120 / 240
aluminum
4 / 6
medium
80 / 240
rust spots
6
soft
60 / 120
Paintwork:
sanding
2 / 3
medium
180 / 400
scratches
4 / 6
hard
120 / 240
stripping
4
medium
40 / 60 / 80


