background image

Operation - Oven

English 18

Using the Oven

Operation

Setting the Cooking Mode 

and Temperature

Note: 

To back out of a current mode, press OFF. (Selecting OFF when not setting 

the cooking mode will turn the oven off.)

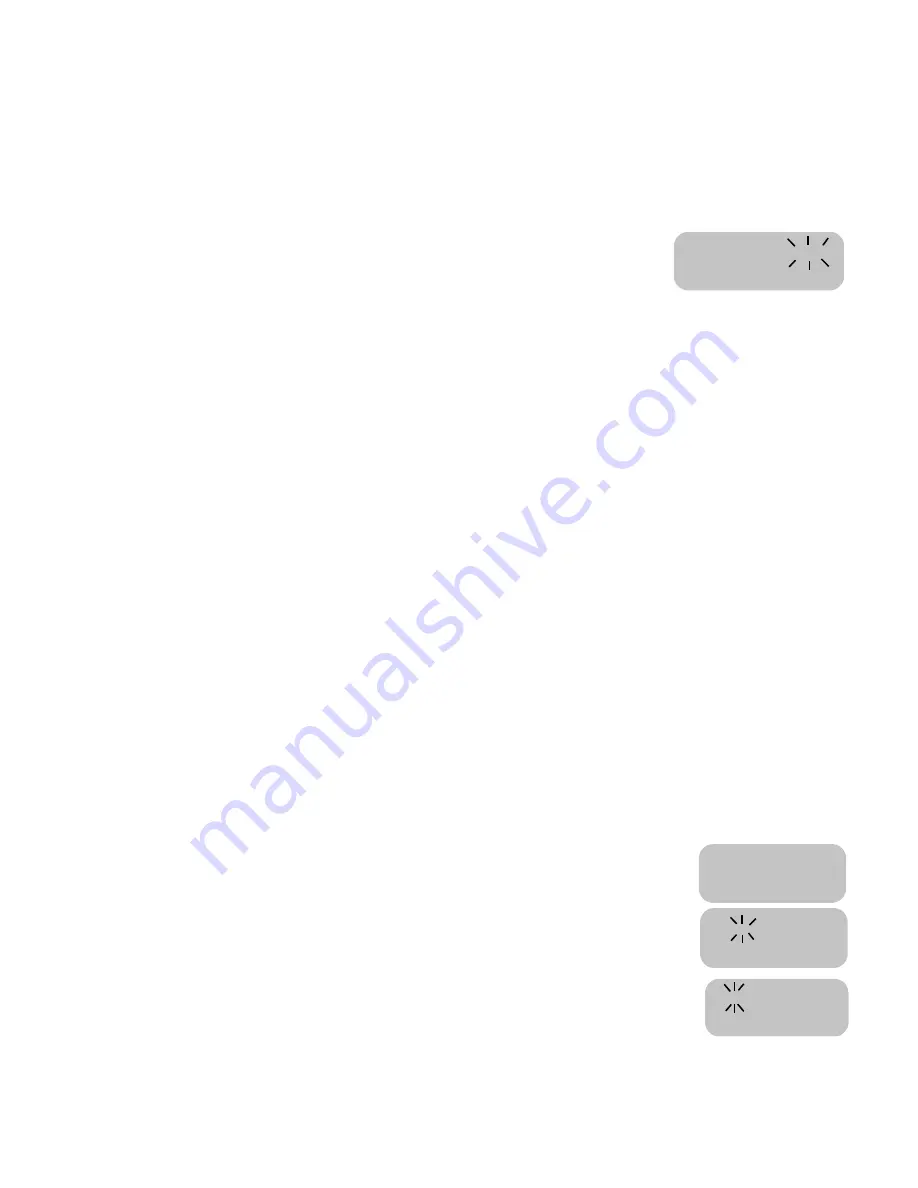
1. Press COOKING MODE.
2. BAKE will flash in the display.
3. If no change is made within 5 seconds, 

control will beep and flash. If this occurs, 
press START.

4. To change the cooking mode, turn knob.
5. Press START.
6. The selected mode will appear in the display, along with the default tempera-

ture for that mode, which will be blinking.

7. To select a different temperature, turn knob to the right or left (in 5° incre-

ments) to desired temperature.

8. Press START. If not pressed, oven automatically turns on in 5 seconds.
9. The display alternates between the cooking mode and preheat. 

The preheated temperature is displayed, starting at 100ºF. The actual tempera-
ture increases until set temperature is reached, at which point the oven will beep.

10. To change temperature during cooking, press Temperature. Turn the knob to 

select new Temperature and press START.

11. Once cooking has been completed, press OFF to turn off oven.

Note:

 After the oven has been turned off, HOT appears in the display where 

the cooking mode was to indicate that the oven is off but still hot. When the 
oven temperature drops below 176° F, HOT is no longer seen in the display.

Using the Timer

Notes: 

If you do not finish setting the timer, the oven will beep periodically as a 
reminder to set time. Press OFF to exit the TIMER mode. (Selecting OFF 
when not setting the timer will turn the oven off.)

Turn the knob to display the time of day or further information about the oven 
mode when the timers are in use.

To set the timer:

1. Press TIME and TIMER 1 will flash in display.

Turn clockwise and TIMER 2 will be displayed. 
Select TIMER 1 or 2, then press TIME. SET 
TIMER 1 (2) appears in display. Minutes flash.

2. Turn knob to set minutes. If setting only minutes, 

press START. Otherwise, continue to step 4.

3. Press TIME again and the hours will flash.
4. Turn knob to set hours.
5. Press TIME again. The TIMER is now set.
6. If TIME or START is not pressed, oven will begin beeping and timer display 

will begin flashing.

BAKE

100

6: 35

PM

380

TIMER  1

0: 00

Set TIMER  2

1: 00

HR:MIN

Set TIMER  2

HR:MIN

PM

2: 

Содержание ELECTRIC FREE-STANDING CONVECTION RANGE

Страница 1: ...ELECTRIC FREE STANDING CONVECTION RANGE Use and Care Manual For Use with Model s mechanical electric models with convection ...

Страница 2: ...ooktop 11 Operation 11 Getting the Most Out of Your Cooktop 12 Cooktop Cooking Guide 12 Cooktop Tips Bridge Element some models 13 Cookware Selection Guide 13 Operation Oven 14 About the Oven 14 Oven Features 14 Oven Parts and Accessories 14 Using the Oven 18 Operation 18 Getting the Most Out of Your Oven 20 Oven Cooking Guide 20 Oven Cooking Modes 21 Operation Warming Drawer some models 25 About ...

Страница 3: ...our Warranty Before using your range be sure to read this manual Pay special attention to the Important Safety Instructions located at the beginning of the manual Important Safety Instructions READ AND SAVE THESE INSTRUCTIONS Important Safety Instructions WARNING Read all instructions before using this appliance If the information in this manual is not followed exactly a fire or explosion may resu...

Страница 4: ... cause burns and my be hot even though they are off Never let clothing potholders or other flammable materi als come in contact with a cooking area until it has cooled Exercise caution when opening the oven or warming drawer Standing to the side open the door slowly and slightly to let hot air and or steam escape Keep your face clear of the opening and make sure there are no children or pets near ...

Страница 5: ...ly oven parts listed in this manual Remove the broiler pan oven racks oven probe and other utensils and wipe out excess soft spillage before self cleaning the oven Birds have very sensitive respiratory systems Keep pet birds out of the kitchen or other rooms where kitchen fumes could reach them During self clean fumes are released that may be harmful to birds Other kitchen fumes such as overheatin...

Страница 6: ...ter on cooking fires Never pick up a flaming pan You may be burned If materials inside the oven should ignite keep oven door closed Turn off oven and disconnect the circuit at the circuit breaker box Fire Extinguishers Use an extinguisher only if You know you have a Class ABC extinguisher and you already know how to operate it The fire is small and contained in the area where it started The fire d...

Страница 7: ...i Tip Brochure and AHAM Safer Cooking Brochure Warranty Registration Card Anti tip Bracket 1 Oven Racks Flat 2 or 3 varies by model 2 Oven Rack Full Extension some models 3 Incandescent Light 4 Oven Control Panel and Knob 5 Broil Element 6 Convection Fan and Element 7 Rack Positions 8 Door Gasket 9 Model Serial Plate 10 Bake Element 11 Oven Door Lock 12 Broiler Pan 13 Oven Vent 14 Storage Drawer 1...

Страница 8: ...MER 1 will flash in display 2 Turn knob to select CLOCK 3 Press Time again and hour digits will flash 4 Turn knob to change hours 5 Press Time again and minute digits will flash 6 Turn knob clockwise or counterclockwise to change minutes 7 Press Time again and the clock is set Note To cancel the TIME selection when setting the clock press OFF at any time while in the clock mode The Select Function...

Страница 9: ... for appliance store use only Change the Display Language Language choices are English Spanish and French English is the default lan guage Note The SELECT FUNCTION menu is displayed in English only regard less of which language is selected 1 Access SELECT FUNCTION Menu 2 Turn knob clockwise until desired language is displayed 3 Press Start 4 Turn knob clockwise to select a different language 5 Pre...

Страница 10: ... and no temperature will show in the display During the Sabbath mode only the OFF key will operate Press OFF at any time during the Sabbath mode to end the mode and turn off the oven At the end of 73 hours the oven will turn off automatically and the display will show SABBATH END Press Off to return to time of day The probe CANNOT be used during the Sabbath mode Setting the Sabbath Feature 1 Acces...

Страница 11: ...d press the center part of the pad with the flat part of your fingertip A beep will sound to indicate that the selection has been made Turn the dial on the backguard to the desired setting and press start The knobs on the front panel of the range are used to control the temperature of the element Push down and turn to the desired temperature See the sections on Using the Cooktop Using the Oven and...

Страница 12: ...dry The material or shape of the pan is slow to transfer the heat Hot Surface Indicator The cooktop displays a hot indicator light to show when the cooking surface is too hot to touch If a hot surface light is on use caution when working or cleaning around the cooktop as the cooktop is still hot Cooktop Parts and Accessories The range s cooking elements are arranged as shown below Figure 2 Element...

Страница 13: ...e the pan the element and the cooktop glass Setting the Burner Heat Level Single Element Control Knob To turn on a single element push in on the control knob and turn in either direc tion to the desired heat setting Dual Element Control Knob To turn ON the small inner element push in on the control knob and turn it coun terclockwise Set to desired heat level To turn ON both the inner and outer ele...

Страница 14: ...eat settings A range of heat settings are listed because the actual setting depends on type and quality of pan See Selecting Cookware type quantity and temperature of the food element used and the cook s preference The Heat Settings recommended are based on a 240 volt power source If your cooktop is connected to 208 volts the same heat settings apply but foods may take a little longer to finish co...

Страница 15: ...est to determine even heat distri bution across the cookware bottom is to place 1 25 4 mm of water in the pan Bring the water to a boil and observe the location of the bubbles as the water starts to boil Good flat cookware will have an even distribution of bubbles over the bottom surface area Matching Diameters The base of the pan should cover or match the diameter of the element being used Pans m...

Страница 16: ...r step or START to be pressed F Number Codes These codes display when there is a problem with the range Convection Fan The convection fan operates during any convection mode When the oven is oper ating in the convection mode the fan will turn off automatically when the door is opened The convection fan does run during self clean although not at the begin ning of the mode Oven Parts and Accessories...

Страница 17: ...order a full extension rack contact Bosch Service 800 944 2904 for a dealer near you Removing and Replacing Note The full extension rack must be in the closed position when removing and replacing Grasp the entire rack both sections 1 Grasp the bottom section and pull straight out 2 Once the stop is reached grasp the top section and pull straight out until the second stop is reached If the top rack...

Страница 18: ...ack is installed correctly after reassembly The back edges of the top rack must be under the rack guide on the bottom rack DO NOT simply rest the top rack on top of the bottom one 1 To reassemble rack hold top rack diagonally across bottom rack 2 Insert one side of top rack to closed position 3 Rotate the other side toward the back of the rack until it passes the stop ball 4 Push top rack the rest...

Страница 19: ...ing mode Cooking or Timed Mode Shows the number of hours and minutes the oven will be on Cooking mode icon is also displayed when cooking mode is selected Control Knob Used to set the clock timers select cook ing mode and temperature Turn clockwise to increase and turn counterclockwise to decrease Elements Displays active element s Light Press pad to turn oven light on or off Door Locking Indicato...

Страница 20: ...ew Temperature and press START 11 Once cooking has been completed press OFF to turn off oven Note After the oven has been turned off HOT appears in the display where the cooking mode was to indicate that the oven is off but still hot When the oven temperature drops below 176 F HOT is no longer seen in the display Using the Timer Notes If you do not finish setting the timer the oven will beep perio...

Страница 21: ...ime the oven will automatically turn off Delayed cooking is not recommended for foods that need to rise i e cookies cakes breads souffles etc Setting a Timed Mode 1 Press COOKING MODE 2 BAKE will be displayed To select a different cooking mode turn the knob 3 Press START 4 Turn knob to select desired temperature Note Time required for the oven to reach temperature must be included in the set cooki...

Страница 22: ... of air space around the pan When baking four cake layers at the same time stagger pans on two racks so that one pan is not directly above the other To allow for best baking results stagger pans as shown in the graphic below Baking Pans Here are some tips for cooking with baking pans Glass baking dishes absorb heat therefore reduce oven temperature 25 F when baking in glass Shiny smooth metal refl...

Страница 23: ... serve Warming mode temperatures are 140 220 F Default temperature is 170 Foods that must be kept moist should be covered with a lid or aluminum foil CAUTION When using Warm mode follow these guidelines Do not use the Warm Mode to heat cold food Be sure to maintain proper food temperature The USDA recom mends holding hot food at 140 F or warmer DO NOT warm food for longer than one hour Convection ...

Страница 24: ...the addition of fats or liquids Browning as the food cooks For Best Results Preheat oven 3 4 minutes Steaks and Chops should be at least 3 4 thick Brush fish and poultry with butter or oil to prevent sticking Use the broil pan and grid included with your range Do not cover the broiler grid with foil It is designed to drain fats and oils away from the cooking surface to prevent smoking and spatteri...

Страница 25: ...ermometer to determine the internal temperature of the meat If the meat is browned to your liking but is not yet done a small strip of foil can be placed over the meat to prevent overbrowning Let meat stand covered with foil 10 15 minutes after removing from the oven Table 5 Broiling Chart Food Item Thickness Rack Position Broil Setting Internal Temp o F Time Side 1 min Time Side 2 min Beef Steak ...

Страница 26: ...s Tenderloin roast 4 6 4 6 3 6 2 3 325 325 325 425 25 32 28 32 24 32 27 32 25 30 28 32 15 25 145 med rare 160 medium 145 med rare 160 medium 145 med rare 160 medium 145 med rare Pork Loin roast boneless or bone in Shoulder 5 8 3 6 350 350 15 25 20 30 160 160 Poultry Chicken whole Turkey unstuffed Turkey unstuffed Turkey unstuffed Turkey breast Cornish hen 3 4 12 15 16 20 21 25 3 8 1 1 1 2 375 325 ...

Страница 27: ...de by side 4 10 1 2 plates single or stacked 3 11 plates single or stacked Operation Warming Drawer some models Parts Key 1 Stainless Steel Drawer Interior 2 Gasket 3 Rail Lock Figure 13 Warming Drawer Parts 1 2 3 Warming Drawer Rack The warming drawer can be used with or without a rack Contact your dealer to order a warming drawer rack Figure 14 Warming Drawer Rack Warming Drawer Settings The war...

Страница 28: ...ontainer If it melts onto the drawer it may not be removable Preheating For best results preheat the warming drawer when warming food Preheat Times Low 10 minutes Medium 15 minutes High 20 minutes Setting the Warming Drawer Heat Level When Only Using the Warming Drawer 1 Press COOKING MODE 2 Turn knob to select WARMING DRAWER 3 Press START 4 Turn knob to select heat setting 5 Press START When Also...

Страница 29: ...g drawer if desired Place cooked hot food in warming drawer in its original cooking container or in a heat safe serving dish Aluminum foil may be used to cover food However DO NOT line the warming drawer with aluminum foil Do not use the warming drawer for storage Crisping Stale Items Place food in low sided dishes or pans Preheat on Low Check crispness after 45 minutes Add time as needed Table 7 ...

Страница 30: ...rface Do not use the glass surface as a cutting board Do not slide cookware across the cooking surface it may scratch the glass Do not place wet pans on the glass surface Before Use Care Care is easy when preventative steps are taken For example apply a small amount of Cooktop Cleaning Creme packaged with range on a daily basis This provides a protective film that makes it easy to remove water spo...

Страница 31: ...r syrup milk or tomato spills Melted plastic film or foil All these items require immediate removal Remove only these types of spills while the surface is hot using the razor blade scraper Be sure to use a new sharp razor in your scraper Remove pan and turn off the element Wearing an oven mitt hold scraper at 30o angle using care not to gouge or scratch the glass Push soil off the heated area Afte...

Страница 32: ...ven The gasket is designed to hold in heat during the self clean cycle Rinse all areas thoroughly then dry 5 Be sure oven light is turned off and the light bulbs and lens covers are in place Do not operate oven without lightbulb and cover in place Important Do not use Commercial Oven Cleaners on the self clean oven or any part because they will damage the finish or part Surface scratches Small scr...

Страница 33: ...ART 3 The default cleaning time is 4 hours To change cleaning time turn knob to change number of hours Otherwise continue to step 4 4 Press START SELF CLEAN flashes Press START 5 REMOVE RACKS appears in the display as a reminder to remove oven racks 6 Press START again to begin the self clean Note In a normal Self Clean mode the door does not lock at the beginning of the cycle However it does lock...

Страница 34: ...rt Recommendations Racks Wash with hot sudsy water Rinse thoroughly and dry or gently rub with cleansing powder or soap filled pads as directed If racks are cleaned in the oven during the self clean mode they will lose their shiny finish and may not glide smoothly If this happens wipe the rack edges with a small amount of vegetable oil then wipe off excess Fiberglass Gasket DO NOT HAND CLEAN GASKE...

Страница 35: ...r slowly to assure that it is correctly and securely in place 4 Door should be straight not crooked Replacing an Oven Light Each light assembly consists of a removable lens a light bulb and a light socket housing that is fixed in place WARNING Make sure oven is cool and power to the oven has been turned off before removing the door Failure to do so could result in electrical shock or burns The ove...

Страница 36: ...s and Suggested Solutions Element cycles more than usual Pan base is warped and not making full contact with heating surface Base diameter of pan is too small for the size of the element Pan ingredients have boiled dry Material of pan is a poor heat conductor heat transfers too slowly A slight odor is noticeable when an element is turned on This is normal with new cooktops and will disappear after...

Страница 37: ...ee Oven Temperature Offset Oven light is not working properly Replace or reinsert the light bulb if loose or defective Touching the bulb with fingers may cause the bulb to burn out Oven light stays on Check for obstruction in oven door Check to see if hinge is bent Cannot remove lens cover on light There may be soil build up around the lens cover Wipe lens cover area with a clean dry towel prior t...

Страница 38: ...tion of any kind 5 a failure to comply with applicable state local city and county electrical and or building codes 6 spills of food or liquid and 7 external forces such as floods fires acts of God or other circumstances beyond BSH s control Also excluded from this warranty are scratches and damages on external surfaces and exposed parts of Range on which the serial numbers have been altered defac...

Страница 39: ...Service English 37 Questions 1 800 944 2904 www boschappliances com 5551 McFadden Ave Huntington Beach CA 92649 We look forward to hearing from you ...

Страница 40: ...n de la surface de cuisson 10 Fonctionnement 10 Pour de meilleurs résultats 12 Guide de cuisson de la surface de cuisson 12 Conseils élément pont certains modèles 12 Guide de sélection de casseroles 12 Fonctionnement four 13 Concernant le four 13 Caractéristiques 13 Pièces et accessoires du four 14 Utilisation du four 17 Fonctionnement 17 Pour de meilleurs résultats avec le four 19 Guide de cuisso...

Страница 41: ...pareil lire ce guide Porter attention aux Instructions de sécurité importantes données au début du guide Instructions de sécurité importantes LIRE ET CONSERVER CES INSTRUCTIONS Instructions de sécurité importantes AVERTISSEMENT lire toutes les instructions avant d utiliser l appareil Si l information comprise dans ce guide n est pas suivie il peut y avoir un risque d incendie ou d explosion causan...

Страница 42: ...es brûlures même si elles sont hors circuit Ne jamais laisser tire plats vêtements ou autres matériaux inflammables entrer en contact avec la zone de cuisson tant qu elle n est pas froide Faire attention en ouvrant et fermant le tiroir réchaud Se tenir sur le côté ouvrir la porte lentement et légèrement pour laisser l air chaud et ou la vapeur s échapper Éloigner le visage de l ouverture et s assu...

Страница 43: ... utiliser de nettoyants à four de type commercial ni d enduit protecteur pour four tel papier aluminium sur toute pièce ou section du four Nettoyer seulement les pièces indiquées dans ce guide Retirer la lèchefrite grilles sonde et autres ustensiles Essuyer l excès de déversement avant d autonettoyer le four Les oiseaux ont un système respiratoire sensible Les éloigner de la cuisine et autres pièc...

Страница 44: ...on NE jamais prendre une casserole en feu Risque de brûlures Si des matériaux à l intérieur du four prennent feu laisser la porte fermer Mettre le four hors circuit et débrancher le circuit au coupe circuit Extincteurs Utiliser un extincteur seulement si L on possède un extincteur de classe ABC et que l on sait s en servir Le feu est petit et contenu dans la zone où il a commencé Le service des in...

Страница 45: ...anti bascule AHAM et brochure pour cuisson sécuritaire AHAM Garantie carte d enregistrement Fixation anti bascule 1 Grilles de four plates 2 ou 3 selon le modèle 2 Grille de four rallonge certains modèles 3 Éclairage incandescent 4 Panneau de contrôle du four et boutons 5 Élément gril 6 Ventilateur à convection et élément 7 Positions des grilles 8 Joint de porte 9 Plaque signalétique 10 Élément cu...

Страница 46: ...ourner le bouton dans un sens ou l autre pour changer les minutes 7 Presser Time et la pendule est réglée Remarque pour annuler la sélection TIME pendule en réglant la pendule presser OFF en tout temps en mode pendule Le menu de sélection de fonction Ceci est la section du menu pour régler et modifier les fonctions données ci des sous 1 Pour accéder au menu SÉLECTION FONCTION presser et maintenir ...

Страница 47: ...eulement quelle que soit la langue choisie 1 Accéder au menu SÉLECTION FONCTION 2 Tourner le bouton dans le sens horaire jusqu à la langue désirée 3 Presser Start 4 Tourner le bouton dans le sens horaire pour une autre langue 5 Presser Start pour accepter le changement Verrouiller déver rouiller le panneau de contrôle Le clavier du four peut être verrouillé à des fins de sécurité Utiliser pour emp...

Страница 48: ...bat 1 Accéder au menu SÉLECTION FONCTION 2 Tourner le bouton dans le sens horaire jusqu à ce que OPTION SABBAT figure 3 Presser START CUISSON figure à l affichage et la température clignote 4 Tourner le bouton pour régler la température du four 5 Si désiré presser LIGHT pour mettre l éclairage en circuit Remarque Par la suite l éclairage ne peut être changé selon son réglage marche ou arrêt pendan...

Страница 49: ...ique situé sous la surface en céramique vitrifiée Il effectue un cycle marche arrêt de par son design voir Limiteur de tem pérature Élément jumelé L élément jumelé comprend deux éléments à ruban radiants dans la même zone Le petit élément interne ou les deux éléments interne et externe peuvent être sélectionnés selon la dimension de la casserole Chaleur conservée La surface de cuisson en verre con...

Страница 50: ...peut fondre et causer des dommages per manents Le plastique papier et chiffon peuvent fondre ou brûler lorsqu en contact avec une surface chaude Ne pas laisser ces articles entrer en contact avec la surface chaude Ne pas laisser les casseroles chauffer à sec Ceci peut endom mager la casserole l élément et la surface de cuisson Figure 2 emplacement des éléments Tableau 1 modèles de surface de cuiss...

Страница 51: ...iré Bouton de contrôle d élément pont certains modèles L élément pont unit les éléments simples avant et arrière pour créer un élément oblong Il est conçu pour les grandes casseroles telles rôtissoires etc 1 Mettre en circuit l élément pont et le petit élément avant Pousser le bouton de contrôle et le tourner dans le sens horaire au réglage désiré 2 Mettre le petit élément arrière en circuit 3 Pou...

Страница 52: ...ur garder les aliments préparés chauds ou pour préparer deux mets à fois Guide de sélection de casseroles Caractéristiques des casseroles Le choix des casseroles affecte directement la vitesse et l uniformité de la cuis son Pour de meilleurs résultats choisir des casseroles à fond plat Lorsque la casserole est chaude le fond devrait reposer uniformément sur la surface sans ballotter Des casseroles...

Страница 53: ...à fond plat seulement Ne jamais placer d anneau ou support sur la surface de cuisson Concernant le four Caractéristiques Arrêt automatique Le four se met automatiquement hors circuit après 12 heures 24 heures si le for mat est réglé pour 24 h au menu Sélection fonction Autonettoyage Le four est doté de la fonction autonettoyage facilitant le nettoyage du four Voyants et autres caractéristiques Bip...

Страница 54: ...le guide 3 Ramener en position horizontale et pousser au fond La grille doit être droite et à plat non croche Retrait des grilles plates 1 Saisir fermement les deux côtés et tirer 2 Lorsque la butée est atteinte incliner vers le haut et tirer Grille rallonge certains modèles La grille rallonge permet un accès aisé aux aliments cuisants Le bas de la section s allonge aussi loin que la grille plate ...

Страница 55: ...le haut 2 Tourner un côté de la grille supérieur vers soi pour dépasser la butée bille 3 Tirer vers le haut et l extérieur tourner le premier côté Assemblage ATTENTION Toujours s assurer que la grille supérieure est installée correctement après l assemblage Les bords arrière de la grille supérieur doivent être sous le guide de grille de la grille inférieure NE PAS mettre les grilles une sur l autr...

Страница 56: ...u un mode cuisson est choisi Bouton de contrôle utiliser pour régler la pendule minuterie choisir le mode cuisson et température Tourner dans le sens horaire pour augmenter et contre horaire pour diminuer Éléments affiche le ou les éléments activés Éclairage presser la touche pour marche ou arrêt Voyant verrouillage de porte l icone figure pendant l autonettoyage lorsque la porte est verrouillée N...

Страница 57: ...r choisir une autre température et presser START 11 Une fois la cuisson terminée presser OFF pour fermer le four Remarque une fois le four hors circuit CHAUD figure à l affichage au lieu du mode cuisson pour indiquer que le four est hors circuit mais chaud Lorsque la température descend sous 176 F CHAUD disparaît Utilisation de la minuterie Notes Si la minuterie n est pas totalement réglée le four...

Страница 58: ...ion de la cuisson différée ou minutée La CUISSON MINUTÉE règle le four à un mode de cuisson pour une durée réglée puis le met hors circuit Disponible pour les modes suivants cuisson cuisson à convection et rôtissage à convection S assurer que la pendule est réglée à l heure en cours Voir Changer la pen dule pour régler l heure À la fin de la durée programmée le four se met hors circuit automatique...

Страница 59: ...iné pour éviter la surcuisson car ils continueront à cuire une fois le cycle complété Vérifier le temps de cuisson et l heure arrêt une fois le différé réglé 1 Presser TIME 2 Tourner le bouton à BAKE END ou BAKE TIME 3 Presser TIME Pour de meilleurs résultats avec le four Guide de cuisson du four Position des grilles Cuisson sur plusieurs grilles Pour la cuisson sur plusieurs grilles suivre l empl...

Страница 60: ... Un réglage plus élevé de la température ne réduit pas le temps de préchauffage Placer les grilles en position avant de pré chauffer Un bip confirme que le four est préchauffé et la température choisie s affiche Modes cuisson du four Cuire et garder chaud Il s agit d une cuisson avec air chaud et sec Les éléments supérieur et inférieur effectuent un cycle pour maintenir la température Utiliser pou...

Страница 61: ...s les recettes La température a été réduite dans ce tableau Ce tableau est un guide La durée réelle dépend des mélanges ou des recettes Suivre les recettes ou les directives sur l emballage et réduire la température de façon appropriée Pour de meilleurs résultats Réduire la température de la recette de 25 F Voir le tableau de cuisson à convection Placer les aliments dans un plat non couvert bas te...

Страница 62: ...Pour brunir des casseroles utiliser des plats en métal ou en céramique vitri fiée comme Corningware Ne jamais utiliser du verre résistant à la chaleur Pyrex ils ne tolèrent pas les températures élevées Les durées de gril et de gril à convection sont approximatives et peuvent varier Les durées sont basées sur la cuisson avec un élément gril préchauffé Tableau 5 gril Aliments Produit épaisseur Posit...

Страница 63: ...sser reposer la viande couverte d aluminium de 10 à 15 minutes après le retrait du four La durée est approximative et dépend de la forme de la viande La dinde farcie requiert une durée additionnelle La température minimale sécu ritaire pour la farce dans la volaille est de 165 F Tableau 7 rôtissage à convection Viande Produit Poids lb Temp four oF Temps rôtissage min par lb Temp interne oF Boeuf C...

Страница 64: ... cm Pyrex 4 pintes 1 8 litre côte à côte 4 assiettes 10 1 2 po 26 6 cm simples ou empilées 3 assiettes 11 po 27 9 cm simples ou empilées Fonctionnement tiroir réchaud certains modèles Pièces clés 1 Intérieur en acier inoxydable 2 Joint 3 Verrouillage de rail Figure 13 pièces du tiroir réchaud 1 2 3 Grille le tiroir réchaud peut être utilisé avec ou sans grille Communiquer avec le marchand pour com...

Страница 65: ...d Ils peuvent fondre et être difficiles à enlever Préchauffage Pour de meilleurs résultats préchauffer le tiroir réchaud Durée de préchauffage Bas 10 minutes Moyen 15 minutes Élevé 20 minutes Régler le niveau de chauff age En utilisant seulement le tiroir réchaud 1 Presser COOKING MODE 2 Tourner le bouton pour choisir TIROIR RECHAUD 3 Presser START 4 Tourner le bouton pour choisir le réglage 5 Pre...

Страница 66: ...plat résistant à la chaleur L aluminium peut être utilisé pour couvrir les aliments NE PAS doubler le tiroir réchaud avec l aluminium Ne pas utiliser le tiroir réchaud à des fins de rangement Rendre les aliments croustillants Placer dans une assiette ou un plat peu profond Préchauffer au réglage bas Vérifier après 45 minutes Ajouter du temps au besoin Tableau 9 cuisson à convection tiroir réchaud ...

Страница 67: ... pas placer de support à wok anneau ou autre support en métal sur la sur face Ne pas utiliser la surface comme planche à découper Ne pas faire glisser les casseroles sur la surface elles peuvent l égratigner Ne pas déposer de casseroles mouillées sur la surface en verre Avant l entretien Par la prévention l entretien est facile Par exemple appliquer une petite quantité de crème nettoyage fournie a...

Страница 68: ...es comme essence à briquet ou WD 40 Figure 16 grattoir Tableau 10 entretien de la surface de cuisson Type de taches Solution possible Sucre sirop lait ou tomates pellicule plas tique ou aluminium fondu Seuls ces pro duits doivent être enlevés immédiatement sur la surface chaude avec le grattoir S assurer d utiliser une nouvelle lame Enlever la casserole et fermer l élément Avec des moufles à four ...

Страница 69: ...age Rincer puis assécher 5 S assurer que l éclairage est hors circuit que les ampoules et les couvercles sont en place Ne pas actionner le four sans les ampoules et les couvercles en place Tache d eau calcaire liquide de cuisson chaud sur la surface Les minéraux dans l eau sur la surface peuvent causer des taches Utiliser du vinaigre non dilué rincer et assécher Appliquer la crème nettoyante Égrat...

Страница 70: ...nnuler ou arrêter le mode pendant le fonctionnement presser OFF Régler le mode autonettoyage 1 Presser COOKING MODE 2 Tourner le bouton jusqu à ce que AUTONETTOYANT figure Presser START 3 La durée par défaut est 4 heures Pour changer tourner le bouton pour changer le nombre d heures autrement passer à l étape 4 4 Presser START AUTONETTOYANT cli gnote Presser START 5 ENLEVER GRILLE figure à l affic...

Страница 71: ...elon les directives de l emballage Guide de nettoyage Tableau 11 nettoyage Pièce Recommandations Grilles Laver à l eau chaude savonneuse Rincer et assécher ou frotter délicatement avec une pou dre ou tampon savonneux tel qu indiqué Si les grilles sont nettoyées dans le four pendant l autonettoyage elles perdront leur fini et peuvent ne pas glisser en douceur Si cela se pro duit essuyer les bords a...

Страница 72: ...ment Nettoyer avec de l eau savonneuse chaude rincer et assécher AVERTISSEMENT S assurer que le four est froid et l alimentation hors circuit au four avant d enlever la porte Sinon il peut en résulter un choc électrique ou des brûlures La porte du four est lourde et fragile Utiliser les deux mains pour l enlever Le devant est en verre Manipuler avec soin pour éviter les bris Saisir seulement par l...

Страница 73: ...ible ou coupe circuit 3 Dévisser la lentille pour l enlever 4 Dévisser l ampoule de la douille 5 Remplacer l ampoule par une nouvelle ampoule d électroménagers 40 watts Éviter de toucher l ampoule avec les doigts car les huiles de la main peuvent l endommager lorsqu elle devient chaude 6 Visser l ampoule 7 Remettre en circuit à l alimentation principale fusible ou coupe circuit ADVERTISSEMENT S as...

Страница 74: ... de cuisson non de niveau Régler les pieds niveleurs au bas de la cuisi nière Format et type de casserole non appropriés Voir Guide de sélection de cassero les Élément faisant un cycle au réglage le plus haut Ceci est normal Le limiteur de température fonctionne automatiquement pour pro téger la surface en céramique vitrifiée des dommages par une température élevée extrême Tableau 13 guide de dépa...

Страница 75: ... ment Laisser le four refroidir avant l autonettoyage Toujours essuyer les saletés et les déversements avant l autonettoyage Si le four est très sale régler l autonettoyage à 5 heures Voir Préparation du four pour l autonettoyage Pendule et minuterie ne fonctionnant pas adéquatement S assurer que l alimentation électrique est fournie au four Voir les rubri ques Pendule et Minuterie Porcelaine écai...

Страница 76: ...ut défaut ou dommage résultant de 1 utilisation de la cuisinière autre qu un usage normal et habituel utilisation commerciale de la cuisinière n est pas considéré normal ou habituel 2 mauvaise utilisation abus accident ou négligence 3 fonctionne ment entretien installation inadéquats ou service non autorisé 4 réglage ou modification de toute sorte 5 manquement à se conformer aux codes d électri ci...

Страница 77: ...tiellement rembourser le prix d achat si applicable il est possible de faire réparer la cuisinière dans tout centre de service d électroménagers et le consommateur sera remboursé pour toute dépense rai sonnable en autant que le coût soit donné par écrit et que le travail effectué est couvert par cette garantie BSH ne remboursera pas les coûts excédants la valeur dépréciée de la cuisinière Question...

Страница 78: ...11 Sacar el mayor provecho de su parrilla 12 Guía para cocinar con su parrilla 12 Consejos para la parrilla Elemento puente algunos modelos 13 Guía de selección de los utensilios de cocina 13 Operación Horno 14 Acerca del horno 14 Características del horno 14 Partes y accesorios del horno 14 Usar el horno 18 Operación 18 Sacar el mayor provecho de su horno 21 Guía para cocinar con su horno 21 Modo...

Страница 79: ...su garantía Antes de usar su estufa asegúrese de leer este manual Ponga especial atención a las Instrucciones Importantes de Seguridad al principio del manual Instrucciones Importantes de Seguridad LEA Y GUARDE ESTAS INSTRUCCIONES Instrucciones Importantes de Seguridad ADVERTENCIA Lea todas las instrucciones antes de usar este aparato El hecho de no observar exactamente la información contenida en...

Страница 80: ...a que la ropa agarraderas de ollas u otros materiales inflamables tengan contacto con un área de cocinar hasta que se haya enfriado Tenga cuidado cuando abra la puerta del horno o cajón calentador Estando parado a un lado abra la puerta lenta y ligeramente para dejar escapar el aire caliente y o vapor Aleje su cara de la apertura y asegúrese que no haya niños o mascotas cerca de la unidad Después ...

Страница 81: ...rno Limpie sólo las partes de horno listadas en este manual Quite la bandeja de asado las rejillas del horno el termómetro para carne y otros utensilios y limpie derrames excesivos de alimentos antes de autolimpiar el horno Pájaros tienen sistemas respiratorios muy sensibles Mantenga los pájaros fuera de la cocina u otras habitaciones donde los puedan alcanzar los vapores de la cocina Durante la a...

Страница 82: ...a en llamas Se puede quemar usted En caso que se enciendan materiales dentro del horno mantenga cerrada la puerta del horno Apague el horno y desconecte el circuito en el cortacircuito Extinguidores de fuego Use un extinguidor de fuego solamente cuando usted Usted sepa que tiene un extinguidor de fuego de la Clase ABC y sabe cómo manejarlo El incendio es pequeño y está contenido en el área donde c...

Страница 83: ...o AHAM Tarjeta de Registro Garantía Soporte Antivolcadura 1 Rejillas del Horno Planas 2 o 3 varía por modelo 2 Rejilla del Horno Extensión Completa algunos modelos 3 Lámpara Incandescente 4 Perilla y Panel de Control del Horno 5 Elemento de Asado 6 Ventilador y Elemento de Convección 7 Posiciones de las Rejillas 8 Empaque de la Puerta 9 Placa con de Serie y Modelo 10 Elemento para Hornear 11 Bloqu...

Страница 84: ... Oprima Time nuevamente y parpadearán los dígitos de la hora 4 Gire la perilla para cambiar las horas 5 Oprima Time nuevamente y parpadearán los dígitos de minutos 6 Gire la perilla en sentido del reloj o en sentido contrario del reloj para cambiar los minutos 7 Oprima Time nuevamente y el reloj quedará configurado Nota Para cancelar la selección de la HORA al poner el reloj oprima OFF Apagar en c...

Страница 85: ...rancés El idioma por default es el Inglés Nota El menú SELECC FUNCION aparece solamente en inglés sin importar el idioma seleccionado 1 Acceda al menú SELECC FUNCION 2 Gire la perilla en sentido del reloj hasta que aparezca el idioma deseado 3 Oprima START 4 Gire la perilla en sentido del reloj para seleccionar un idioma diferente 5 Oprima START para aceptar el idioma nuevo Bloquear desblo quear e...

Страница 86: ...za a parpadear 4 Gire la perilla para fijar la temperatura del horno 5 Prenda la luz del horno si así lo desea oprima LIGHT Luz Nota No se puede cambiar la luz después de este punto Se quedará pren dida o apagada durante todo el modo Sabatino 6 Oprima START El horno comienza después de 5 segundos Cambiar el for mato de la hora Se puede configurar el reloj a un formato de 12 horas o de 24 horas Por...

Страница 87: ...emento doble consiste en dos elementos radiantes de cinta dentro de la misma área para calentar Se puede seleccionar ya sea el elemento interior o ambos elementos el interior y el exterior para ser utilizados dependiendo del tamaño de los utensilios de cocina Calor Retenido La superficie de vidrio para cocinar retiene el calor y permanece caliente después de apagar el elemento s Se puede usar el c...

Страница 88: ...tar muy caliente Partes y accesorios de la parrilla Los elementos de la estufa para cocinar están acomodados como se muestra abajo Figura 2 Acomodo de los elementos Tabla 1 Modelos de parrillas Tipo Tamaño Potencia 1 Doble 5 8 750 2200 2 Sencillo 6 1200 3 Sencillo 6 1500 4 Sencillo 7 1800 5 Sencillo 8 2000 6 Elemento puente n a 800 7 Indicador de superfi cie caliente n a n a 8 Doble 5 9 2500 3 1 4...

Страница 89: ...lla permanente mente Ajustar el nivel de calor de los quemadores Perilla de control de un elemento sencillo Para prender un elemento sencillo presione la perilla de control y gírela en cual quier dirección al ajuste de calor deseado Perilla de control de un elemento doble Para prender el pequeño elemento interior presione la perilla de control y gírela en sentido contrario del reloj Ajústela al ni...

Страница 90: ... de ajustes de calor porque el ajuste real depende de tipo y calidad de la olla Vea Seleccionar utensilios de cocina tipo cantidad y temperatura del alimento elemento utilizado y las preferencias del cocinero Los ajustes de calor que se recomiendan aquí se basan en una fuente de alimen tación de 240 voltios Si su parrilla está conectada a 208 voltios aplican los mis mos ajustes de calor pero tal v...

Страница 91: ...ara determinar la distribución térmica uniforme sobre el fondo de las ollas es poner 1 de agua en la olla Hervir el agua y obser var la ubicación de las burbujas a medida que el agua comienza a hervir Una buena olla plana ten drá una distribución homogénea de burbujas en toda la superficie del fondo Diámetros que coinciden La base de la olla debe cubrir o igualar el diámetro del elemento que se es...

Страница 92: ...Parpadea Señala una configuración incompleta y solicita otro paso o que se oprima START Códigos de Números F Estos códigos aparecen cuando existe un problema con la estufa Ventilador de convección El ventilador de convección opera durante cualquier modo de convección Cuando el horno opera en el modo de convección el ventilador se apaga automáticamente al abrir la puerta El ventilador de convección...

Страница 93: ...ntos al usuario Para pedir una rejilla de extensión com pleta contacte al Servicio de Bosch 800 944 2904 para localizar un distribuidor cerca de su casa Quitar y Reemplazar Nota La rejilla de extensión completa debe estar en la posición cerrada cuando la quiera quitar y reemplazar Agarre la rejilla completa ambas secciones 1 Agarre la sección inferior y jálela hacia usted 2 Una vez que llegue al t...

Страница 94: ...la superior después del reensamblado Los bordes traseros de la rejilla superior deben quedar abajo de la guía en la rejilla inferior NO descanse sim plemente la rejilla superior sobre la inferior 1 Para reensamblar la rejilla sostenga la rejilla superior diagonalmente sobre la rejilla inferior 2 Inserte un lado de la rejilla superior a la posición cerrada 3 Gire el otro lado hacia el fondo de la r...

Страница 95: ...de Cocinar Indica el número de horas y minutos que el horno quedará encendido Tam bién se muestra el icono del modo de cocinar cuando selecciona el modo de cocinar Perilla de control Se usa para fijar el reloj y los cronómetros seleccionar un modo de cocinar y la temper atura Gire en sentido de las manecillas del reloj para aumentar y en sentido opuesto para disminuir Elementos Indica el elemento ...

Страница 96: ...emperatura preestablecida en cuyo momento el horno emitirá un pitido 10 Para cambiar la temperatura durante el proceso de cocinar simplemente oprima Temperature Gire la perilla para seleccionar una temperatura nueva y oprima START 11 Una vez que haya terminado el horneado oprima OFF para apagar el horno Nota Después de apagar el horno la pantalla muestra CALIENTE en lugar del modo de cocinar para ...

Страница 97: ...a pantalla principal Cancelar Si no termina la operación el horno emitirá pitidos periódicamente como recorda torio para ajustar el tiempo Oprima OFF para salir del modo del Timer Cronómetro Seleccionar OFF cuando no está en un modo de configuración detendrá el funcionamiento del horno Usar el modo de cocinar cronometrado o retardado La opción CONCINAR CRON Cocinar Cronometrado cambia el horno a u...

Страница 98: ...lla para ingresar la hora del día cuando el horno deje de cocinar o cuando se apague 8 Fije las horas y luego oprima TIME 9 Fije los minutos y luego oprima TIME Nota El reloj calcula automáticamente la hora del día cuando el modo comienza y termina El tiempo de cocinar que aparece cuenta en forma regresiva por minuto 10 Al final del tiempo programado de cocinar el horno se apaga automática mente L...

Страница 99: ...ucir la temper atura del horno 25 F cuando hornea en moldes de vidrio Metal brilloso suave refleja el calor resultando un dorado más ligero y más delicado Los moldes oscuros ásperos o sin brillo absorben el calor produciendo una costra más dorada y crujiente Algunos fabricantes recomiendan bajar la tem peratura 25 cuando usa este tipo de molde Siga las recomendaciones del fabricante Use moldes osc...

Страница 100: ...calentar son 140 220 F 60 104 C La temperatura por default es 170 F 77 C Alimentos que deben quedar húmedos deben taparse con una tapa o papel aluminio PRECAUCIÓN Siga estas pautas cuando usa el modo de calentar No use el modo de calentar para calentar alimentos fríos Asegúrese de mantener una temperatura apropiada para los ali mentos La USDA recomienda mantener caliente los alimentos a una temper...

Страница 101: ...sirve mejor para cocinar cortes delgados suaves de carne 1 o menos pollo y pescado Se puede usar también para calentar y dorar carnes guisados y otros alimentos Siempre ase con la puerta cer rada Los beneficios del asado incluyen Asado rápido y eficiente Cocinar sin agregar grasas o líquidos Los alimentos se doran mientras se cocinan Tabla 4 Tabla para horneado de convección Alimento Artículo Posi...

Страница 102: ...carne y pollo Los beneficios del tostado de convección Hasta un 25 más rápido para cocinar que el tostado horneado normal Un dorado uniforme Para lograr mejores resultados Use la misma temperatura que se indica en la receta Revise el término de la carne oportunamente ya que se puede disminuir el tiempo de asado por un 25 Consulte la tabla para asado de convección para ejemplos No tape la carne o u...

Страница 103: ... para el relleno en pavo es 165 F 74 C Tabla 6 Tabla para tostado de convección Carnes Artículo Peso lb Temperatura horno o F Tiempo Tostado min por lb Temperatura Interna o F Res Costillas Rib eye sin hueso Rump eye tip sirloin sin hueso Lomo suave 4 6 4 6 3 6 2 3 325 325 325 425 25 32 28 32 24 32 27 32 25 30 28 32 15 25 145 vuelta y vuelta 160 medio 145 vuelta y vuelta 160 medio 145 vuelta y vue...

Страница 104: ...4 cuartos lado a lado 4 platos de 10 1 2 sencillo o apilados 3 platos de 11 sencillo o apilados Operación Cajón Calentador algunos modelos Identificador de partes 1 Interior del cajón de acero inoxi dable 2 Empaque 3 Bloqueo del riel Figura 13 Partes del cajón calentador 1 2 3 Rejilla del cajón calentador Se puede usar el cajón calentador con o sin una rejilla Contacte a su distribuidor para encar...

Страница 105: ...obre el cajón calen tador tal vez ya no se puede quitar después Precalentar Para lograr mejores resultados precaliente el cajón calentador cuando calienta alimentos Tiempos para precalentar Bajo 10 minutos Mediano 15 minutos Alto 20 minutos Ajustar el nivel de calor del cajón calentador Cuando usa solamente el cajón calentador 1 Oprima COOKING MODE Modo de Cocinar 2 Gire la perilla para selecciona...

Страница 106: ...tos calientes cocidos en sus contenedores originales en los cuales se cocieron o en un plato térmico Se pueden tapar los alimentos con papel de aluminio Sin embargo NO forre el cajón calentador con papel de aluminio No use el cajón calentador para almacenar cosas Dorar alimentos viejos no frescos Coloque el alimento en ollas o platos planos Precaliente en Bajo Revise lo crujiente después de 45 min...

Страница 107: ...la u otro objeto Nunca cocine los alimentos directamente sobre el vidrio Evite colocar un anillo de soporte para wok un trébedes u otra base metálica sobre la superficie de vidrio No use la superficie de vidrio para cortar cosas No deslice las ollas encima de la superficie de cocinar esto puede rayar el vidrio No coloque ollas húmedas sobre la superficie de vidrio Cuidarla antes de usarla El cuida...

Страница 108: ...anqueador con cloro pueden manchar la parrilla permanentemente Limpiadores inflamables como líquido para encendedor o WD 40 Tabla 10 Tabla de cuidado para la parrilla Tipo de suciedad Posible solución Derrames de azúcar seca jarabe de azú car leche o jitomate Película de plástico o papel de aluminio derretido Todas estas cosas se deben quitar de inmediato Quite solamente estos tipos de derrames mi...

Страница 109: ...a Líquidos calientes para cocinar vertidos en la superficie Los minerales en algunos tipos de agua pueden ser transferidos a la superficie y causar manchas Debe usar vinagre blanco no dilu ido enjuagar y secar Vuelva a acondicionar con la crema para limpieza de parrillas Raspaduras en la superficie Se pueden esperar raspaduras pequeñas en la superficie del vidrio pero éstas no afectan el trabajo d...

Страница 110: ...no se bloqueará al comienzo del ciclo La lámpara del horno no funciona durante este modo Durante la autolimpieza la cocina debe estar bien ventilada para ayudar a eliminar los olores asociados con la autolimpieza Con el tiempo disminuyen los olores El tiempo prefijado de la limpieza son cuatro horas Se puede ajustar este tiempo de limpieza para 3 o 5 horas El modo se detiene automáticamente al fin...

Страница 111: ...autolimpieza 1 Al final del tiempo programado de limpieza el horno se apagará automática mente FIN AUTOLIMPIEZ aparece en la pantalla Oprima OFF para bor rarlo Nota La puerta no se desbloqueará hasta que el horno alcance una temperatura segura 2 El modo de autolimpieza puede producir cenizas que se asentarán dentro del horno Cuando esto sucede quite las cenizas con un trapo húmedo antes de usar el...

Страница 112: ... limpia o una toalla de papel y limpie Evite el uso de limpiadores en polvo esponjillas de fibra metálica y limpiadores para hornos Superficies de porcelana Limpie de inmediato derrames ácidos como jugos de fruta leche y jitomate con una toalla seca No use una esponja toalla húmeda sobre porcelana caliente Cuando ya está frío limpie con agua jabonosa caliente o aplique Bon Ami o Soft Scrub a una e...

Страница 113: ...tes con bisagra a su posición asegúrese de cerrar y abrir la puerta lentamente para estar seguro que esté colocada bien y que funcione correctamente 4 La puerta debe estar recta no torcida o chueca ADVERTENCIA Asegúrese que el horno esté frío y que se haya apagado la corriente antes de quitar la puerta De otro modo puede causar una descarga eléctrica o quemaduras La puerta del horno está pesada y ...

Страница 114: ...Los lentes son de vidrio Manéjelos con cuidado para evitar que se rom pan Vidrio roto puede causar heridas El casquillo tiene corriente cuando la puerta está abierta Servicio Tabla 12 Tabla para resolver problemas de la parrilla Problema de la parrilla Posibles causas y soluciones sugeridas El elemento cicla más de lo nor mal La base de la olla está deformada y no hace contacto completo con la sup...

Страница 115: ... de recetas por 25 F 4 C cuando hornea con el modo de horneado de convección La temperatura del horno está muy caliente o muy fría Se debe ajustar el termostato del horno Vea Compensación de la temperatura del horno La lámpara del horno no funciona bien Reemplace o reinserte el foco si está flojo o defectuoso El foco se puede quemar si lo toca con los dedos La luz del horno se queda prendida Revis...

Страница 116: ...s que resultan de 1 el uso de la Estufa en un modo diferente de su uso normal y usual el uso comercial de la Estufa no se considera normal o usual 2 mal uso abuso accidentes o negligencia 3 operación manten imiento instalación no apropiada o servicio no autorizado 4 ajustes o alteraciones o modificaciones de cualquier tipo 5 el hecho de no cumplir con los códigos eléctricos y o de construcción est...

Страница 117: ...precio de su compra donde aplica usted puede llevar la Estufa a cualquier taller grande o centro de repa ración de aparatos electrodomésticos para su reparación y todos los gastos razonables serán reembolsados siempre y cuando los costos están justificados por escrito y el trabajo realizado está cubierto por esta garantía BSH no reembol sará ningún gasto de reparación bajo la presente que exceda e...

Страница 118: ......

Страница 119: ......

Страница 120: ... responsible for products which are transported from the United States for use in Canada Check with your local Cana dian distributor or dealer For the most up to date critical installation dimensions by fax use your fax handset and call 702 833 3600 Use code 8317 Note The Bosch appliance referred to throughout this manual is manufactured by BSH Home Appliances Corp 5551 McFadden Avenue Huntington ...

Отзывы: