Operation
5
Climate 6100i/8100i – 6721821568 (2020/11)
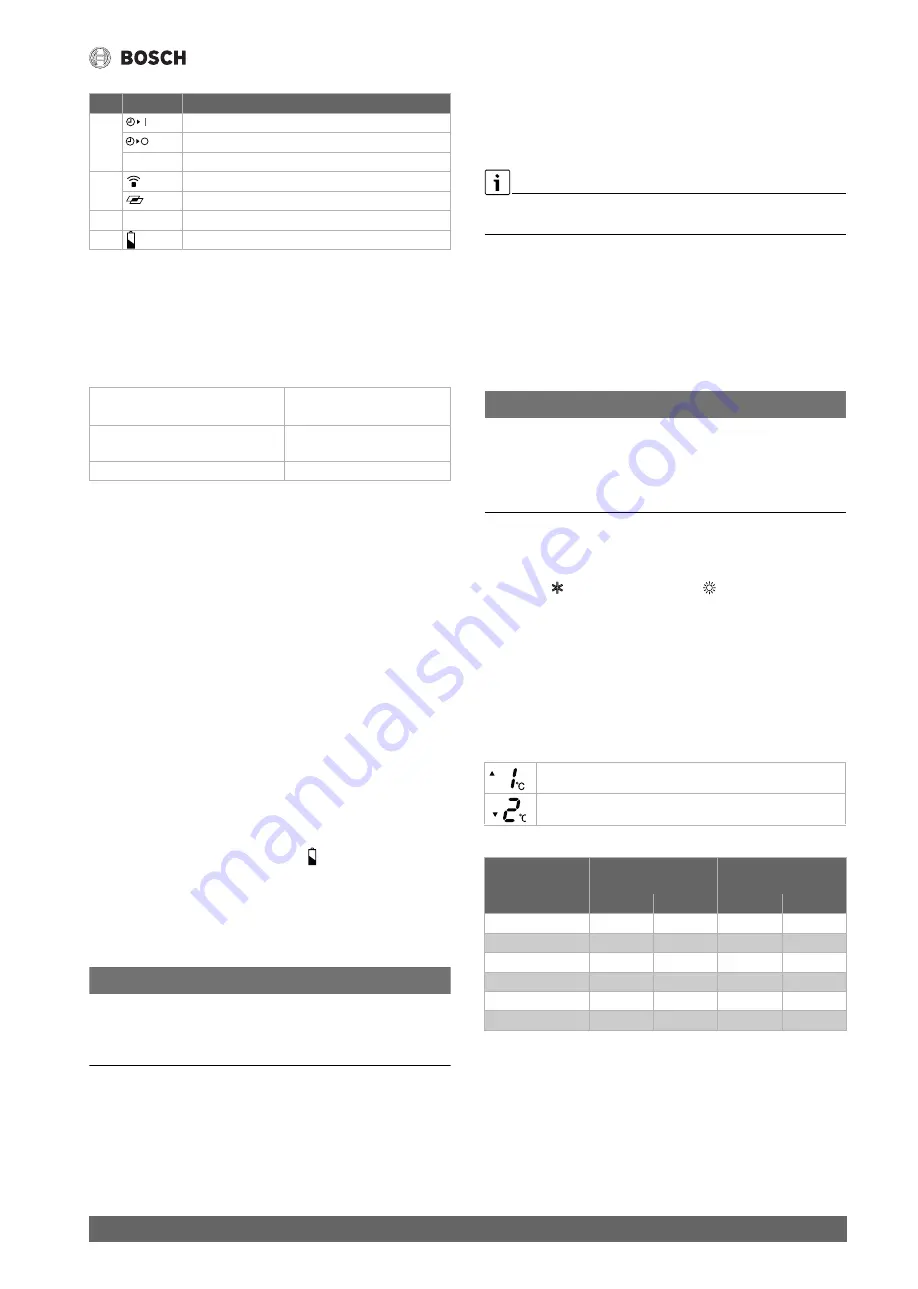
Table 6 Symbols in the display of the remote control
3.3
Operation via the app
Control the most important functions of the indoor unit very easily via
the Bosch HomeCom Easy app on your smartphone.
You can continue using the remote control of your indoor unit.
3.3.1
Technical requirements
Table 7
3.3.2
Downloading app
The app can be downloaded from the Apple App Store for iOS and also
the Google Play Store for Android. To benefit from the latest function and
security updates, make sure you always have the latest version installed
on your smartphone.
▶ Scan QR code (
Fig. 13).
▶ Bosch HomeCom Easy Downloading the app.
3.3.3
Connecting the app
Prerequisite:
• The WLAN signal strength is sufficient to establish a connection with
the Internet. If the signal is too weak use a WLAN repeater.
▶ Bosch HomeCom Easy Start the app (
Fig. 14).
The first time you use the app it guides you step-by-step through the
connection process.
3.4
Replace or insert batteries
Use 2 AAA (R03) size batteries. Using rechargeable batteries is not
recommended.
The battery life is approximately 1 year under normal use. Replace the
batteries when the remote control displays
.
▶ Remove the battery cover (
Fig. 2).
▶ Insert the batteries, making sure the polarities are correctly aligned.
The display indicates “AM 6:00” when the batteries are properly
inserted.
▶ Reinstall the cover.
NOTICE
▶ When replacing the batteries, always change both and use the same
type.
▶ If you will not be using the unit for a long time, remove the batteries
from the remote control.
3.5
Setting the current time
There are two clock modes: 12-hour mode and 24-hour mode.
▶ To set the 12-hour mode, press the
Clock
button once.
-or-
▶ To set the 24-hour mode, press the
Clock
button twice.
▶ Press the
.
or
/
button to set the current time. Hold down the
button to advance or reverse the time quickly.
▶ Press the
Set/C
button.
The colon (:) on the display blinks.
The current time cannot be set when the timer is set. To set the time the
timer must be cancelled.
3.6
Using the remote control
The signal range is 7 m. If objects are in the way or certain fluorescent
lamps are used in the same room this can affect transmission of the
signal.
▶ Point the remote control towards the signal receiver window of the
unit and press the desired key.
The unit emits a beep when it receives a signal.
NOTICE
The remote control may be permanently prevented from working
correctly.
▶ Do not expose the remote control to direct sunlight.
▶ Do not leave the remote control near a heating appliance.
▶ Protect the remote control from moisture and impacts.
3.7
Setting main operating mode
Switching on the device
▶ Press the
button (cooling mode), the
button (heating mode) or
the
Auto
button (automatic mode).
The green operation lamp
K
lights up.
▶ Press the
Temp.
button to set the desired temperature.
– In cooling/heating mode, the temperature range is 16-30°C.
– The indoor unit switches on/off automatically in automatic mode.
The switch-off temperature is controlled automatically based on
the outside temperature (
Tab. 9). An offset of up to ±2 °C can
be set.
Examples for the offset in automatic mode:
Table 8
Table 9 Switch-on and switch-off temperatures in automatic mode,
depending on the outside temperature
4
Timer for switching on active
Timer for switching off active
–
Display time
5
Transmission Symbol
Symbol for multi space mode
6
– Set
temperature
7
Battery status
Operating system
• Android
• IOS
Router
Standard router with 2.4 GHz
signal
WLAN standard
IEEE 802.11b/g/n
Pos. Symbol
Function
Switch-off temperature is 1°C higher
Switch-off temperature is 2°C lower
Outside
temperature [ °C]
Switch-on
temperature
Switch-off
temperature
Heating
Cooling
Heating
Cooling
< 0 °C
21 °C
–
1)
1) At outside temperatures below 18 °C the cooling operation is never switched on
to protect the outdoor unit.
24 °C
–
0...10 °C
21 °C
–
23 °C
–
10...18 °C
21 °C
–
22 °C
–
18...28 °C
21 °C
29 °C
22 °C
24 °C
28...34 °C
21 °C
29 °C
22 °C
25 °C
> 34 °C
21 °C
29 °C
22 °C
26 °C


