background image

Service

L’entretien 

préventif

effectué  par  des  employés

non  auto risés  peut  entraîner  un  position nement

erroné des composants et des fils internes, et ainsi

causer des dangers sévères.

Il est recom man dé que

l’entretien et la réparation de nos outils soient confiés

à un centre de service-usine Bosch ou à un centre de

service après-vente Bosch agréé.

LUBRIFICATION DE L’OUTIL

Votre outil Bosch a été convenablement lubrifié et est

prêt  à  utiliser.  Il  est  conseillé  de  lubrifier  tous  les

outils  munis  d’engrenages  avec  du  lubrifiant  Bosch  à

chaque changement de balais.

BALAIS DE CHARBON

Les balais et le collecteur de votre outil ont été conçus

pour donner plusieurs heures de fonctionnement sans

aléas.  Pour  maintenir  le  moteur  en  forme,  nous

recommandons  d’exa miner  les  balais  tous  les  deux  à

six  mois.  Vous  ne  devriez  utiliser  que  les  balais  de

rechange  d’origine  Bosch  qui  con viennent

spécialement à votre outil.

ROULEMENTS

Tous  les  deux  rem placements  de  balais,  il  faudrait

confier  le  remplacement  des  roulements  à  un  centre

de  service-usine  Bosch  ou  à  un  centre  de  service

après-vente  Bosch  agréé.  Les  roulements  qui  sont

devenus  bruyants  (à  cause  de  sciage  de  matériaux

très  abrasifs  ou  de  durs  efforts)  devraient  être

remplacés à l’instant pour éviter la surchauffe et la dé -

faillance du moteur.

Entretien

AVERTISSEMENT

!

-18-

ACCOUPLEMENT A GLISSEMENT

L’outil  renferme  un  accouplement  à  glissement

préréglé.  L’arbre  arrêtera  de  tourner  si  l’accessoire

grippe et surcharge l’outil.

POIGNEE AUXILIAIRE

La  poignée  auxiliaire,  qui  pivote  sur  360°,  doit  être

utilisée  pour  supporter  l’outil.  Pour  repositionner

et/ou  faire  pivoter  la  poignée,  desserrez  la  manette,

déplacez  la  poignée  à  la  position  désiré  le  long  du

cylindre, puis resserrez fermenment la manette.

CONSEILS PRATIQUES

Pour de meilleurs résultats dans le béton, exercez une

pression  uniforme  sans  excès  de  force.  Autrement,

l’outil ne donnera pas le rendement prévu.

Tous  les  marteaux  ont  besoin  d’un  court  temps  de

préchauffe.    Selon  la  température  de  la  pièce,  le

temps peut varier de 15 secondes (90°F) à 2 minutes

(32°F).  Un  marteau  neuf  n’atteindra  sa  pleine

performance  qu’après  avoir  fait  l’objet  de  rodage

approprié,  à  savoir  jusqu’à  5  heures  de

fonctionnement.

Un  marteau  rotatif  est  probablement  l’outil  portatif  le

plus  dispendieux  en  chantier.  La  robustesse  et

l’efficacité  des  marteaux  Bosch  feront  plus  que

justifier  le  coût  des  outils  de  ce  genre.  Tel  qu’il  a  été

signalé  antérieurement,  l’entretien  des  accessoires  et

la propreté des prises d’air influent directement sur le

rendement  de  l’outil.  Adoptez  un  programme

d’entretien que vous suivrez régulièrement.

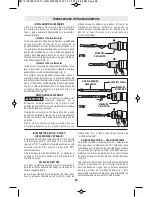
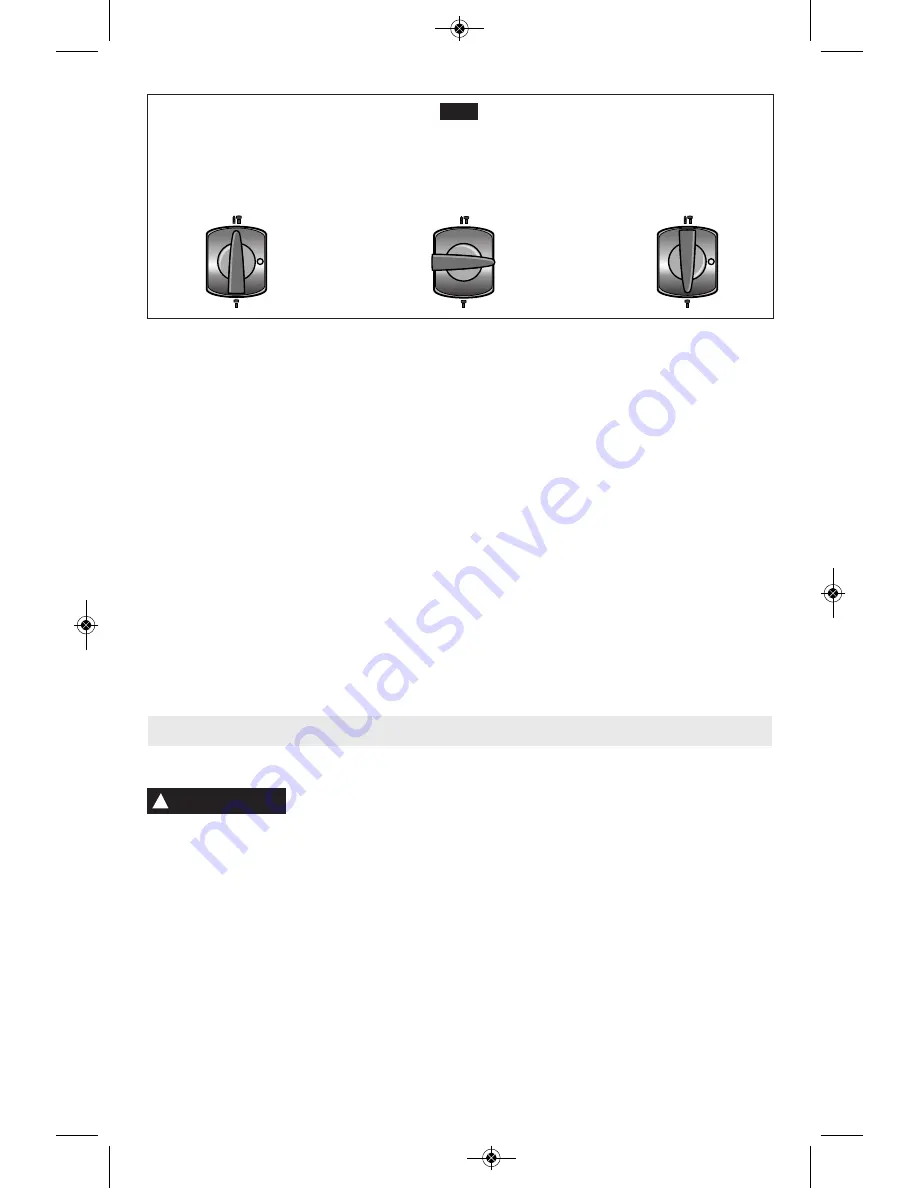
Perçage/Marteau :

utilisé pour le perçage avec

mèches solides au carbure et

mèches creuses

Marteau seulement : 

servant au burinage et  

à la démolition

Vario-lock :

permet de fixer le burin en l’une de 12

positions de 12 façons (position « 0 » à

droite ou à gauche)

FIG. 4

BM 1619929519 07-12_BM 1619929519 07-12  7/19/12  8:58 AM  Page 18

Содержание 11240

Страница 1: ...nnement sécurité Instrucciones de funcionamiento y seguridad 1 877 BOSCH99 1 877 267 2499 www boschtools com Call Toll Free for Consumer Information Service Locations Pour obtenir des informations et les adresses de nos centres de service après vente appelez ce numéro gratuit Llame gratis para obtener información para el consumidor y ubicaciones de servicio 11240 11247 BM 1619929519 07 12_BM 16199...

Страница 2: ...rsonal protective equipment Always wear eye protection Protective equipment such as dust mask non skid safety shoes hard hat or hearing protection used for appropriate conditions will reduce personal injuries Prevent unintentional starting Ensure the switch is in the off position before connecting to power source and or battery pack picking up or carrying the tool Carrying power tools with your fi...

Страница 3: ...angled with the spinning bit it could entrap you causing serious personal injury Position yourself to avoid being caught between the tool or side handle and walls or posts Should the bit become bound or jammed in the work the reaction torque of the tool could crush your hand or leg Do not strike the bit with a handheld hammer or sledge hammer when attempting to dislodge a bound or jammed bit Fragm...

Страница 4: ...maintenance schedule for your tool When cleaning a tool be careful not to disassemble any portion of the tool since internal wires may be misplaced or pinched or safety guard return springs may be improperly mounted Certain cleaning agents such as gasoline carbon tetrachloride ammonia etc may damage plastic parts Risk of injury to user The power cord must only be serviced by a Bosch Factory Servic...

Страница 5: ...torque 1 2 3 Selector settings Speed torque or position settings I II III Higher number means greater speed Infinitely variable selector with off Speed is increasing from 0 setting Arrow Action in the direction of arrow Alternating current Type or a characteristic of current Direct current Type or a characteristic of current Alternating or direct current Type or a characteristic of current Class I...

Страница 6: ...United States and Canadian Standards Symbols continued IMPORTANT Some of the following symbols may be used on your tool Please study them and learn their meaning Proper interpretation of these symbols will allow you to operate the tool better and safer This symbol designates that this tool is recognized by Underwriters Laboratories This symbol designates that this tool is listed by Underwriters La...

Страница 7: ...mbly adjustments or changing accessories Such preventive safety measures reduce the risk of starting the tool accidentally WARNING Rotary Hammer TRIGGER SWITCH AUxILIARy HANDLE HAND GRIP DUST SHIELD LOCKING SLEEVE SELECTOR LEVER VENTILATION OPENINGS VENTILATION OPENINGS FIG 1 SPLINE TOOL HOLDER Model 11247 only NOTE For tool specifications refer to the nameplate on your tool BM 1619929519 07 12_BM...

Страница 8: ...ged accessories are used The cost to maintain sharp and undamaged accessories is more than offset by the time saved in operating the tool with sharp accessories 8 WARNING LOCKING SLEEVE FIG 2 FIG 3 LOCKING SLEEVE ALIGNMENT MARK FLAT HEx ROUND CHISEL TRIGGER ON OFF SWITCH To turn the tool ON squeeze the trigger switch To turn the tool OFF release the trigger switch which is spring loaded and will r...
Страница 9: ...ollow a set maintenance program 9 Service Preventive maintenance performed by unauth orized personnel may result in misplacing of internal wires and components which could cause serious hazard We recommend that all tool service be performed by a Bosch Factory Service Center or Autho rized Bosch Service Station TOOL LUbRICATION Your Bosch tool has been properly lubricated and is ready to use It is ...

Страница 10: ...disassembling the entire tool housing Cleaning To avoid accidents always disconnect the tool from the power supply before cleaning or performing any maintenance The tool may be cleaned most effectively with compressed dry air Always wear safety goggles when cleaning tools with compressed air Ventilation openings and switch levers must be kept clean and free of foreign matter Do not attempt to clea...

Страница 11: ... rallonges sont faites pour l extérieur et réduisent le risque de choc électrique S il est absolument nécessaire d utiliser l outil électroportatif dans un endroit humide utilisez une alimentation protégée par un disjoncteur de fuite de terre GFCI L utilisation d un disjoncteur GFCI réduit les risques de choc électrique Sécurité personnelle Restez concentré faites attention à ce que vous faites et...

Страница 12: ...e bras ou de votre poignet Si vous perdez contrôle et que le cordon s enroule autour de votre bras ou de votre poignet il peut vous emprisonner et vous blesser Utilisation et entretien des outils électroportatifs Ne forcez pas sur l outil électroportatif Utilisez l outil électroportatif qui convient à la tâche à effectuer L outil qui convient à la tâche fait un meilleur travail et est plus sûr à l...

Страница 13: ...xemptes d huile et de graisse On ne pas maîtriser un outil électroportatif en toute sécurité quand on a les mains glissantes Créez un agenda d entretien périodique pour votre outil Quand vous nettoyez un outil faites attention de n en démonter aucune pièce car il est toujours possible de mal remonter ou de pincer les fils internes ou de remonter incorrectement les ressorts de rappel des capots de ...

Страница 14: ...de vitesse de couple ou de position Un l ll lll nombre plus élevé signifie une vitesse plus grande Sélecteur variable à l infini avec arrêt La vitesse augmente depuis le réglage 0 Flèche Action dans la direction de la flèche Courant alternatif Type ou caractéristique du courant Courant continu Type ou caractéristique du courant Courant alternatif ou continu Type ou caractéristique du courant Const...

Страница 15: ...des États Unis et du Canada Symboles suite IMPORTANT Certains des symboles suivants peuvent être utilisés sur votre outil Veuillez les étudier et apprendre leur signification Une interprétation appropriée de ces symboles vous permettra d utiliser l outil de façon plus efficace et plus sûre Ce symbole indique que cet outil est reconnu par Underwriters Laboratories Ce symbole signifie que cet outil ...

Страница 16: ...e modèle 11240 11247 Type de tige SDS Maxi Cannelé Capacités maximales Mèches à pointe au carbure 40 mm 40 mm Mèches à carottage 102 mm 102 mm Marteau rotatif INTERRUPTEUR À GÂCHETTE POIGNEE AUXILIAIRE POIGNEE PRISE PARE POUSSIÈRE MANCHON DE VERROUILLAGE LEVIER SELECTEUR PRISES D AIR PRISES D AIR REMARQUE Pour spécifications de l outil reportez vous à la plaque signalétique de votre outil FIG 1 PO...

Страница 17: ...oir enlevés REMARQUE Le marteau rotatif ne produira les résultats attendus que si vous l équipez d embouts bien affûtés et en parfait état Les frais d entretien de l équipement sont minimes comparés au temps que vous épargnerez Consignes de fonctionnement 17 AVERTISSEMENT GACHETTE DE COMMANDE Pour mettre l outil en marche serrez la gâchette de commande Pour l arrêter relâchez tout simplement la gâ...

Страница 18: ...un accouplement à glissement préréglé L arbre arrêtera de tourner si l accessoire grippe et surcharge l outil POIGNEE AUXILIAIRE La poignée auxiliaire qui pivote sur 360 doit être utilisée pour supporter l outil Pour repositionner et ou faire pivoter la poignée desserrez la manette déplacez la poignée à la position désiré le long du cylindre puis resserrez fermenment la manette CONSEILS PRATIQUES ...

Страница 19: ...ants sans avoir à démonter tout le boîtier à outils Nettoyage Pour éviter le risque d accidents débranchez toujours l outil de la prise de courant avant de procéder au nettoyage ou à l entretien Vous pouvez très bien le nettoyer à l air comprimé Dans ce cas portez toujours des lunettes de sécurité Gardez les prises d air et les interrupteurs propres et libres de débris N essayez pas de les nettoye...

Страница 20: ...cordón de extensión adecuado para uso a la intemperie La utilización de un cordón adecuado para uso a la intemperie reduce el riesgo de que se produzcan sacudidas eléctricas Si es inevitable utilizar una herramienta mecánica en un lugar húmedo utilice una fuente de energía protegida por un interruptor de circuito accionado por corriente de pérdida a tierra GFCI El uso de un GFCI reduce el riesgo d...

Страница 21: ...n la muñeca el cordón puede atraparle y causarle lesiones Sitúese de modo que evite ser atrapado entre la herramienta o el mango lateral y las paredes o los Uso y cuidado de las herramientas mecánicas No fuerce la herramienta mecánica Use la herramienta mecánica correcta para la aplicación que desee realizar La herramienta mecánica correcta hará el trabajo mejor y con más seguridad a la capacidad ...

Страница 22: ...reen un peligro para el operador Mantenga los mangos secos limpios y libres de aceite y grasa Las manos resbalosas no pueden controlar de modo seguro la herramienta mecánica Desarrolle un programa de mantenimiento periódico de la herramienta Cuando limpie una herramienta tenga cuidado de no desmontar ninguna de sus partes ya que los cables internos podrían reubicarse incorrectamente o pellizcarse ...

Страница 23: ...nes de velocidad par motor o posición I II III Un número más alto significa mayor velocidad Selector infinitamente variable La velocidad aumenta desde la graduación de 0 con apagado Flecha Acción en la dirección de la flecha Corriente alterna Tipo o una característica de corriente Corriente continua Tipo o una característica de corriente Corriente alterna o continua Tipo o una característica de co...

Страница 24: ...nadienses Símbolos continuación IMPORTANTE Es posible que algunos de los símbolos siguientes se usen en su herramienta Por favor estúdielos y aprenda su significado La interpretación adecuada de estos símbolos le permitirá utilizar la herramienta mejor y con más seguridad Este símbolo indica que esta herramienta está reconocida por Underwriters Laboratories Este símbolo indica que Underwriters Lab...

Страница 25: ... Max Estriado Capacidadmáxima Brocas con punta de carburo 40 mm 40 mm Brocas huecas de pared gruesa 102 mm 102 mm Martillo giratorio INTERRUPTOR GATILLO MANGO AUXILIAR EMPUNADURA PROTECTOR ANTIPOLVO MANGUITO DE FIJACIÓN PALANCA SELECTORA ABERTURAS DE VENTILACIÓN ABERTURAS DE VENTILACIÓN NOTA Para obtener las especificaciones de la herramienta consulte la placa del fabricante colocada en la herrami...

Страница 26: ...si se utilizan accesorios afilados y sin daños El costo de mantener accesorios afilados y sin daños es sobradamente compensado por el tiempo que se ahorra al hacer funcionar la herramienta con accesorios afilados Instrucciones de funcionamiento 26 INTERRUPTOR GATILLO ON OFF DE ENCENDIDO Y APAGADO Para encender la herramienta posición ON apriete el interruptor gatillo Para apagar la herramienta pos...

Страница 27: ...tablezca y siga un programa fijo de mantenimiento Servicio El mantenimiento preventivo realizado por personal no autorizado pude dar lugar a la colocación incorrecta de cables y componentes internos que podría constituir un peligro serio Recomendamos que todo el servicio de las herramientas sea realizado por un Centro de servicio de fábrica Bosch o por una Estación de servicio Bosch autorizada LUB...

Страница 28: ...ar toda la carcasa de la herramienta Limpieza Para evitar accidentes desconecte siempre la herra mienta de la fuente de energía antes de la limpieza o de la realización de cualquier mantenimiento La herramienta se puede limpiar más eficazmente con aire comprimido seco Use gafas de seguridad siempre que limpie herramientas con aire comprimido Las aberturas de ventilación y las palancas de interrupt...

Страница 29: ...Notes 29 BM 1619929519 07 12_BM 1619929519 07 12 7 19 12 8 58 AM Page 29 ...

Страница 30: ... 30 Remarques BM 1619929519 07 12_BM 1619929519 07 12 7 19 12 8 58 AM Page 30 ...

Страница 31: ... 31 Notas BM 1619929519 07 12_BM 1619929519 07 12 7 19 12 8 58 AM Page 31 ...

Страница 32: ...IT ÊTRE TENU POUR RESPONSABLE DES INCIDENTS OU DOMMAGES INDIRECTS INCLUANT MAIS NE SE LIMITANT PAS AUX PERTES DE PROFITS CONSÉCUTIFS À LA VENTE OU L USAGE DE CE PRODUIT CERTAINS ÉTATS AMÉRICAINS ET CERTAINES PROVINCES CANADIENNES N ADMETTANT PAS LE PRINCIPE DE LA LIMITATION NI L EXCLUSION DES DOMMAGES INDIRECTS ET CONSÉQUENTIELS IL EST POSSIBLE QUE LES LIMITATIONS OU EXCLUSIONS CI DESSUS NE S APPL...

Отзывы: