General repair instructions
BOMAG
19
008 911 63
1.3
Gaskets and mating surfaces
Leaking or failing seals and gaskets can in most cases
be tracked down to careless assembly, causing dam-
age not only to the seal or gasket, but also to the mat-
ing surfaces. Careful assembly work is mandatory if
good results are to be achieved.
●
Before assembling replacement seals make sure
that the running surface is free of pitting, flutes, cor-
rosion or other damage.
●
Inappropriately stored or handled seals (e.g. hang-
ing from hooks or nails) must under no circumstanc-
es be used.
●
Sealing compound should only be used if specially
requested in the instructions. In all other cases
these joints should be assembled in dry condition.
●
Sealing compound must be applied thin and evenly
on the corresponding surfaces; take care that the
compound does not enter into oil galleries or blind
threaded bores.
●
Before assembly remove any residues of old seal-
ing compound. Do not use any tools that could dam-
age the sealing surfaces.
●
Examine the contact faces for scratches and burrs,
remove these with a fine file or an oilstone; take
care that no grinding dust and dirt enters into
tapped bores or enclosed components.
●
Blow lines, ducts and gaps out with compressed air,
replace any O-rings and seals that have been dis-
lodged by the compressed air.
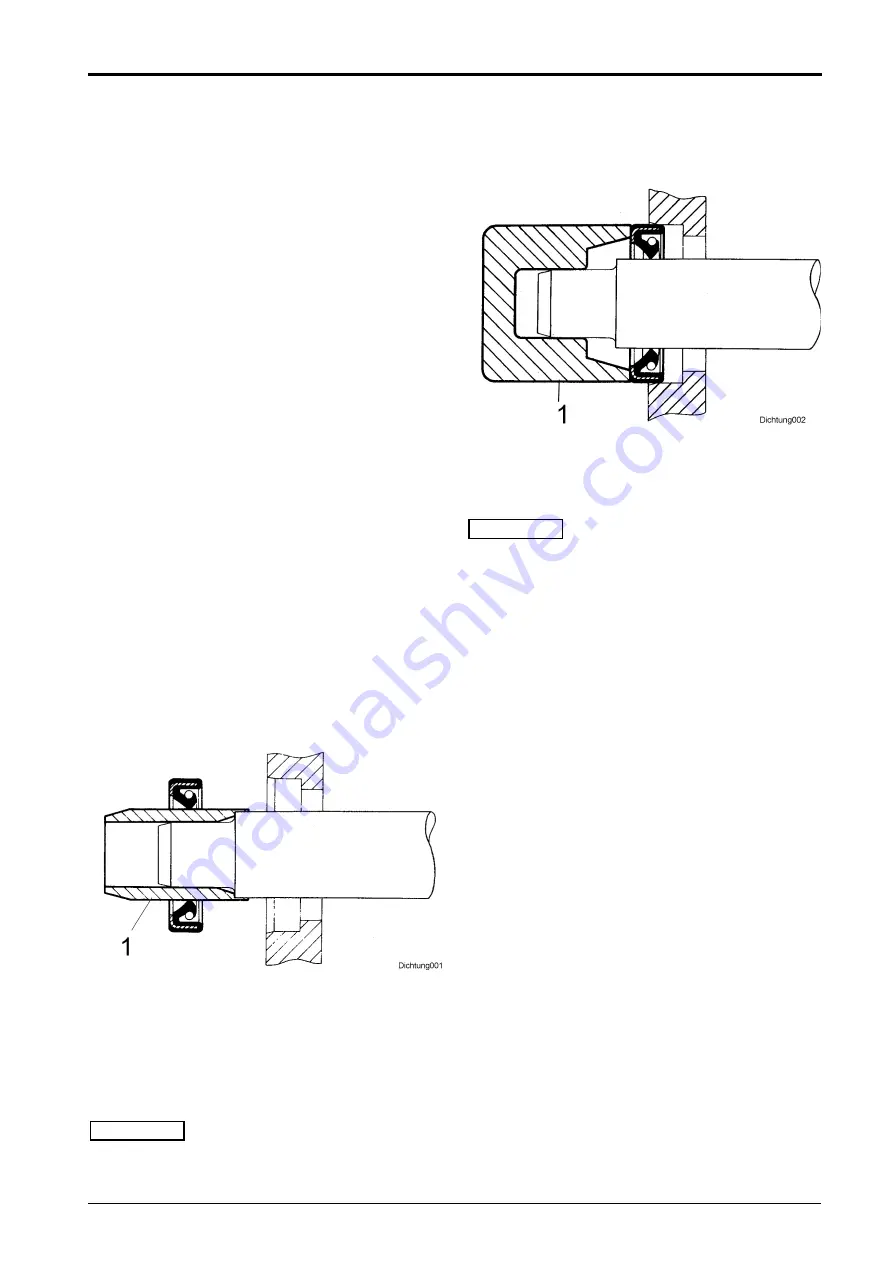
Assembly of radial seals
Fig. 2
●
Lubricate sealing lips 1 (Fig. 2) with clean grease; in
case of double seals fill the space between the seal-
ing lips with a generous amount of grease.
●
Slide the seal over the shaft, with the lip facing to-
wards the fluid to be sealed.
i
Note
If possible, use an assembly sleeve 1 (Fig. 2),
to pro-
tect the lip from being damaged by sharp edges,
threads or splines.
If no assembly sleeve is availa-
ble, you should use a plastic tube or adhesive tape to
prevent the sealing lip from being damaged.
Fig. 3
●
Lubricate the outer rim 1 (Fig. 3) of the seal and
press it flat on the housing seat.
i
Note
If possible, use a "bell" 1 (Fig. 3), to make sure
that
the seal will not skew.
In some cases it may be ad-
visable to assemble the seal into the housing first, be-
fore sliding it over the shaft. Under no circumstances
should the full weight of the shaft rest on the seal.
If you have no proper service tools at hand, use a suit-
able drift punch with a diameter which is about 0.4mm
smaller than the outer diameter of the seal. Use VERY
LIGHT blows with the hammer if no press is available.
●
Press or knock the seal into the housing, until it is
flush with the housing surface.


