Lap Dissolve
Superimposing a fade-in on a fade-out makes
a lap dissolve so that one picture gradually
disappears as the next gradually appears.
This allows for a smooth transition during
which the picture brightness scarcely varies.
To produce lap dissolve, close the first shot
in a sequence with a fade-out. Lock the
shutter in the “closed” position. Set the frame
control to zero. Disengage the motor. Set
the slide release to the ʻMʼ position. Douse
the Viewfinder. Cap the lens. Rewind the
film, using the backwind key, until the frame
counter indicates the duration of the fade-out.
Move the slide release to the STOP position.
Frame the second sequence to be filmed
and release the slide lever. At the same time
make a fade-in the same length as the fade-
out.
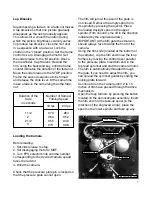
Duration of the
fade
in seconds
Number of frames/
Filming Speed
18 fps
24 fps
973
964
955
973
964
952
940
928
1 1/2
3
2
2 1/2
Loading the Camera
Before loading:
1. Set side release to stop.
2. Set disengaging motor to MOT.
3. Turn FPS selector knob until the number
corresponding to the desired camera speed
faces the red dot.
4. Wind the camera.
Check that the pressure plate pin is locked so
that the pressure plate cannot open.
The film will jam at this point if the plate is
not closed. Remove the empty spool from
its spindle by pressing the ejector. Place
the loaded daylight spool on the upper
spindle. (Film should come off in the direction
indicated by the engraved arrow).
IMPORTANT: At the film gate the emulsion
should always face towards the front of the
camera.
Using the film knife (located at the bottom of
the camera), clip the film end.Close the loop
formers by moving the control lever parallel
to the pressure plate. Insert film end in the
top feed sprocket and start the camera motor.
The film is automatically threaded through
the gate. If you need to adjust the film, you
can spread the sprocket guides by sliding the
locking plate forward.
Continue to run the camera until 12 to 15
inches of film have passed through the drive
mechanism.
Open the loop formers by pressing the button
located on the sprocket/gate assembly. Insert
the film end into the take-up spool (in the
direction of the engraved arrow), place the
spool on the lower spindle and take up any
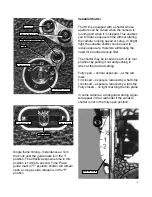
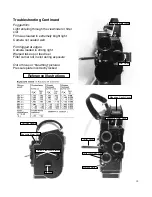
Loop Formers
Pressure Plate Pin
Sprocket Guides
Release
Sprocket Guide Lock
7


