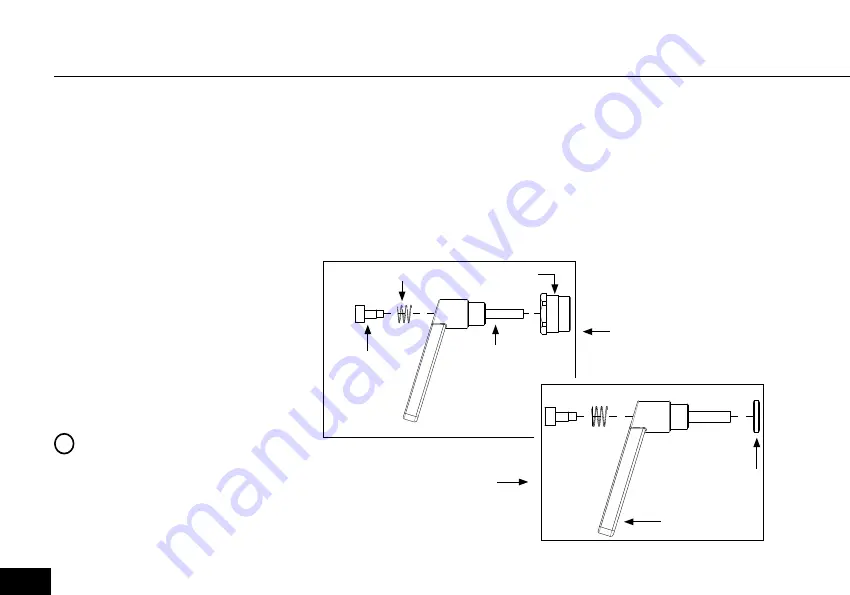
Every 3 months the handles need
cleaning and grease to protect the
parts from sweat, dust, dirt and
water.
1) Remove the adjustment handle
and disassemble the handle
completely into a screw, a spring,
a handlegrip, a main screw and a
brass washer, see figure 9. Do this
with both the horizontal and vertical
adjusment handle.
You don’t need
to remove the 32mm nut.
2) Clean all the parts thoroughly
one by one using a steel brush. If
the residue is extreme, a sharp
object can be used, for example a
screwdriver.
3) Lubricate the internal parts with
grease before reassembling the
handle. Remember to lubricate
inside the handle as well.
4) Reassemble the handle by
inserting the main screw in the
handle grip.
5) The spring is inserted into the
top of the handle and fixed in
place with the remaining screw.
6) Tighten with a 5mm Allen
wrench.
7) Add grease to the main screw
before mounting it on the cycle.
ADJUSTMENT HANDLE
Figure 11
Vertical
adjustment
Heizontal
adjustment
Washer
Screw
Main
screw
Spring
Hand grip
32mm nut
PLEASE NOTE
Never use a tool when tightening
the adjustment handle on the cycle.
By pulling the handle it can be turned
freely.
!
014
Содержание Classic
Страница 1: ...01 INSTRUCTIONS BODY BIKE INDOOR CYCLE BODY BIKE CLASSIC ENGLISH ...
Страница 7: ...Unpacking 8 Bottom frame 8 9 Handlebar 10 Saddle 10 Pedals 11 12 ASSEMBLY ASSEMBLY 07 ...
Страница 12: ...Figure 8 Figure 9 Figure 10 Tighten in the direction of the handlebar Point upwards 012 ...
Страница 18: ...Figure 15 Remove the 7 bolts and slide the side cover off in the dirrection of the steer Figure 16 018 ...


