background image


10 


3.  Inicializando el teléfono 

Como retirar la cubierta posterior:


• Asegúrese de que el dispositivo esté apagado. 
• Sujete firmemente el aparato con la parte frontal hacia abajo. 
• Deslice el dedo en la ranura diseñada para remover la cubierta y retire suavemente la 
cubierta trasera. 
 

Como insertar la tarjeta SIM:


Ubique  la  ranura para  tarjeta  SIM  e  inserte  la  SIM  tal  como  se  muestra  en  la figura.   
Adicional usted tendrá una ayuda visual, como referencia, de donde se inserta la tarjeta 
SIM. 
• Deslice la tarjeta SIM en la ranura hasta que esta llegue al tope de la misma. 


Содержание AX823

Страница 1: ...AX823 Mobile Phone MANUAL DE USUARIO DE LA SERIE AX Android 7 0 Bmobile ...

Страница 2: ...cauciones en el uso del cargador Limpieza y mantenimiento Precauciones comunes 2 Familiarizándose con el teléfono 7 3 Inicializando el teléfono 9 Como retirar la cubierta posterior Como insertar la tarjeta SIM Encendido Apagado Como instalar una tarjeta de memoria ...

Страница 3: ...léfono 12 Como cambiar el estilo del menúprincipal Notificaciones Cámara Red GPRS WCDMA WIFI Almacenamiento masivo Música Bluetooth Radio FM Calculadora 5 Especificaciones técnicas 22 6 Aviso importante sobre el FCC 24 7 Garantí a limitada Bmobile 27 ...

Страница 4: ...nto de la temperatura cambio de color o deformació n durante el uso la carga o el almacenamiento de la baterí a por favor deje de usarlo y sustituir la baterí a por una nueva lo antes posible El líquido de la batería puede ocasionar quemaduras en la ropa y piel en caso de que se presenten fugas Si esto sucede por favor lavar con abundante agua limpia inmediatamente y vaya al hospital más cercano P...

Страница 5: ...cargas eléctricas Elimine el polvo acumulado en la clavija de alimentación No ponga contenedores de agua al lado de la fuente de alimentación para evitar el sobrecalentamiento incendios descargas eléctricas y mal funcionamiento No desmonte ni fuerce el cargador o puede provocar lesiones personales descarga eléctrica fuego y dañ os en el cargador No utilice el cargador en lugares de alta humedad co...

Страница 6: ...a y el cargador con un paño suave y seco Nunca utilice alcohol solventes y o soluciones corrosivas como el benceno para limpiar el telé fono Los tomacorrientes sucios pueden causar un mal contacto y una baja en la fuente de alimentació n o incluso puede hacer que la carga de la baterí a no se realice correctamente Así que por favor lí mpielos periódicamente 1 4 Precauciones Comunes Telé fono móvil...

Страница 7: ...ficos y siga las instrucciones estipuladas para su eliminación PRECAUCIÓN SE CORRE EL RIESGO DE EXPLOSIÓN SI SE SUSTITUYE LA BATERÍ A POR UNA DE TIPO INCORRECTA ELIMINE LAS BATERIAS USADAS DE ACUERDO CON LAS REGULACIONES DE SU PAIS Cargador No cargue el telé fono en las siguientes condiciones Lugares con luz solar directa Lugares con temperatura ambiente inferior a 0 o superior a 40 lugares húmedo...

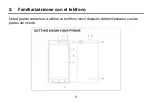
Страница 8: ...8 2 Familiarizándose con el teléfono Usted puede comenzar a utilizar su telé fono móvil después de familiarizarse con las partes del mismo ...

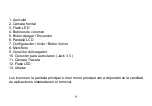
Страница 9: ...ntalla LCD 7 Configuración Inicio Botó n Volver 8 Micrófono 9 Conector del cargador 10 Conector para auriculares Jack 3 5 11 Cámara Trasera 12 Flash LED 13 Altavoz Los iconos en la pantalla principal o en el menúprincipal van a depender de la cantidad de aplicaciones instaladas en el terminal ...

Страница 10: ...ce el dedo en la ranura diseñada para remover la cubierta y retire suavemente la cubierta trasera Como insertar la tarjeta SIM Ubique la ranura para tarjeta SIM e inserte la SIM tal como se muestra en la figura Adicional usted tendráuna ayuda visual como referencia de donde se inserta la tarjeta SIM Deslice la tarjeta SIM en la ranura hasta que esta llegue al tope de la misma ...

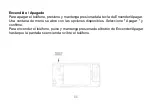
Страница 11: ...ga presionada la tecla de Encender Apagar Una ventana de menú se abre con las opciones disponibles Seleccione Apagar y confirme Para encender el telé fono pulse y mantenga presionado el botón de Encender Apagar hasta que la pantalla se encienda o vibre el telé fono ...

Страница 12: ...ga completa de la baterí a Algunas baterí as tienen mejor rendimiento después de varios ciclos de carga descarga Nota sólo el adaptador de CA y el cable de sincronización USB proporcionado con el dispositivo debe ser utilizado para cargar del mismo Conecte el cable USB del adaptador de CA al conector de carga de su dispositivo e introduzca el adaptador de CA a un tomacorriente para iniciar la carg...

Страница 13: ...13 No extraiga la batería del dispositivo mientras esté cargándose con el adaptador para el automóvil o AC Como medida de seguridad la batería dejará de cargarse antes de que se sobrecaliente ...

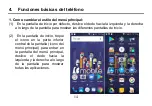
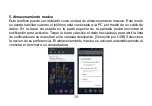
Страница 14: ... y la derecha a lo largo de la pantalla para mostrar las diferentes pantallas de inicio 2 En la pantalla de inicio toque el icono en la parte inferior central de la pantalla icono del menú principal para entrar en la pantalla del menú principal deslice el dedo hacia la izquierda y la derecha a lo largo de la pantalla para mostrar todas las aplicaciones ...

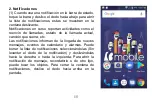
Страница 15: ...as estado de la llamada actual canción que suena etc Las notificaciones informan de la llegada de nuevos mensajes eventos de calendario y alarmas Puede borrar la lista de notificaciones seleccionándolas Sin levantar el dedo de la notificación y deslizándolas hacia la derecha o hacia la izquierda Para abrir la notificació n de mensaje recordatorio o de otro tipo puede tocar los objetos Para cerrar ...

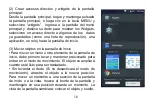
Страница 16: ... reloj hacia la pantalla de inicio 3 Mover objetos en la pantalla de inicio Para mover un icono u otro elemento de la pantalla de inicio debe primero tocar y mantener presionado para entrar en el modo de movimiento El objeto se ampliará cuando estélisto para ser trasladado Sin levantar el dedo Si no desactivará el modo de movimiento arrastre el objeto a la nueva posición Para mover un elemento a u...

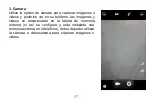
Страница 17: ...o videos y poderlos ver en su telé fono las imá genes y videos se almacenaran en la tarjeta de memoria externa si así se configura y esta instalada una memoria externa en el telé fono Antes de poder utilizar la cámara o videocámara para capturar imá genes o videos ...

Страница 18: ...señal inalámbrica Cuando el telé fono está en modo WCDMA normal o en cobertura de red HSPA se puede utilizar la funció n de video llamadas siempre y cuando el receptor tenga la misma cobertura y soporte el servicio Para utilizar el navegador tiene que estar conectado a una red Al abrir el Anclaje de red y zona WI FI del telé fono se puede tomar como un punto de acceso inalámbrico y otros telé fono...

Страница 19: ...eña para el Anclaje de red Paso 3 Abra las conexiones de WI FI en otros telé fonos o computadoras portátiles busque con la configuración de WI FI de su telé fono un punto de acceso inalámbrico luego introduzca la contraseñ a y proceda a conectarse a la red ...

Страница 20: ...able de datos En la barra de estado en la parte superior de la pantalla podrá encontrar la notificació n para activarlo Toque la barra y deslice el dedo hacia abajo para abrir la lista de notificaciones se muestran en la ventana deslizante Conexió n por USB Seleccione la opcion de su preferencia El almacenamiento masivo se activaráautomáticamente al conectar el terminal a su computadora ...

Страница 21: ...n inalámbrica entre el telé fono y otros dispositivos compatibles y transmitir datos puede establecer una conexió n inalámbrica entre dispositivos con el telé fono a una distancia de varios metros Hay que tener en cuenta que la conexió n Bluetooth puede ser interferida por obstáculos como paredes puertas u otros dispositivos electró nicos 1 Entre en el menú de configuración toque Bluetooth para ab...

Страница 22: ...ea emparejar para confirmar la contraseña y asípoder completar el emparejamiento Puede utilizar Bluetooth para compartir las imá genes ví deos o archivos de música con familiares y amigos 8 Radio FM El telé fono cuenta con una Radio FM Para utilizar esta función tiene que pulsar sobre el icono de Radio FM en el menú principal para abrir la misma Es importante y necesario tener conectado los auricu...

Страница 23: ...izar cálculos básicos como sumas restas divisiones y multiplicaciones también puede realizar otros tipos de cálculos deslizando el dedo hacia el lado izquierdo sobre el teclado numérico de la calculadora para encontrar otras opciones de cálculo ...

Страница 24: ... se requiere previo aviso por separado para los cambios de capacidad Nota Las condiciones de funcionamiento reales dependen del entorno local de red la tarjeta SIM y el comportamiento del usuario Advertencia Cualquier consecuencia causada por mal uso abuso o no seguir todas y cada una de las sugerencias e instrucciones anteriormente descritas será responsabilidad del usuario no deben considerar al...

Страница 25: ...l fabricante se reserva el derecho de cambiar o actualizar las especificaciones o versiones de software sin previo aviso Algunas funciones pueden no estar disponibles y dependerán del paí s donde se adquiera el dispositivo ...

Страница 26: ...toridad del usuario para operar el equipo 15 105 Información para el usuario Nota Este equipo ha sido probado y cumple con los lí mites para un dispositivo digital de Clase B según la parte 15 de las normas de la FCC Estos lí mites están diseñados para proporcionar una protecció n razonable frente a interferencias perjudiciales en una instalación residencial Este equipo genera utiliza y puede irra...

Страница 27: ...desarrollados por organizaciones cientí ficas independientes mediante la evaluació n perió dica y exhaustiva de estudios cientí ficos Los estándares incluyen un margen de seguridad diseñ ado para garantizar la seguridad de todas las personas independientemente de su edad o salud La Declaració n de FCC sobre exposició n a la RF y el lí mite SAR para EE UU FCC es de 1 6 W kg promedio por cada gramo ...

Страница 28: ...n el cuerpo Para cumplir con los requisitos de exposició n a RF debe mantenerse a una distancia de separació n mí nima de 1 0 cm entre el cuerpo del usuario y el telé fono incluyendo la antena Accesorios de terceros como clips para cinturón fundas y accesorios similares utilizados con este dispositivo no deben contener componentes metálicos accesorios que no cumplan estos requisitos de exposición ...

Страница 29: ... usuario por los defectos del mismo Los accesorios cuentan con una Garantí a comercial de seis 6 meses contados a partir de la fecha de compra por parte del usuario La garantí a incluye mano de obra y los gastos de transportación son cubiertos únicamente desde el establecimiento de compra Para adquirir partes componentes consumibles y accesorios avocarse al taller de servicio autorizado para más i...

Страница 30: ... uso normal del producto incluyendo carcasas teclado lentes pantallas y otros componentes 2 Cuando el producto se hubiese utilizado en condiciones distintas a las normales 3 Cuando el producto no hubiese sido operado de acuerdo con el instructivo de uso que se le acompaña 4 Cuando el producto hubiese sido alterado o reparado por personas no autorizadas por el fabricante nacional importador o comer...

Страница 31: ...tre otros VALIDEZ DE GARANTIA 1 Para hacer efectiva la garantí a no deben exigirse mayores requisitos que la presentació n del producto acompañ ado de la póliza correspondiente debidamente sellada por el establecimiento que lo vendió o la factura o recibo o comprobante en el que consten los datos especí ficos del producto objeto de la compraventa Bmobile se reserva el derecho de rechazar los servi...

Страница 32: ...NCION Bmobile recomienda encarecidamente que antes de la actualizació n del software o el mantenimiento del producto se haga una copia de seguridad de los datos enlaces y otros contenidos que se ha enviado a través de descarga y se almacena en la memoria ya que se pueden perder durante el procedimiento o reparació n de la actualizació n En caso de sustitució n se recomienda el mismo procedimiento ...

Страница 33: ..._________________________________________ CIUDAD __________________________________ ESTADO ______________________ CÓDIGO POSTAL __________________________ TELÉFONO ____________________ FECHA DE COMPRA _______________________________________________________ DISTRIBUIDOR NOMBRE __________________________________________________________________ N º DE FACTURA __________________________ DATOS DE EDICI...

Страница 34: ...34 Table of Contents 1 Foreword 33 2 Getting know your phone 36 3 Starting up the device 38 4 Introduce the basic phone function 41 5 Technical Specifications 49 6 FCC Cautions 50 ...

Страница 35: ...n if liquid in the battery leaks onto skin or clothes If this happens please flush with plenty of clean water immediately and go to a hospital at once Please keep the battery away from fire to avoid fire and explosion if the battery leaks or emits a strange smell Do not place expose the battery to moisture or it may cause overheating fumes and corrosion Do not use or place the battery under direct...

Страница 36: ...r cord or power plug with wet hands or it can cause electric shock Do not put heavy objects on the power cord or change the power cord or it may cause electric shock and fire Please unplug the power socket before cleaning and maintenance Please hold the charger to unplug the socket as pulling the power cord may damage the power wire and cause electric shock and fire 1 3 Cleaning and maintenance As...

Страница 37: ...d and you will need to replace it with an approved new battery Do not dispose of old batteries as household waste Give them to specified disposal places and follow any stipulated instructions for disposal CAUTION RISK OF EXPLOSION IF BATTERY IS REPLACED BY AN INCORRECT TYPE DISPOSE USED BATTERIES ACCORDING TO THE INSTRUCTIONS OF YOUR COUNTRY Charger Do not charge under following conditions Places ...

Страница 38: ...38 2 GETTING KNOW YOUR PHONE ...

Страница 39: ...6 LCD Screen 7 Menu Home Back Button 8 Microphone 9 Charger connector 10 Headset Jack Jack 3 5 11 Back Camera 12 Flash LED 13 Speaker The number of icons in the main desk or the main menu will be according the quantity of applications installed on your device 3 STARTING YOUR DEVICE ...

Страница 40: ...er To install the SIM card Remove the battery if it is installed Locate the SIM card slot and then insert the SIM card with its gold contacts and its cut off corner as shown in the diagram Slide the SIM card completely into the slot To install a memory card To have additional storage for your images videos music and files you can purchase a memory card and install it in your device ...

Страница 41: ...he battery s exposed copper contacts with the battery connectors at the bottom part of the battery compartment 2 Insert the contacts side of the battery first and then gently push the battery into place Replace the back cover Charging the Battery New batteries are shipped partially charged Before you start using your device it is ...

Страница 42: ...rt charging the battery As the battery is being charged while the device is on a charging icon appears in the title bar In the Home screen After the battery has been fully charged a full battery icon appears in the title bar of the Home screen Warning Do not remove the battery from the device while you are charging it using the AC or car adapter As a safety precaution the battery stops charging be...

Страница 43: ...reen slide your fingertip left and right along the screen to reveal the more home screen 2 On Home screen click icon on the bottom of the screen Main menu icon to enter the main menu screen slide your fingertip left and right along the screen to reveal the more applications 4 2 Home screen ...

Страница 44: ...s call forwarding ON current call status song playing Notifications report the arrival of new messages calendar events and alarms You can clear notifications list by selecting Clear notifications at the top of the notifications window To open the message reminder or other notification you can touch the items To close the notifications window slide your finger up the screen 2 Create Home screen sho...

Страница 45: ...Move objects on the Home screen To move an icon or other item on the Home screen you must first touch hold i t to enter move mode The object will magnify when it s ready to be moved Without lifting your finger or you ll drop out of move mode drag the object to the new position To move an item to a section of the Home screen not in view move it to the edge of the screen and hold it there for a mome...

Страница 46: ...All the pictures you can capture or view on your phone are stored on a memory card which must be installed in your phone Before you can use the Camera or view pictures in Pictures make sure you have a card installed ...

Страница 47: ...d other objects through which the signal passes When your phone is in of the normal WCDMA or HSPA network coverage and the other side The receiver s phone and SIM card can also be supported the video call function of 3G To open the Browser you need to be connected to a network When you open the WIFI or GPRS of touch phone you can take it as a wireless AP and the other phone or computer can interne...

Страница 48: ...upports movable storage i e the U disk function When the phone is switched on you see the icon in the status bar on the top of the screen when its connected to a PC by a data line Touch the bar and slide your finger down the screen to open the list of notifications displayed in the sliding window Select USB connected and touch Turn on USB storage to confirm you can use the phone as a U disk ...

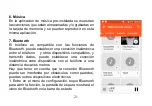
Страница 49: ...45 4 6 Music Songs that you saved in the memory card or phone storage can be played on this app ...

Страница 50: ...46 4 7 Bluetooth The phone supports Bluetooth functions you can establish a wireless connection between the phone with other compatible devices and data transmission and you can establish a wireless ...

Страница 51: ...ch Scan for devices Bluetooth devices within the range of the phone will start scanning Touch the device you want to pair to confirm password to complete the pairing You can use Bluetooth to share the pictures videos or music files with family and friends 4 8 FM Radio The device includes a FM Radio application To use this function you have to go to the main menu and select it Is very important tha...

Страница 52: ...t SIM and user behavior Warning Any consequence caused by misuse abuse or not following any and all of the above written suggestions and instructions shall not hold the producer in any way responsible to any degree Announcement The manufacturer reserves the right to change or upgrade specifications or software versions without prior or separate notice Trademarks mentioned in this material belong t...

Страница 53: ...stallation This equipm ent generates uses and can radiate radio frequency energy and if not installed and use d in accordance with the instructions may cause harmful interference to radio communi cations However there is no guarantee that interference will not occur in a particular in stallation If this equipment does cause harmful interference to radio or television recepti on which can be determ...

Страница 54: ...ceiver Connect the equipment into an outlet on a circuit different from that to which the receiv er is connected Consult the dealer or an experienced radio TV technician for help 15 19 Labelling requirements This device complies with part 15 of the FCC Rules Operation is subject to the following two conditions 1 This device may not cause harmful interference and 2 this device ...

Страница 55: ...the party responsible for compliance could void the user s authority to operate the equipment Specific Absorption Rate SAR information This Mobile Phone meets the government s requirements for exposure to radio waves The guidelines are based on standards that were developed by independent scientific organizations through periodic and thorough evaluation of scientific studies The ...

Страница 56: ...ice was tested for typical body worn operations with the back of the handset kept 10mm for body worn To maintain compliance with FCC RF exposure requirements use accessories that maintain a 10mm for body worn The use of belt clips holsters and similar accessories should not contain metallic components in its assembly The use of accessories that do not satisfy these requirements may not comply with...

Страница 57: ... worn must be maintained between the user s body and the handset including the antenna Third party belt clips holsters and similar accessories used by this device should not contain any metallic components Body worn accessories that do not meet these requirements may not comply with RF exposure requirements and should be avoided Use only the supplied or an approved antenna ...

Отзывы: