background image


7

Basic Operations 


IMPORTANT: 

The BLUEANT INTERPHONE needs to be ‘

paired’

 with your Bluetooth mobile 

phone before you can use the following functions. 

(See 

Pairing to your 

Bluetooth Mobile Phone 

on page 3.)


Make a Call:


Dial the number using your phone as normal. Audio will automatically be on the 
headset. 

Note: With some phones like Siemens S55 and Panasonic X70, audio is always 
on the phone during an outgoing call. You will need to press 

MFB(1)

 to transfer 

the audio to your headset. 


Answer a Call:


To answer an incoming call just press the 

MFB(1)

 for 1 second (1

st

 beep).  


Or, Assuming the 

InterPhone Voice Answer and Reject 

is activated: 

Accept a call by loudly saying a word within  10  seconds. 

(Example: When you 

receive the ring tone, Say loudly 

”Hello!”

)

 The call will be answered. Audio will be 

on the headset. 
  
Note: See InterPhone Voice Dial and Reject Activation / Deactivation on page 10  
 

End a Call:


Press the

 MFB (1)

 for 1 second to end the call (1

st

 beep). 


Voice Dial:  
 

Important:

 First, make sure to activate the voice dial function of your phone. 

Record at least one 

voice tag

. (Kindly refer to the procedure in your phone’s 

manual.) 

Note: Voice dialing entries must be stored in the phone’s memory, not on 

the SIM card!


1. Press 

MFB (1)

 for 1 second (

1

st


beep) to manually activate voice dialing. The 

Voice dial tone/ beep will be heard on the headset prompting the user to say 
 the voice tag of the contact to call. 

2.  Say the voice tag. The voice will be played back to you then the phone will 

dial the number automatically. 


Содержание Interphone none

Страница 1: ......

Страница 2: ...t 4 Using the Headset Clip Mount with Fastening Clamp 4 Using the Headset Clip Mount with Adhesive 5 Mounting the InterPhone 5 Quick removal of the InterPhone 6 Basic Operations 7 Make a Call 7 Answer a Call 7 End a Call 7 Voice Dial 7 Reject a Call For Handsfree Profile Phones only 8 Volume Settings 8 Reconnect the Interphone 8 Special Features 9 High Volume or Low Volume Mode 9 Voice Answer and ...

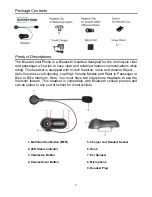
Страница 3: ...wer Reject Auto Volume Level Adjusting Low High Volume Modes and Rider to Passenger or Bike to Bike Intercom Note You must have two Interphone Headsets to use the Intercom feature This headset is compatible with Bluetooth cellular phones and can be suited to any sort of helmet for motorcyclists 1 Multi function Button MFB 5 Charger and Headset Socket 2 LED Status Indicator 6 Hook 3 Volume Up Butto...

Страница 4: ...e Pairing has to be done only once when first connecting to a phone 1 From OFF Press and Hold the MFB on the InterPhone for about 5 seconds until the LED turns to a blinking red blue InterPhone is now in pairing mode ready to be found in by your phone 2 While the headset is in pairing mode access the Bluetooth menu of your phone Turn Bluetooth ON 3 Go to the Devices list and execute a Bluetooth se...

Страница 5: ...th Fastening Clamp 1 Using the provided screw driver loosen the Clips screws enough to allow the Clip to slide onto either side of the Helmets shell 2 Make sure you put the clip under the helmets padding 3 Adjust the Clip until you find the best location for your helmet 4 Tighten the screws to hold the clip firmly in place 4 Note If the helmet s shell is too thick the Spacer provided may be needed...

Страница 6: ...be faced towards the bottom of the helmet As shown in the picture to the right 5 Remove the protective strip from the double sided adhesive and carefully attach the Clip to the outside shell of the helmet Mounting the InterPhone 1 Take your InterPhone Headset and slide it down into the slots in the Headset Clip Mount Make sure that it s perfectly fitted and locked into place by trying to extract i...

Страница 7: ... speaker and mic under the padding 4 Taking care to match the pins up connect the Headset Plug 9 to the Headset Socket 5 The plug can only be inserted in one position 5 Secure the cord of the Headset Plug 9 inside the helmet Tuck any extra wire into the helmet Ensure that only few centimeters of the cord comes out You have successfully mounted the InterPhone Quick removal of the InterPhone Remove ...

Страница 8: ... loudly saying a word within 10 seconds Example When you receive the ring tone Say loudly Hello The call will be answered Audio will be on the headset Note See InterPhone Voice Dial and Reject Activation Deactivation on page 10 End a Call Press the MFB 1 for 1 second to end the call 1st beep Voice Dial Important First make sure to activate the voice dial function of your phone Record at least one ...

Страница 9: ... will be transferred back to the headset Volume Settings Note This is for basic volume adjustment once set up Please see the section in Special Features on High or Low Volume Mode to set the correct volume range for your helmet Press Volume Up 3 or down 4 button until desired level is reached Automatic Volume Adjustment When the bike is in motion motorcycle running and there is driving and backgro...

Страница 10: ...f press and hold the Volume Up 3 2 Keep the Volume Up 3 pressed and then press the MFB 1 for 5 seconds 3 Power On beep followed by a HIGH TONE can be heard The Status Indicator 2 will flash red blue 4 Release both buttons Note Be careful At full volume the Ear Speaker 7 can be very loud Do not position your Ear Speaker close to your ear Low Volume Mode Activation is advised if the positioning of y...

Страница 11: ...Volume Up 3 Volume down 4 buttons 2 Keep both buttons pressed and then press the MFB 1 for 5 seconds 3 Power On beep followed by a HIGH TONE can be heard The Status Indicator 2 will flash red blue 4 Release all 3 buttons Deactivation 1 From Off press and hold simultaneously the Volume Up 3 Volume Down 4 buttons 2 Keep both buttons pressed and then press the MFB 1 for 5 seconds 3 Power On beep foll...

Страница 12: ...Press Volume Down 4 button of BLUEANT INTERPHONE N 2 for about 5 seconds 1st beep followed by 5 successive beeps will be heard BLUEANT INTERPHONE N 2 pairing blink will change to blinking blue while BLUEANT INTERPHONE N 1 will again turn off 6 Wait for 3 seconds and then switch on again BLUEANT INTERPHONE N 1 7 Press MFB 1 of BLUEANT INTERPHONE N 1 for about 3 seconds 2nd beep to connect to BLUEAN...

Страница 13: ...ring Switching Connections between Phones The BLUEANT INTERPHONE can be paired to 5 different Bluetooth phones An additional pairing will automatically delete the phone that has not been used for the longest time Thus maintaining 5 phones in its memory You can easily switch to any of the paired phones by 1 Disconnecting the currently used phone using the Active devices in the Bluetooth menu of tha...

Страница 14: ...ancellation Echo Cancellation Automatic Volume Adjustment depending on ambient noise and speed level Intercom Mode Easy to find Volume Multi Function buttons Digital Volume Control Voice Recognition Dialing If phone supports Answer or reject incoming calls by voice control Water Resistant Aerodynamic and Compact Shape Easy to install compatible with most common helmets available in the market Main...

Страница 15: ...efer to the online FAQ and support documents or call us Our number is on the back page 2 Check our website for more information updated manuals and troubleshooting www blueantwireless com 3 Call us and speak to one of the BlueAnt Wireless Customer Service Team We will clarify whether you have a hardware or connection issue 4 Return the unit directly to BlueAnt for testing and replacement of faulty...

Страница 16: ... other household wastes at the end of its working life To prevent possible harm to the environment or human health from uncontrolled waste disposal please separate this from other types of wastes and recycle it responsibly to promote the sustainable reuse of material resources Household users should contact either the retailer where they purchased this product or their local government office for ...

Страница 17: ......

Отзывы: