Manual
Roboost Roof Tiles Landscape
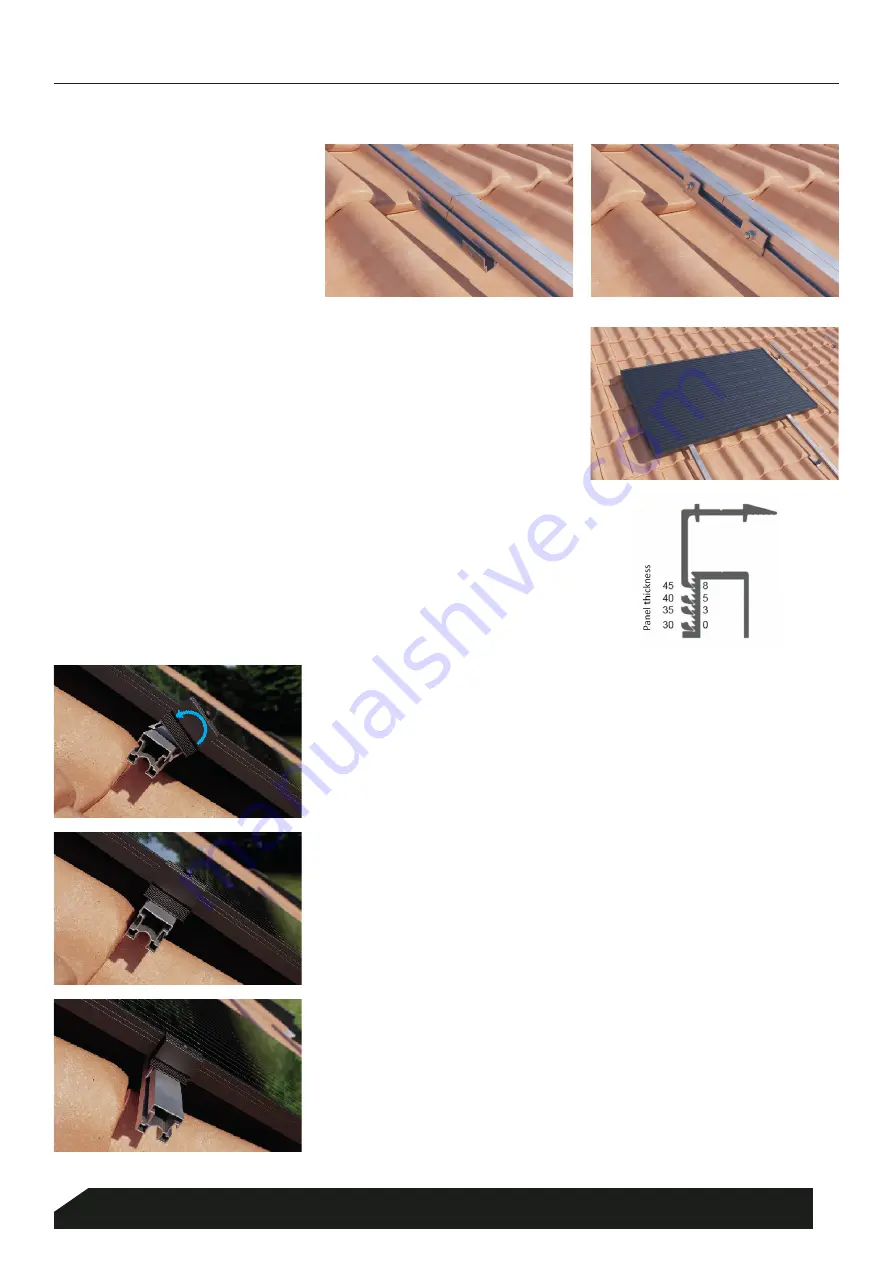
Install the profile coupling using
two hammer-head screws and lock
nuts. Two hammer-head screws
per profile coupling are sufficient.
Tighten the lock nuts to prevent the
profile from rotating or slipping free.
STEP
7
SOLAR PANELS
Place the first panel onto the mounting profiles.
STEP
8
Attach an end clamp to the ends.
Caution! The tightening torque of the screw connection is 9 Nm.
STEP
9
Hook in the universal clamp behind the lip on top of the
hammer-head chamber (see illustration).
STEP
9.1
Check that the clamp is securely in place, as illustrated.
STEP
9.3
Slide the clamp towards the panel.
STEP
9.4
Twist the clamp smoothly over the rail until it clicks into place on the other
side of the hammer-head chamber.
STEP
9.2
4
Blubase
|
Lingenstraat 9
|
8028 PM Zwolle, Nederland
|
T. (+31) 085-8000 501
|
|
www.blubase.com
Содержание roboost Roof Tiles Landscape
Страница 1: ...Roof Tiles Landscape Manual ...


