7
Gas Connection and Initial Startup
Installation
Connect the oven to the gas line with the proper type of
gas according to Local and National Installation Stan-
dards.
Setting Equipment for Other Types of Gas -- 1000 Se-
ries Only
NOTE: The 900 Series ovens are not convertible. Data
given on the following page is for information only.
CAUTION!!
The conversion of gas type may only be car-
ried out by the service agents or qualified
personal.
1.
Shut off the gas valve and turn off the operat- ing
switch.
2. Dismantle the manifold by means of a cou- pling. Re-
move the bolts holding the manifold to the brackets.
Remove the manifold.
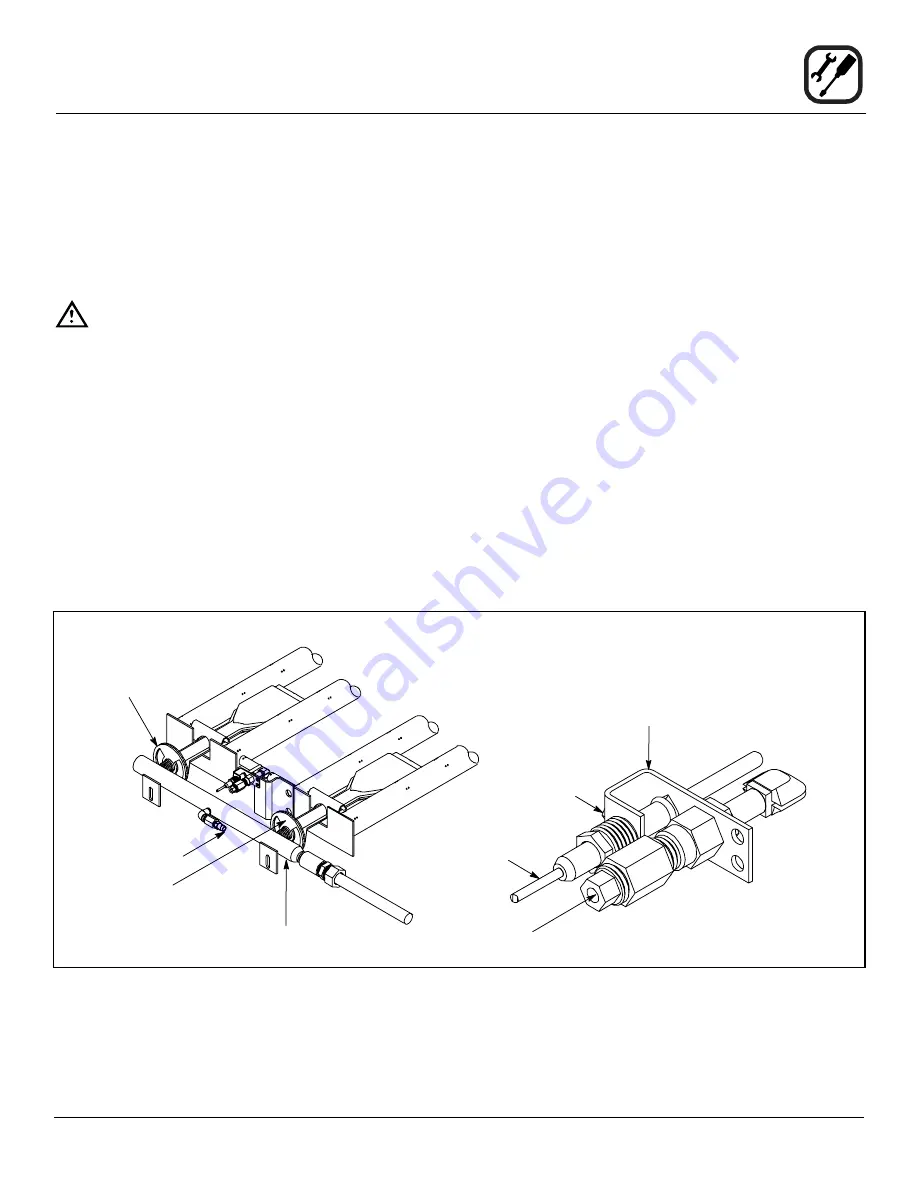
3. Replace the injectors.
4. Adjust the air shutters to the proper air opening. Refer
to the table on the following page.
5. Reinstall the manifold.
6. Remove the two screws holding the pilot bracket.
7. Remove the pilot tube from the pilot assembly.
8. Loosen the set screw on the left side of the pi- lot
bracket. Remove the thermocouple. Remove the pilot
bracket assembly.
9. Insert the thermocouple into the new pilot bracket as-
sembly. Tighten the set screw.
10. Install the new pilot bracket assembly with the screws
removed in step 6.
11. Install the pilot tube in the new pilot bracket assembly.
INITIAL STARTUP
1.
All the oven to burn off for four hours. Set the thermo
-
stat to 140°C. Increase the temperature by 55° ev-
ery hour up to 315°C. This procedure may produce
smoke.
Air Shutter
Pressure Tap
Air Shutter
Manifold
Pilot Tube
Thermocouple
Set Screw
Pilot bracket
Figure 7
Содержание 901 Double
Страница 3: ...1 Installation and Operation Manual for Export Series Gas Deck Ovens Original Instructions ...
Страница 29: ...27 Einbau und Betriebsanweisungen für Sortiergasöfen der Exportserie Gebrauchsanweisung ...
Страница 42: ...40 Manuale d Uso e di Installazione per Forni a Gas con Ripiani della Serie Export Istruzioni originali ...
Страница 55: ...53 Manual de instalación y operación para hornos de plataforma a gas Serie Export Instrucciones originales ...


