background image

PRO S30 

USER GUIDE MANUAL DE UTILIZAÇÃO

22

Installation

03

03.3.2

 MacOs

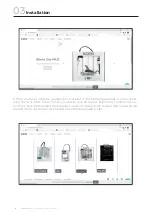
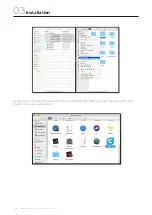
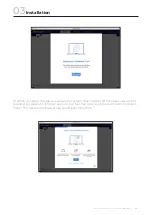
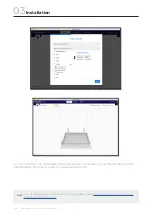
1. First, you need to prepare the software to recognize Blocks 3D printers. You need to get 

into the Blocks website (https://blockstec.com) and in the Tab “Support” select the option 

“Printers”.

Содержание ONE MKII

Страница 1: ...Blocks Pro S30 USER GUIDE MANUAL DE UTILIZADOR ...

Страница 2: ...English Português 03 54 57 109 ...

Страница 3: ...r the correct use of the equipment the user must follow this user manual strictly This electro mechani cal equipment is intended for the creation of digitally shaped parts or models through the deposition of molten thermoplastics Despite the quality we believe we have achieved with pose is the user responsibility The indications in both this user manual are derived from our experience and from sou...

Страница 4: ......

Страница 5: ...nter directly on the screen Security Installation Rod Lubrication Belt tensioning Cleaning and maintenance of the extruder Nozzle clearing 11 02 03 04 05 Troubleshooting 06 Introduction Operation Maintenance Windows MacOs 22 Level plate Nozzle Adjustment 37 39 41 44 45 47 50 50 50 52 52 52 53 54 50 41 ...

Страница 6: ...ay react to high temperatures or electrical surges 7 Do not leave liquids near the printer 8 The printing process should always be supervised 9 The printer should be installed in a well ventilated area as vapors that are harmful to health may be released during the printing process The recommendations of the material manufacturer must always be followed 10 Do not install the printer in direct cont...

Страница 7: ...between the extruder and the hotend to move in the system Set of components that includes the plate that serves as the platform for the prints Where you can see information about machine status and printing pr ocess For navigation and selection in the menus visible on the LCD screen Cable guide PTFE tube Printing head Hot End Extruder Build platform SD card slot LCD Screen Selection button ...

Страница 8: ...8 Extruder illustration 1 2 3 5 Fitting Fitting Clip Hige Tension Spring Filament Run Out Sensor Component responsible for the tension of the extruder This component serves to thermally insulate the heating block and nozzle 1 2 5 2 3 3 4 4 5 ...

Страница 9: ...switched on Fan that promotes the cooling of the hot end heatsink Connecting element between the heatsink and the heating block The interior has a PTFE part Note this component must always be mounted with the PTFE part facing the nozzle Where the heating element and the hot endtemperature sensor are locat Electro mechanical sensors responsible for the vertical axis positioning print platform calib...

Страница 10: ...and coil holder Weight Operational conditions Printer storage conditions Firmware Recommended slicer Supported Operating System File types for slicer 1 75 mm Nozzle 0 4 mm 40 300 mícrons 180 mm s Glass plate 4 mm PLA Wood and Metal Filaments Flex PETG ABS Nylon 0 4 mm 180 285 C 2 min 45º 1 5 min 90º 4 5 min Filament spool holder SD card USB In AC 100 240V 4A 50 60Hz Fuse 2 un 5x20mm 10A Aprox 40x5...

Страница 11: ... declogging needles spool holder USB cable and power cable 03 2 but it may be undergoing updates so we advise you to visit the equipment page on our website and check if the installed version can be seen on the screen when the printer is switched on is the latest version available After you have unboxed the Blocks Pro S30 you will need to go to our website to the prod Installation 03 In this user ...

Страница 12: ...PRO S30 USER GUIDE MANUAL DE UTILIZAÇÃO 12 2 When the download is ready to start click on the file and a window to start the installa tion on your PC will appear Installation 03 ...

Страница 13: ...tions of Ultimaker Cura 4 9 0 After completing these steps just press Install and give all permissions that could be asked further 4 When the installation finished don t open the Ultimaker Cura 4 9 0 yet Now you need to prepare the software to recognize Blocks 3D printers You need to get into the Blocks web site https blockstec com and in the Tab Support select the option Printers ...

Страница 14: ...ocks 3D printer In the following example we are consid ering the One MKII printer Once you choose your 3D printer select Print Profiles Cura 4 and then click to download the Zip folder as shown below Click to allow download the Zip file and when this download finished open the downloads folder ...

Страница 15: ...USER GUIDE MANUAL DE UTILIZAÇÃO PRO S30 15 Installation 03 ...

Страница 16: ... Installation 03 6 Open the Downloads folder and then extract the Zip folder Cura Print Profiles Click with the right button of your mouse in the folder and select the option Extract All Then open the extracted folder and leave it open for now ...

Страница 17: ...ÇÃO PRO S30 17 Installation 03 7 The next step is to open the folder Resources from the Ultimaker Cura folder Follow the steps shown below the path to the wanted folder is This PC OS C Program Files Ultimaker Cura 4 9 0 Resources ...

Страница 18: ...PRO S30 USER GUIDE MANUAL DE UTILIZAÇÃO 18 Installation 03 8 With the two pastes opened you can see a direct correspondence between both ...

Страница 19: ...me in Ultimaker Cura 4 9 0 folder in the resources folder as shown below for the example of definitions Now repeat this process for all the folders on the folder Cura Print Profiles 10 Once you moved all the files inside the folders of the folder Cura Print Profiles to the inside of Ultimaker Cura 4 9 0 correspondent folders you can now open the Ultimaker Cura 4 9 0 application ...

Страница 20: ...w At this stage you are not required to create an Ultimaker account but feel free to do so if you don t want to click on Skip The next step is to associate your Blocks 3D printer If you had already opened the application you just need to select Settings Printer Add Printer and then you can select your Blocks 3D printer ...

Страница 21: ...USER GUIDE MANUAL DE UTILIZAÇÃO PRO S30 21 Installation 03 12 The installation of Ultimaker Cura 4 9 0 and its connection to your Blocks 3D printer is completed Everything is ready to do awesome prints ...

Страница 22: ...DE UTILIZAÇÃO 22 Installation 03 03 3 2 MacOs 1 First you need to prepare the software to recognize Blocks 3D printers You need to get into the Blocks website https blockstec com and in the Tab Support select the option Printers ...

Страница 23: ...ocks 3D printer In the following example we are consid ering the One MKII printer Once you choose your 3D printer select Print Profiles Cura 4 and then click to download the Zip folder as shown below Click to allow download the Zip file and when this download finished open the downloads folder ...

Страница 24: ...PRO S30 USER GUIDE MANUAL DE UTILIZAÇÃO 24 Installation 03 ...

Страница 25: ... MANUAL DE UTILIZAÇÃO PRO S30 25 Installation 03 3 The next step is to extract the provided Zip folder Cura Print Profiles Click with the right button of your mouse on the folder and select the option Extract All ...

Страница 26: ...PRO S30 USER GUIDE MANUAL DE UTILIZAÇÃO 26 Installation 03 4 The next step is to open the folder Cura Print Profiles When opened the folder you will see the folders shown below Leave it open for now ...

Страница 27: ...at you just must get into the Ulti maker Cura website https ultimaker com software ultimaker cura and click Download for free Once you clicked to download just choose your operating system in this case it will be MacOs Then click Save when a small window appears Once the download is finished proceed to the next step ...

Страница 28: ...ÃO 28 Installation 03 6 When the download finished go to the Downloads folder and select the file to start the Ultimaker Cura 4 9 0 download on your Mac When a window appears click Open Then give all permissions that could be asked further ...

Страница 29: ...GUIDE MANUAL DE UTILIZAÇÃO PRO S30 29 Installation 03 7 When the download is finished the shown windows will appear now you need to move the Ultimaker Cura 4 9 0 app to the inside of the Applications folder ...

Страница 30: ...L DE UTILIZAÇÃO 30 Installation 03 8 Now you need to open the Applications folder and find the Ultimaker Cura 4 9 0 app When you find it click with the right side of your mouse on it and select the option Show Package Contents ...

Страница 31: ... 9 The next step is to open the folder Resources from the Ultimaker Cura Package Content Follow the steps shown below the path to the wanted folder is Contents Re sources resources And then put it side by side with the folder Cura Print Profiles already opened ...

Страница 32: ...PRO S30 USER GUIDE MANUAL DE UTILIZAÇÃO 32 Installation 03 ...

Страница 33: ...dence between both 11 Now you just have to drag all the files on the downloaded folder Cura Print Profiles into the folder with the same name in Ultimaker Cura 4 9 0 folder in the resources folder as shown below for the example of definitions Now repeat this process for all the folders on the folder Cura Print Profiles ...

Страница 34: ...PRO S30 USER GUIDE MANUAL DE UTILIZAÇÃO 34 Installation 03 12 Once you moved all the files to the correspondent folders you can now open the Ulti maker Cura 4 9 0 application ...

Страница 35: ...allation 03 13 When you open the app you will see the screen shown below At this stage you are not required to create an Ultimaker account but feel free to do so if you don t want to click on Skip The next step is to associate your Blocks 3D printer ...

Страница 36: ... The installation of Ultimaker Cura 4 9 0 and its connection to your Blocks 3D printer is completed Everything is ready to do awesome prints Note You can also check our tutorial videos in our youtube channel https www youtube com channel UCZpilRr_5rOD27x9hZaejDw ...

Страница 37: ...rinted object to have an optimal adhesion to the printing plate and to ensure the printing is successful Attention It is mandatory to follow this process in the same order as shown here 1 Level plate 1 1 In the menu select 1 2 Follow the indications on the screen to adjust the height of the plate by turning the Plate knob adjacent to the nozzle position in the correct direction you will have to ad...

Страница 38: ...PRO S30 USER GUIDE MANUAL DE UTILIZAÇÃO 38 Installation 03 2 4 3 5 1 Main Screen 6 7 ...

Страница 39: ...stance to the plate please select the option No to properly clean the nozzle from all residues 2 3 Put a thin paper sheet between the nozzle and build plate 2 4 By rotating the LCD knob adjust the distance of the plate to the nozzle until you feel a light pressure on the paper Installation 03 Paper sheet between the nozzle and build plate 2 ...

Страница 40: ...PRO S30 USER GUIDE MANUAL DE UTILIZAÇÃO 40 Installation 03 2 4 3 5 1 6 7 8 Main Screen ...

Страница 41: ...the process or wait for the machine to do it after thirty beeps Note Operation 04 Begin by connecting the power supply supplied with the equipment into the power plug and into the wall outlet Then turn the printer on by clicking the switch on the back of the machine 5 For the Loading procedure insert the filament into the extruder pulling the hinge at the same time and make sure that you are pushi...

Страница 42: ...PRO S30 USER GUIDE MANUAL DE UTILIZAÇÃO 42 Operation 04 2 4 3 5 1 6 7 Main Screen ...

Страница 43: ...USER GUIDE MANUAL DE UTILIZAÇÃO PRO S30 43 Operation 04 2 4 3 5 1 Main Screen ...

Страница 44: ...the Hot End reaches the chosen temperature for the material to be printed and show any visible spaces between the lines it means a excessive distance between nozzle and plate nor cient distance between nozzle and plate Operation 04 2 4 3 5 1 Main Screen Open the software for preparing the 3D printing files and load the modeled object file Make sure that the print characteristics are correct for th...

Страница 45: ...hat is loaded Once the machine has completed this procedure the user must follow mend that you always keep the same type of material Different materials have different printing characteristics which can cause poor adhesion between the layers in the change zone or in some cases a nozzle clogging if they are combined in the same print Operation 04 For Loading the Filament see page 41 ...

Страница 46: ...PRO S30 USER GUIDE MANUAL DE UTILIZAÇÃO 46 Operation 04 2 4 3 5 1 6 7 8 9 10 11 Main Screen ...

Страница 47: ... by mode 1 Auto home Serves to reposition the print head at the origin of the spatial coordinates 2 this option allows to unblock the stepper motors when they are in stand by 3 here the operator can directly change some print parameters In stand by mode to perform maintenance and cleaning operations the Hot End temperature and the cooling blower speed can be set or changed It can also accelerate t...

Страница 48: ...n 04 2 3 1 2 1 Main Screen Main Screen 5 Stop print It completely cancels the printing Please note that it is no longer recoverable 6 Tune Allows the operator to directly change some of the printing parameters and change filament during printing The printing speed the Hot End temperature heated plate temperature cooling blower speed and filament flow can be established or changed ...

Страница 49: ...USER GUIDE MANUAL DE UTILIZAÇÃO PRO S30 49 Operation 04 2 3 1 Main Screen ...

Страница 50: ... also resort to a spatula or x acto if necessary 05 2 Cleaning the nozzle After several prints it is normal for the nozzle to show some dirt due to the accumulation of ing this temperature the operator can use a dry cloth or cleaning paper to remove the dirt Attention At this temperature the hot end can cause burns the user is advised to use tweezers to handle the cleaning object to be used 05 3 F...

Страница 51: ...are and Xloader 8 Open the Xloader 9 Click on the 3 dots on the first line of the program 10 Select the HEX file found in the same foldeer aas ther Xloader 11 Select the board Mega ATMEGA2560 12 Check that the baud rate is at 115200 and press the upload button The process takes between 1 and 5 minutes ...

Страница 52: ...he hinge so that the two gears become exposed Then with a steel brush or sharp object remove all the plastic parti cles that are inside After the cleaning procedure close the hinge e put the screw and the spring on the original place 05 6 05 4 Rod lubrication To lubricate polished rods the operator must place two to three drops of machine oil on each rod To lubricate the threaded trapeze rod that ...

Страница 53: ...l the temperature stabilizes 2 In the menu select and click to disable the motors the opposite direction on the opposite side of the insert This process should be relatively smooth and if you cannot get the needle through contact Blocks customer service immediately and at the same time relieving the tension of the extruder hinge 8 Take a piece of PLA with at least 30 cm and repeat step 4 until the...

Страница 54: ...sistent extrusion Temperature variation Nozzle Clogging Extruder is not feeding well Print blower Extrusion problems Nozzle Clogging Unclog the nozzle Cleaning the extruder Level the plate Clean the plat e and apply an adhesi ve lacquer glue or kapton bluetape the material used Level the plate Lubricate with grease paste Lubricate with machine oil Perform a maintenance procedure on the extruder Ch...

Страница 55: ......

Страница 56: ...English Português 03 54 57 109 ...

Страница 57: ... o uso correcto do equipamento o utliziador deve seguir estritamente este manual Este equipamento electroamecânico destina se à criação de peças ou modelos modelados As indicações presentes neste manual do utilizador decorrem da nossa experiência e tam selhamos que contacte directamente a Blocks ou um seu revendedor Este equipamento foi testado e respeita as normas em vigor relativamente à marcaçã...

Страница 58: ......

Страница 59: ...rato Segurança Instalação Limpeza do nozzle Tensão das correias Limpeza e manutenção do extrusor Desentupimento do nozzle Resolução de Problemas 02 03 04 05 06 Introdução Funcionamento Manutenção Windows MacOs 76 91 93 95 98 100 102 105 105 105 107 107 107 108 109 105 95 65 65 65 65 61 60 ...

Страница 60: ...bricante do material devem ser sempre respeitadas 10 Não instalar a impressora em contacto directo com a radiação solar pois pode ocorrer a deformação de alguma peça impressa e provocar danos no equipamento 11 Preste atenção aos seguintes símbolos Este símbolo indica a presença de peças móveis no interior Este símbolo indica a presença de partes com temperaturas elevadas Este símbolo indica a pres...

Страница 61: ...aforma de impressão Slot para cartão SD Ecrã LCD Botão de selecção Conjunto de cabos dos componentes electrónicos da cabeça de impressão se deslocar no sistema Conjunto de componentes onde se inclui o prato que serve de base às impressões Ilustração Blocks Pro S30 Introdução 02 1 2 3 4 5 6 7 8 3 5 6 7 8 1 4 2 ...

Страница 62: ...ão 02 1 2 3 4 5 1 1 2 3 4 5 Fitting Pinhão Rolamento guia Patilha 2 4 5 Componente responsável pela tensão do extrusor 51 5 3 5 4 5 Pro S30 USER GUIDE MANUAL DE UTILIZAÇÃO 4 5 Fitting Pinhão Rolamento guia Patilha 2 4 5 Componente responsável pela tensão do extrusor 51 5 3 5 4 5 ...

Страница 63: ...cionar sempre que a máquina esteja ligada Ventoinha que promove o arrefecimento do dissipador de calor do hot end Elemento de ligação entre o dissipador e o bloco de aquecimento O in terior tem uma parte de PTFE Nota este componente tem sempre de ser montado com a parte de PTFE voltada para o nozzle Onde se encontram o element o de aqueciment o e o sensor detemperatura Componente substituível com ...

Страница 64: ...uisitos de energia Dimensões externas da impressora incluí tubo Bowden e suporte Peso Condições de operação Condições de armazenamento Firmware Slicer recomendado Sistemas Operativos 1 75 mm Nozzle 0 4 mm 40 300 mícrons 180 mm s Prato de vidro 4 mm PLA Filamentos de madeira e metal Flex PETG ABS Nylon 0 4 mm 180 285 C 2 min 45º 1 5 min 90º 4 5 min Cartão SD USB Entrada AC 100 240V 4A 50 60Hz Fuse ...

Страница 65: ...e desentupimento spool holder cabo USB e cabo de alimentação 03 2 mas o mesmo vai sofrendo actu website e comparar a versão instalada pode ser vista no ecrã ao ligar a impressora com a versão mais recente disponível resoluções Instalação 03 Neste tutorial vais aprender como instalar o Ultimaker Cura 4 9 0 e como conectar o soft ware de impressão à tua impressora 3D da Blocks 03 3 1 Windows 1 Insta...

Страница 66: ...PRO S30 USER GUIDE MANUAL DE UTILIZAÇÃO 66 2 Quando o download estiver pronto clica no ficheiro e irá aparecer uma janela para começar a instalação no teu computador Instalação 03 ...

Страница 67: ...ma aparecer pressiona Seguinte assim como em todas as janelas seguintes e recomendamos que deixes as definições padrão do Ultimaker Cura Depois de concluir estes passos basta pressinar Instalar e dar todas as permissões que possam ser solicitadas posteriromente Instalação 03 ...

Страница 68: ...o download do Ultimaker Cura 4 9 0 terminar não abras já o programa Primeiro ainda é preciso preparar o mesmo para reconhecer as impressoras 3D da Blocks Para isso é necessário ires ao website da Blocks https blockstec com e selecionar na aba Support a opção Printers ...

Страница 69: ...eguinte é selcionares a tua impressora 3D da Blocks O exemplo demonstrado abaixo é para a impressora One MKII 6 Uma vez escolhida a impressora agora basta selecionar a opção Print Profiles Cura 4 e clicar no sítio correto para iniciar a transferência do ficheiro zipado ...

Страница 70: ...PRO S30 USER GUIDE MANUAL DE UTILIZAÇÃO 70 Instalação 03 7 Depois de concluídos os passos acima é necessário extrair a pasta zipada Cura Print Pro files Depois de extraida é necessário abrir esta pasta ...

Страница 71: ... pasta resources que está dentro da pasta do Ultimaker Cura 4 9 0 Segue os passos abaixo mostrados para chegares à pasta pretendida o caminho até lá é Este PC OS C Programas Ultimaker Cura 4 9 0 resources Agora coloca esta pasta ao lado da pasta Cura Print Profiles aberta anteriormente ...

Страница 72: ...PRO S30 USER GUIDE MANUAL DE UTILIZAÇÃO 72 Instalação 03 ...

Страница 73: ...selecionar todos os ficheiros das pastas dentro da pasta Cura Print Profiles transferida do website da Blocks e movê los ou copiá los para o interior das pastas com o mesmo nome na pasta Ultimaker Cura 4 9 0 na pasta resources como mostrado no ex emplo para definitions em baixo Repetir este processo para as restantes pastas da pasta Cura Print Profiles ...

Страница 74: ...o abrir a aplicação será apresentada a janela abaixo apresentada Neste ponto não é obrigatório criar uma conta na plataforma Ultimaker mas sente te livre para o fazer caso não queiras basta clicar em Skip Depois disto irá aparecer a janela para adicionar uma impressora 3D e basta escolher aquela que adquiriste Caso já tenhas aberto a aplicação an teriormente basta selecionares Settings Printer Add...

Страница 75: ...ER GUIDE MANUAL DE UTILIZAÇÃO PRO S30 75 Instalação 03 13 A instalação da Ultimaker Cura 4 9 0 e a sua conexão à tua impressora 3D da Blocks estão terminadas Está tudo pronto para impressões espetaculares ...

Страница 76: ...ZAÇÃO 76 Instalação 03 03 3 2 MacOs 1 Primeiro precisas de preparar o software para reconhecer as impressoras 3D da Blocks Para isso é necessário ires ao website da Blocks https blockstec com e selecionar na aba Support a opção Printers ...

Страница 77: ...ks O exemplo demonstrado abaixo é para a impressora One MKII 3 Uma vez escolhida a impressora agora basta selecionar a opção Print Profiles Cura 4 e clicar no sítio correto para iniciar a transferência do ficheiro zipado Dar autorização para iniciar o download e quando este estiver concluído abrir a pasta de Downloads ...

Страница 78: ...PRO S30 USER GUIDE MANUAL DE UTILIZAÇÃO 78 Instalação 03 ...

Страница 79: ...USER GUIDE MANUAL DE UTILIZAÇÃO PRO S30 79 Instalação 03 4 Depois de concluidos os passos acima é necessário extrair o ficheiro zipado Cura Print Profiles ...

Страница 80: ... GUIDE MANUAL DE UTILIZAÇÃO 80 Instalação 03 5 O próximo passo é abrir esta pasta extraída Cura Print Profiles Quando aberta podes ver as pastas apresentadas abaixo no seu interior Deixar esta pasta aberta para já ...

Страница 81: ... ir ao website do Ulti maker Cura https ultimaker com software ultimaker cura e clicar em Download for free Após clicar basta escolher o sistema operativo que neste caso será o MacOs De seguida basta clicar em Save quando uma pequena janela se abrir Quando este download estiver concluído podes avançar para o próximo passo ...

Страница 82: ...bre a pasta de Downloads e seleciona o ficheiro para começar a instalação do Ultimaker Cura 4 9 0 no teu Mac Quando uma nova janela apare cer clica Open Dá autorização a todas as permissões que possam vir a ser pedidas poste riormente e recomendamos que deixes todas as definições padrão ...

Страница 83: ...E UTILIZAÇÃO PRO S30 83 Instalação 03 8 Quando este download estiver concluído a janela abaixo aparecerá e deves simples mente mover a aplicação do Ultimaker Cura 4 9 0 para o interior da pasta de aplicações Applications ...

Страница 84: ...AÇÃO 84 Instalação 03 9 Agora precisas de abrir a pasta que contém as aplicações e encontrar o Ultimaker Cura 4 9 0 Quando encontrado clica com o botão do lado direito do rato sobre a aplicação e se leciona a opção Show Package Contents ...

Страница 85: ...é abrir a pasta resources que está dentro da pasta do Ultimaker Cura aberta acima Segue os passos abaixo mostrados para chegares à pasta pretendida o caminho até lá é Contents Resources resources Agora coloca esta pasta ao lado da pasta Cura Print Profiles aberta anteriormente ...

Страница 86: ...PRO S30 USER GUIDE MANUAL DE UTILIZAÇÃO 86 Instalação 03 ...

Страница 87: ...este passo é necessário mover todos os ficheiros no interior das pastas da pasta transferida Cura Print Profiles para dentro das pastas com o mesmo nome na pasta do Ul timaker Cura 4 9 0 na pasta resources como mostrado abaixo para o exemplo das defi nitions Agora é necessário repetir este processo para todas as pastas da pasta Cura Print Profiles ...

Страница 88: ...alação 03 13 Quando tiverem sido movidos todos os fichieros de dentro das pastas da pasta transferi da Cura Print Profiles para o interior das pastas correspondentes do Ultimaker Cura 4 9 0 podes finalmente abrir a aplicação do Ultimaker Cura 4 9 0 ...

Страница 89: ...ação 03 14 Quando aberta irá aparecer o ecrã apresentado abaixo Nesta fase não és obrigado a criar uma conta no Ultimaker mas sente te livre para o fazeres se não quiseres basta clicar em Skip O próximo passo é associares a tua impressora 3D da Blocks ...

Страница 90: ...talação do Ultimaker Cura 4 9 0 e a sua conexão com a tua impressora 3D da Blocks está completa Está tudo pronto para impressões espetaculares Podes também aceder ao video tutorial no nosso canal do youtube https www youtube com channel UCZpilRr_5rOD27x9hZaejDw Nota ...

Страница 91: ...a do objecto impresso tenha uma optima adesão ao prato de impressão e garantir a impressão se realize com sucesso Atenção É obrigatório seguir este processo na ordem representada aqui Instalação 03 1 Nivelamento do Prato 1 1 No menu seleccione 1 2 Siga as indicações na tela para ajustar a altura da placa girando a maçaneta do prato Atenção Execute este passo nivelar o prato pelo menos duas vezes M...

Страница 92: ...PRO S30 USER GUIDE MANUAL DE UTILIZAÇÃO 92 47 Pro S30 USER GUIDE MANUAL DE UTILIZAÇÃO Instalação 03 2 4 3 5 1 Ecrã Inicial 6 7 ...

Страница 93: ... Se o nozzle parecer ter muitos resíduos que possam afetar sua distância ao prato de impressão selecione a opção No para limpar adequadamente o nozzle 2 4 Com o botão do LCD ajuste a distância do prato ao nozzle até sentir uma ligeira pressão no papel Instalação 03 Folha entre o nozzle e o prato de impressão 2 2 ...

Страница 94: ...PRO S30 USER GUIDE MANUAL DE UTILIZAÇÃO 94 Instalação 03 2 4 3 5 1 6 7 8 Ecrã Inicial ...

Страница 95: ...gar ou descarregar e volte a primir o botão 3 Seleccione agora qual o material a ser carregado descarregado carregando no botão ou aguardar que o processo termine automaticamente após trinta avisos sonoros fazer este último passo até a máquina o terminar Funcionamento 04 1 Pressione o botão do ecrâ uma vez rode até selecionar Filament e volte a pressionar mais uma vez ...

Страница 96: ...PRO S30 USER GUIDE MANUAL DE UTILIZAÇÃO 96 Funcionamento 04 2 4 3 5 1 6 7 Ecrã Inicial ...

Страница 97: ...USER GUIDE MANUAL DE UTILIZAÇÃO PRO S30 97 Funcionamento 04 2 4 3 5 1 Ecrã Inicial ...

Страница 98: ...sionar mais uma vez A qualidade de impressão está directamente relacionada com a diferença de altura entre cama também será superior o tempo de impressão aguarde enquanto a cama quente e o Hot End atingem astemperaturas escolhidas para o mate uma distância entre nozzle e prato excessiva nem deve apresentar excesso de material que provoca irregu Funcionamento 04 ...

Страница 99: ...USER GUIDE MANUAL DE UTILIZAÇÃO PRO S30 99 2 4 3 5 1 Ecrã Inicial Funcionamento 04 ...

Страница 100: ... Tune utilizador deve seguir todos os passos que aparecem no ecrã relativos ao carregamento do Com a Blocks Pro S30 recomendamos que mantenha sempre o mesmo o tipo de material Materiais diferentes as camadas na zona de mudança ou em certos casos um entupimento do nozzle se forem combinados na mesma impressão Funcionamento 04 Para carregar Filamento consulte a pág 95 ...

Страница 101: ...USER GUIDE MANUAL DE UTILIZAÇÃO PRO S30 101 Funcionamento 04 2 4 3 5 1 6 7 8 9 10 11 Ecrã Inicial ...

Страница 102: ...icionamento da cabeça de impressão na origem das coordenadas espaciais 2 Disable steppers esta opção permite desactivar o bloqueio dos motores passo a passo quando estes se encontram em stand by 3 Temperature aqui o operador pode alterar directamente alguns parâmetros de im pressão Em modo stand by para efetuar operações de manutenção e limpeza a tempera tura do Hot End e a velocidade do Blower de...

Страница 103: ...m pausa para limpar alguma sujidade que possa ter aparecido e retoma a impressão onde tenha parado 5 Stop print 6 Tune permite ao operador alterar directamente alguns parâmetros de impressão e Hot End a temperatura da cama quente a velocidade do Blower de arrefecimento e o 2 3 1 2 1 Ecrã Inicial Ecrã Inicial ...

Страница 104: ...PRO S30 USER GUIDE MANUAL DE UTILIZAÇÃO 104 2 3 1 Ecrã Inicial Funcionamento 04 ...

Страница 105: ...eratura o operador pode utilizar um pano seco ou papel de limpeza para remover a sujidade Atenção A esta temperatura o hot end pode provocar queimaduras aconselha se o uti lizador a usar uma pinça para manusear o objecto de limpeza a utilizar 05 3 Manutenção 05 1 Confirme que tem o Cura 15 02 1 instalado Caso não tenha faça o download e instale Win Mac 2 Faça o download do ficheiro HEX a partir do...

Страница 106: ... o programe Xloader 9 Carregar nos três pontos na primeira linha do programa 10 Selecionar o ficheiro HEX que se encontra na mesma pasta do Xloader 11 Selecionar a Board Mega ATMEGA2560 12 Verficiar que o baudrate é de 115200 e carregar no botão de upload O processo demora entre 1 a 5 minutos Manutenção 05 ...

Страница 107: ...epois deve desapertar com a mão o para fuso lateral do extrusor que contém a mola e de seguida abrir por completo a alavanca de forma a ficarem visíveis as duas engrenagens dentadas do mesmo De seguida com auxílio de uma escova de aço ou um objeto afiado remover todas as partículas de plástico que se encontrem nas engrenagens Após o procedimento de limpeza volte a fechar a alavanca e coloque o par...

Страница 108: ...faça para desactivar os motores o tubo PTFE na direcção oposta 5 Se tiver difculdade no passo anterior utilize a agulha fornecida com o equipamento e lado oposto da inserção Este processo deve ser relativamente suave e caso não consiga fazer passar a agulha contacte imediatamente o serviço de apoio ao cliente Blocks tempo aliviando a tensão da patilha do extrusor 8 Pegue num pedaço de PLA com pelo...

Страница 109: ...inconsistente Variação de temperatura Entupimento do nozzle Blower da impressão Problemas de extrusão Entupimento do nozzle Desentupir o nozzle de impressão disponibilizados pela Blocks Efectuar limpeza do extrusor Efectuar o nivelamento do prato Limpar o prato e aplicar um ader ente laca cola ou kapton bluetape para o material utilizado Efectuar o nivelamento do prato comprovada Efectuar a manute...

Страница 110: ...www blockstec com ...

Отзывы: