background image

Getting Started

1.Press the STANDBY button to turn on the radio.
2.Press the STANDBY button again to enter STANDBY mode.
Note: It is recommended that the unit is switched off and remove the  adapter
from outlet during storms  or if being left unused for long period of time.

6

Carefully remove your DAB+ receiver form the box.(we recommend you keep the package for 
future reference.)

1.Connect the power

2.Exetend the telescopic aerial

Connect the power adaptor provided
to the unit and then connect to you wall
outlet and turn on the power.

Extend the telescopic aerial for the 
best reception possible

3.Turning on the radio

Содержание oslobludab

Страница 1: ......

Страница 2: ...ure you read the safety instructions before you operate this unit This Digital Radio has been designed to give you many years of trouble free service In the unlikely event that your product fails to work normally please call one of our qualified service engineers on the full free warranty line 1300 055 518 Contents Your DAB Radios Introduction Contents Introduction Safety Instructions Your DAB Wha...

Страница 3: ... openings with items such as news papers tablecloths curtains etc This may cause overheating No naked flame sources such as lit candles should be placed on the unit Do not expose the unit to dripping or splashing and no objects filled with liquids such as vases they should not be placed on the unit Do not place the unit in closed bookcases or racks without proper ventilation Disconnect the unit fr...

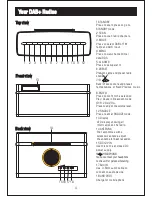
Страница 4: ...to confirm the selection Play Pause in Bluetooth mode 10 11 VOL VOL Press to adjust the volume level 12 SNOOZE Press to enter SNOOZE mode 13 Display LED display showing all information on the radio 14 ANTENNA The radio comes with a telescopic antenna adjust the antenna for best reception 15 DC12V IN Use this to the enclosed DC power supply 17 AUX IN Use 3 5mm audio cable to connect to audio device...

Страница 5: ...ntage and uses the direct and reflected signals to actually reinforce the end result allowing for better service most of the time A signal DAB frequency can be used to cover the whole of Australia solving many of the problems experienced with the earlier analogue system DAB scan automatically tunes in all of the available stations in your area Broadcasters can transmit text to your radio this way ...

Страница 6: ... during storms or if being left unused for long period of time 6 Carefully remove your DAB receiver form the box we recommend you keep the package for future reference 1 Connect the power 2 Exetend the telescopic aerial Connect the power adaptor provided to the unit and then connect to you wall outlet and turn on the power Extend the telescopic aerial for the best reception possible 3 Turning on t...

Страница 7: ... 5 Changing the volume Adjust the volume level by pressing the VOL button to increase the volume or decrease the volume by pressing the VOL button 7 Connect your headphones to the 3 5mm headphone socket on the back of the unit as shown above ...

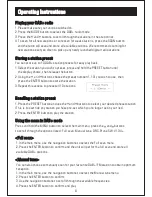
Страница 8: ... weak stations press the SCAN button and the radio will scan and store all available stations We recommend scanning for new stations every so often to pick up any newly launched digital radio stations Storing a station preset You can store up to 10 DAB station presets for easy play back 1 Select the station you wish to preset press and hold the PRESET button until the display shows then release th...

Страница 9: ... to the first setting Audio mode This shows the current station is broadcast in stereo or mono DLS Dynamic label segment This is the scrolling message that the broadcaster may include with their transmissions Signal strength This shows the signal transmission level Program type This is the type and description of the program provided by the DAB station Time and Date This shows the current time and...

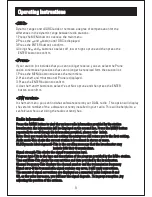
Страница 10: ...the and buttons to select ALARM type DAB FM Beep tone1 Beep tone2 then press the ENTER button to confirm If you select DAB or FM you should select station you desired 5 Press the and buttons to adjust alarm volume as desired then press the ENTER button to confirm 6 To turn off the alarm you will need to change the ON setting to OFF 7 To silence the alarm press the STANDBY button Alarm setting Cloc...

Страница 11: ...ess the SNOOZE button to cycle through the 10 light setting Bluetooth connection 1 Press the MODE button to enter Bluetooth mode operate your bluetooth device to pair with the speaker 2 LCD will display pairing after enter Bluetooth mode it will keep flashing until successful pairing 3 LCD will display paired after successful pairing press ENTER button to play music 4 NOTE The Bluetooth name is OS...

Страница 12: ...ther electrical equipment 2 The station is not tuned in 1 Extend and aim the aerial for the best reception possible keep the unit away from other electrical equipment 2 Fine tune the station 1 Volume may not be adjusted 2 Headphone are connected 3 Power is not correctly connected 1 Increase the volume level 2 Disconnect Headphone 3 Check the Power properly 1 Volume may not be adjusted 2 Headphone ...

Страница 13: ...bly foreseeable loss or damage You are also entitled to have the goods repaired or replaced if the goods fail to be of acceptable quality the failure does not amount to a major failure In the unlikely event that your product fails to work normally please contact the Warranty on 1300 055 518 and have you receipt of purchase on hand This guarantee is subject to the following provisions It is only va...

Страница 14: ......

Отзывы: