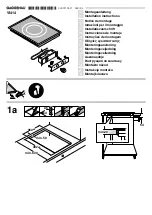
background image

12 

Opmerking: Tussen het apparaat en een wasemkap boven het apparaat moet de 
veiligheidsafstand worden aangehouden die door de fabrikant van de wasemkap wordt 

opgegeven. Neem de aanwijzingen van de fabrikant van de wasemkap in acht. 

WAARSCHUWING: zorg voor voldoende ventilatie


Zorg  ervoor  dat  de  keramische  kookplaat  goed  geventileerd  is  en  de  luchtinlaat  en  -uitlaat  niet 
geblokkeerd zijn. Om onopzettelijk contact met de hete onderzijde van de kookplaat of een onverwachte 
elektrische schok tijdens het koken te voorkomen, moet een plaat, vastgezet met schroeven, op een 
minimumafstand van 10 mm van de onderzijde van de kookplaat worden aangebracht. 

Rond  de  buitenzijde  van  de  kookplaat  bevinden  zich  ventilatiesleuven.  U  MOET 

ervoor zorgen dat deze sleuven niet geblokkeerd worden door het werkblad wanneer 
u de kookplaat op zijn plaats aanbrengt. 

Zorg  ervoor  dat  de  lijm  waarmee  het  kunststof  of  houtmateriaal  aan  de 

keukenkasten is bevestigd, bestand is tegen temperaturen van meer dan 150 °C, 
om loslaten van de bekleding te voorkomen.   

De  achterwand,  naastgelegen  en  omringende  oppervlakken  moeten  daarom 

bestand zijn tegen temperaturen van 90 °C. 

A (mm) 

B (mm) 

C (mm)  D 

raadpleeg de fabrikant van de afzuigkap


50 min. 

20 min. 

Luchtinlaat  550 x 30mm 

Содержание 5RE62360

Страница 1: ...saanwiizing it sv Monterings och bruksanvisningar es Montaje y modo de empleo hr Uputstva za i uporabu si Navodila za monta in uporabo Kochfeld 5RE62360 Hob 5RE62360 Table de cuisson 5RE62360 Kookplaa...

Страница 2: ......

Страница 3: ...2 5 Bevor Sie Ihr neues Cerankochfeld verwenden 7 2 6 Technische Daten 7 3 Bedienung des Produkts 7 3 1 Wahl des geeigneten Kochgeschirrs 7 3 2 Verwendung des Kochfelds 8 3 2 1 Zu Beginn des Kochvorga...

Страница 4: ...mschlag und m glicherweise zum Tod f hren 1 2 2 Schnittverletzungsgefahr H ten Sie sich Sie vor den scharfen Kanten des Kochfeldes Mangelnde Vorsicht kann Schnittverletzungen zur Folge haben 1 2 3 Wic...

Страница 5: ...kann zu einem Stromschlag und m glicherweise zum Tod f hren 1 3 2 Gesundheitsgefahren Das Ger t erf llt die Normen in Bezug auf die elektromagnetische Sicherheit Allerdings m ssen Personen die einen H...

Страница 6: ...Folge haben 1 3 5 Wichtige Sicherheitshinweise Lassen Sie das eingeschaltete Ger t niemals unbeaufsichtigt Beim berkochen k nnen sowohl Rauch als auch fettige Verunreinigungen entstehen die sich entz...

Страница 7: ...buch ausdr cklich dazu aufgefordert werden Alle sonstigen Service Eingriffe sollten nur durch einen qualifizierten Techniker erfolgen Verwenden Sie zum Reinigen Ihres Kochfelds keinesfalls einen Dampf...

Страница 8: ...llt kein Kinderspielzeug dar Reinigung und Pflege d rfen von Kindern nur unter Aufsicht durchgef hrt werden WARNUNG Das unbeaufsichtigte Erhitzen von Fett oder l auf einem Kochfeld ist gef hrlich und...

Страница 9: ...onen Das mikroprozessorgesteuerte Cerankochfeld wird dank der Widerstandsdrahterw rmung der Mikroprozessorsteuerung und der mehrstufigen Leistungswahl den unterschiedlichsten Anforderungen in der K ch...

Страница 10: ...20 240 V 50 60 Hz Anschlussleistung 5500 6600W Produktabmessungen T B H mm 590x520x55 Einbauma e A B mm 560x490 Die Werte zum Gewicht und zu den Abmessungen stellen ungef hre Angaben dar Da wir kontin...

Страница 11: ...Vorsicht vor hei en Oberfl chen Bei hei er Glasplatte leuchtet die Restw rmeanzeige Ber hren Sie die Glasplatte erst wieder nachdem die Anzeige erloschen ist Dieses Merkmal l sst sich auch als Energie...

Страница 12: ...4 Wenden Sie das Steak w hrend des Bratens nur einmal Die erforderliche Dauer zum Braten des Steaks richtet sich nach dessen Dicke sowie dem gew nschten Gargrad Sie kann zwischen rund 2 und 8 Minuten...

Страница 13: ...r auf das noch warme jedoch nicht mehr hei e Glas 3 Wischen Sie die Verunreinigungen ab und trocknen Sie mit einem sauberen Geschirrtuch oder mit K chenpapier nach 4 Schalten Sie die Spannungsversorgu...

Страница 14: ...aft besch digen Schnittverletzungsgefahr Beim Entfernen der Schutzabdeckung wird die messerscharfe Klinge des Schabers freigelegt Verwenden Sie den Schaber mit gr ter Sorgfalt und achten Sie darauf ih...

Страница 15: ...eitsabstand zwischen den Seiten des Kochfelds und den Innenseiten der Arbeitsplatte sollte mindestens 3 mm betragen L W E F H D A B X P R 590mm 520mm 560mm 490mm mind 55mm mind 51mm 594 1 0 mm 524 1 0...
Страница 16: ...latte versperrt werden Beachten Sie dass der zum Verbinden von Holz oder Kunststoff in Ihrem M bel verwendete Klebstoff Temperaturen von mindestens 150 C standhalten muss da sonst die Gefahr besteht d...

Страница 17: ...n ab den Einbau selbst durchzuf hren 2 Die Montage des Kochfelds darf nicht auf K hl und Gefrierger ten Geschirrsp lmaschinen und W schetrocknern erfolgen 3 Zur Steigerung der Zuverl ssigkeit sollte d...

Страница 18: ...f gt 2 Wird das Ger t auf direktem Wege an die Netzspannungsversorgung angeschlossen ist ein allpoliger Schutzschalter mit einem Mindestabstand von 3 mm zwischen den Kontakten einzuf gen 3 Der Install...

Страница 19: ...auf hin dass dieses nicht ber den normalen Hausm ll entsorgt werden darf Vielmehr ist es zum Recycling der elektrischen und elektronischen Bestandteile bei einem Wertstoffhof abzugeben Dieses Ger t mu...

Страница 20: ...roduct Information 5 2 4 Working Principle 6 2 5 Before using your New Ceramic Hob 6 2 6 Technical Specification 6 3 Operation of Product 6 3 1 Choosing the right Cookware 6 3 2 How to use 7 3 2 1 Sta...

Страница 21: ...es are sharp Failure to use caution could result in injury or cuts 1 2 3 Important safety instructions Read these instructions carefully before installing or using this appliance No combustible materi...

Страница 22: ...hat their implants will not be affected by the electromagnetic field Failure to follow this advice may result in death 1 3 3 Hot Surface Hazard During use accessible parts of this appliance will becom...

Страница 23: ...and or climb on it Do not store items of interest to children in cabinets above the appliance Children climbing on the cooktop could be seriously injured Do not leave children alone or unattended in t...

Страница 24: ...nsory or mental capabilities or lack of experience and knowledge if they have been given supervision or instruction concerning use of the appliance in a safe way and understand the hazards involved Ch...

Страница 25: ...iew 2 2 Control Panel 2 3 Product Information The microcomputer ceramic cooker hob can meet different kinds of cuisine demands because of resistance wire heating micro computerized control and multi p...

Страница 26: ...220 240V 50 60Hz Installed Electric Power 5500 6600W Product Size D W H mm 590X520X55 Building in Dimensions A B mm 560X490 Weight and Dimensions are approximate Because we continually strive to impro...

Страница 27: ...4 Cooking Guidelines Take care when frying as the oil and fat heat up very quickly particularly if you re using PowerBoost At extremely high temperatures oil and fat will ignite spontaneously and this...

Страница 28: ...frying 1 Choose an ceramic compatible flat based wok or a large frying pan 2 Have all the ingredients and equipment ready Stir frying should be quick If cooking large quantities cook the food in sever...

Страница 29: ...s 1 Switch the power to the cooktop off 2 Hold the blade or utensil at a 30 angle and scrape the soiling or spill to a cool area of the cooktop 3 Clean the soiling or spill up with a dish cloth or pap...

Страница 30: ...ctrical shock and larger deformation caused by the heat radiation from the hotplate As shown below Note The safety distance between the sides of the hob and the inner surfaces of the worktop should be...

Страница 31: ...locked by the worktop when you put the hob into position Be aware that the glue that join the plastic or wooden material to the furniture has to resist to temperature not below 150 to avoid the unstuc...

Страница 32: ...qualified personnel or technicians Please never conduct the operation by yourself 2 The ceramic cooker hob shall not be mounted to cooling equipment dishwashers and rotary dryers 3 The ceramic cooker...

Страница 33: ...to avoid any accidents 2 If the appliance is being connected directly to the mains supply an omnipolar circuit breaker must be installed with a minimum gap of 3mm between the contacts 3 The installer...

Страница 34: ...d of in the wrong way The symbol on the product indicates that it may not be treated as normal household waste It should be taken to a collection point for the recycling of electrical and electronic g...

Страница 35: ...incipe de fonctionnement 7 2 5 Avant d utiliser votre nouvelle plaque vitroc ramique 7 2 6 Sp cifications techniques 7 3 Fonctionnement du produit 7 3 1 Choisir les bons ustensiles de cuisine 7 3 2 Co...

Страница 36: ...Risque de coupure Faites attention les bords du panneau sont coupants Des blessures ou des coupures peuvent se produire si vous ne faites pas preuve de prudence 1 2 3 Instructions de s curit importan...

Страница 37: ...timulateurs cardiaques ou d autres implants lectriques comme des pompes insuline doivent consulter leur m decin ou fabricant d implant avant d utiliser cet appareil pour s assurer que leurs implants n...

Страница 38: ...face de travail ou de stockage Ne laissez jamais d objets ou d ustensiles sur l appareil Ne placez ni ne laissez aucun objet magn tisable par ex des cartes de cr dit des cartes m moire ou des disposit...

Страница 39: ...er des casseroles sur la surface vitroc ramique car cela peut rayer le verre N utilisez pas d ponges r curer ni d autres agents de nettoyage abrasifs agressifs pour nettoyer votre plaque de cuisson ca...

Страница 40: ...u de l huile peut tre dangereuse et peut provoquer un incendie N essayez JAMAIS d teindre un feu avec de l eau mais teignez l appareil puis couvrez la flamme par exemple avec un couvercle ou une couve...

Страница 41: ...a plaque de cuisson vitroc ramique micro ordinateur peut r pondre diff rents types de demandes de cuisine en raison du chauffage par r sistance lectrique de la commande micro informatis e et de la s l...

Страница 42: ...ce lectrique install e 5500 6600W Taille du produit P L H mm 590x520x55 Dimensions de l encastrement A B mm 560x490 Le poids et les dimensions sont approximatifs Parce que nous nous effor ons continue...

Страница 43: ...nction d conomie d nergie si vous souhaitez chauffer de nouvelles casseroles utilisez la plaque chauffante encore chaude 4 Directives de cuisson Lors de la friture veillez ce que l huile et la graisse...

Страница 44: ...our lui permettre de s assouplir et devenir tendre avant de servir 4 1 3 Cuisson au wok 1 Choisissez un wok fond plat ou une grande po le frire compatible avec la vitroc ramique 2 Pr parez tous les in...

Страница 45: ...la plaque de cuisson le verre peut se colorer D bordements aliments fondus et d versements sucr s et chauds sur le verre Retirez les imm diatement avec une spatule un couteau palette ou un grattoir la...

Страница 46: ...mm Veuillez s lectionner un mat riau de surface de travail r sistant la chaleur et isol le bois et les mat riaux fibreux ou hygroscopiques similaires ne doivent pas tre utilis s comme mat riau de sur...

Страница 47: ...laque de cuisson Il y a des orifices de ventilation l ext rieur de la plaque de cuisson VOUS DEVEZ vous assurer que ces orifices ne sont pas bloqu s par le plan de travail lorsque vous mettez la plaqu...

Страница 48: ...int rieures du plan de travail apr s l installation voir photo 8 3 Mises en garde 1 La plaque de cuisson vitroc ramique doit tre install e par un personnel qualifi ou des techniciens N effectuez jama...

Страница 49: ...utils appropri s afin d viter tout accident 2 Si l appareil est connect directement au secteur un disjoncteur omnipolaire doit tre install avec un espace minimum de 3 mm entre les contacts 3 L install...

Страница 50: ...roduit indique qu il ne peut pas tre trait comme un d chet m nager Il doit tre d pos dans un point de collecte pour le recyclage des biens lectriques et lectroniques Cet appareil n cessite une liminat...

Страница 51: ...2 3 Productinformatie 6 2 4 Werkingsprincipe 7 2 5 Voordat u uw nieuwe keramische kookplaat gaat gebruiken 7 2 6 Technische specificatie 7 3 Bediening van het product 7 3 1 Het juiste kookgerei kieze...

Страница 52: ...ijgevaar Pas op de paneelranden zijn scherp Onvoorzichtig werken kan resulteren in letsel of snijwonden 1 2 3 Belangrijke veiligheidsinstructies Lees deze instructies zorgvuldig door voordat u dit app...

Страница 53: ...Dit apparaat voldoet aan de elektromagnetische veiligheidsnormen Personen met een pacemaker of andere elektrische implantaten zoals insulinepompen moeten echter voorafgaand aan het gebruik van het app...

Страница 54: ...at nooit als werk of opbergvlak Laat nooit gebruiks voorwerpen achter op het apparaat Leg geen magnetiseerbare voorwerpen bijv creditcards geheugenkaarten of elektronische apparaten bijv Computers mp3...

Страница 55: ...urende reinigingsmiddelen voor het reinigen van uw kookplaat omdat die krassen in het keramische glas kunnen veroorzaken Wanneer het netsnoer beschadigd is moet het door de fabrikant zijn onderhoudsce...

Страница 56: ...r maar het apparaat uitschakelen en vervolgens de vlam afdekken met bijv een deksel of een branddeken WAARSCHUWING brandgevaar bewaar geen items op de kookzones Waarschuwing Wanneer het oppervlak geba...

Страница 57: ...aneel 2 3 Productinformatie De keramische kookplaat met microcomputer voldoet aan uiteenlopende kookwensen en is daarmee de ideale keuze voor moderne families Hij beschikt onder meer over verhitting d...

Страница 58: ...5RE62360 Kookzones 4 zones Ingangsspanning netvoeding 220 240 V 50 60 Hz Ge nstalleerd elektrisch vermogen 5500 6600W Productafmetingen DxBxH mm 590x520x55 Inbouwafmetingen AxB mm 560x490 Gewicht en...

Страница 59: ...akken Wanneer de glasplaat heet is brandt de waarschuwingsindicator voor hete kookzones Raak de glasplaat pas aan nadat de indicator gedoofd is Zo n hete kookzone kan ook worden gebruikt voor energieb...

Страница 60: ...ren van ongeveer 2 8 minuten per zijde Druk het vlees in om te controleren hoe doorbakken het is hoe steviger het vlees aanvoelt des te beter doorgebakken het is 5 Voorafgaand aan het serveren legt u...

Страница 61: ...nigingsmiddel achter op de kookplaat dat kan vlekken op het glas veroorzaken Overgekookte gesmolten en hete suikerhoudende levensmiddelen op het glas Verwijder deze onmiddellijk met een spatel een pal...

Страница 62: ...ve van de installatie en het gebruik moet een ruimte van minimaal 5 cm rondom het gat worden aangehouden Controleer of de dikte van het werkblad minimaal 30 mm is Kies een warmtebestendig en ge soleer...

Страница 63: ...en moet een plaat vastgezet met schroeven op een minimumafstand van 10 mm van de onderzijde van de kookplaat worden aangebracht Rond de buitenzijde van de kookplaat bevinden zich ventilatiesleuven U M...

Страница 64: ...n de beugels de binnenzijden van het werkblad raken na de installatie zie afbeelding 8 3 Waarschuwingen 1 De keramische kookplaat mag uitsluitend door gekwalificeerd e personeel of monteurs worden ge...

Страница 65: ...rkomen 2 Wanneer het apparaat rechtstreeks op het lichtnet wordt aangesloten moet een meerpolige zekeringautomaat met een minimumafstand van 3 mm tussen de contacten worden ingebouwd 3 De installateur...

Страница 66: ...et symbool op dit product geeft aan dat het niet als normaal huisvuil mag worden verwerkt Het moet worden ingeleverd bij een inzamelpunt voor het recyclen van elektrische en elektronische goederen Dit...

Страница 67: ...to 7 2 5 Prima di utilizzare il vostro nuovo piano di cottura in ceramica 7 2 6 Specifiche tecniche 7 3 Funzionamento del prodotto 7 3 1 Scelta delle stoviglie idonee 7 3 2 Utilizzo del piano di cottu...

Страница 68: ...che o il decesso 1 2 2 Pericolo di taglio Attenzione i bordi del pannello sono taglienti La mancata osservanza della presente avvertenza pu provocare lesioni o tagli 1 2 3 Importanti istruzioni di sic...

Страница 69: ...chi per la salute L elettrodomestico conforme alle norme di compatibilit elettromagnetica Ciononostante i portatori di pacemaker o di altri tipi di impianto come le pompe insuliniche dovranno consulta...

Страница 70: ...zare mai l elettrodomestico come un piano di lavoro o di deposito Non lasciare mai oggetti od utensili sull elettrodomestico Non appoggiare o lasciare oggetti magnetizzabili ad es carte di credito mem...

Страница 71: ...n quanto queste possono graffiarla Non utilizzare pagliette o altri detergenti aggressivi e abrasivi per pulire il piano di cottura in quanto questi possono graffiare la vetroceramica Se il cavo di al...

Страница 72: ...spegnere un incendio con acqua bens spegnere dapprima l elettrodomestico e poi coprire le fiamme ad esempio con un coperchio o una coperta antincendio AVVERTENZA pericolo di incendio non conservare og...

Страница 73: ...o Il piano di cottura in ceramica comandato da microcomputer in grado di soddisfare diverse esigenze grazie al riscaldamento a resistenza ai comandi gestiti da microcomputer e alla selezione multipote...

Страница 74: ...Zone di cottura 4 zone Tensione di alimentazione 220 240 V 50 60 Hz Potenza elettrica installata 5500 6600W Dimensioni ProfxLargh Alt mm 590x520x55 Dimensioni di incasso A B mm 560x490 Pesi e misure s...

Страница 75: ...in vetro bollente l indicazione di avvertimento per il piano di cottura bollente si accende Non toccare il piano in vetro finch l indicazione non si spegne Pu anche essere utilizzata come funzione di...

Страница 76: ...rato I tempi possono variare ed essere pari a circa 2 8 minuti per lato Esercitare una leggera pressione sulla bistecca per valutarne il grado di cottura pi consistente pi cotta 5 Lasciar riposare la...

Страница 77: ...verificare che il detergente o la paglietta siano idonei Non lasciare mai residui di detergente sul piano di cottura il vetro potrebbe macchiarsi Traboccamenti cibo fuso e fuoriuscite di cibo zuccher...

Страница 78: ...no spazio minimo di 5 cm attorno al foro a fini di installazione e d uso Sincerarsi che lo spessore del piano di lavoro sia pari ad almeno 30 mm Scegliere un piano di lavoro in materiale resistente al...

Страница 79: ...elettrica necessario inserire un inserto fissato con viti ad una distanza minima di 10 mm dal fondo del piano stesso Sul lato esterno del piano di cottura sono disposti dei fori di ventilazione SINCER...

Страница 80: ...i interne del piano di lavoro dopo l installazione vedi figura 8 3 Avvertimenti 1 Il piano di cottura in ceramica deve essere installato da personale qualificato o da tecnici qualificati Non effettuar...

Страница 81: ...do da evitare incidenti 2 Se l elettrodomestico viene collegato direttamente all alimentazione di rete installare un interruttore automatico onnipolare con uno spazio minimo tra i contatti di 3 mm 3 L...

Страница 82: ...o prodotto non deve essere trattato come rifiuto domestico ma deve essere consegnato presso l idoneo punto di raccolta per il riciclaggio di apparecchiature elettriche ed elettroniche L elettrodomesti...

Страница 83: ...verpanel 6 2 3 Produktinformation 6 2 4 Funktionsprincip 7 2 5 Innan du anv nder din nya keramikh ll 7 2 6 Tekniska specifikationer 7 3 Anv nda produkten 7 3 1 V lj r tt kokk rl 7 3 2 Anv ndning 8 3 2...

Страница 84: ...att panelkanterna r vassa Du riskerar skador eller sk rs r om du inte r f rsiktig 1 2 3 Viktiga s kerhetsanvisningar L s dessa anvisningar noggrant innan du installerar och anv nder produkten Br nnba...

Страница 85: ...ller med implantattillverkaren innan de anv nder denna produkt f r att s kerst lla att implantaten inte p verkas av det elektromagnetiska f ltet Att inte f lja dessa anvisningar kan i v rsta fall resu...

Страница 86: ...g ska samtliga kokzoner och h llen st ngas av enligt anvisningarna i denna bruksanvisning dvs med touchreglagen F rlita dig inte p att kokzonen st ngs av automatiskt via detekteringsfunktionen f r kok...

Страница 87: ...ar f rsiktig och undvik att vidr ra v rmeelementen L t inte barn under 8 r vara n ra produkten s vida de inte r under kontinuerlig uppsikt Denna produkt kan anv ndas av barn fr n 8 r och av personer m...

Страница 88: ...5 Anv nd inte ngtv ttsutrustning p h llen Denna produkt ska inte man vreras med hj lp av en extern timer eller ett separat fj rrkontrollssystem...

Страница 89: ...ktion till produkten 2 1 Vy fr n ovan 2 2 Man verpanel 2 3 Produktinformation Denna keramikh ll med mikrodator uppfyller m nga olika matlagningsbehov tack vare funktioner som uppv rmning med motst nds...

Страница 90: ...600W Produktm tt D B H mm 590x520x55 Inbyggnadsdimensioner A B mm 560X490 Uppgifter om vikt och m tt r ungef rliga Vi str var kontinuerligt efter att f rb ttra v ra produkter och d rf r kan specifikat...

Страница 91: ...rytor eller pannor Anv nd kokzonen medan den fortfarande r het 4 Riktlinjer vid matlagning Var f rsiktig n r du steker eftersom olja och fett hettas upp mycket snabbt s rskilt n r du anv nder PowerBoo...

Страница 92: ...en vila n gra minuter s att den r m r n r den serveras 4 1 3 Tillaga wokade r tter 1 Anv nd en wokpanna som r kompatibel med keramikh llar eller en stor stekpanna 2 Ta fram alla ingredienser och utrus...

Страница 93: ...palettkniv eller rakbladsskrapa f r keramikh llar men var f rsiktig om kokzonens yta r het 1 St ng av kokzonen 2 H ll rakbladsskrapan eller n got annat f rem l som du anv nder se ovan i 30 vinkel mot...

Страница 94: ...erade omr den p grund av v rmen fr n produkten m ste b nkskivan vara tillverkad av ett v rmebest ndigt och isolerat material tr och liknande fibermaterial eller hygroskopiska material f r inte anv nda...

Страница 95: ...minst 10 mm fr n h llens undersida Det finns ventilationsh l runtom p h llens utsida DU M STE se till att dessa h l inte blockeras av arbetsb nken n r du placerar h llen i utrymmet d r den ska install...

Страница 96: ...der n gra omst ndigheter vidr ra innerytorna p arbetsb nken efter installationen se bilden 8 3 Varningar 1 Keramikh llen m ste installeras av kvalificerad personal eller tekniker F rs k aldrig utf ra...

Страница 97: ...g s att olyckor f rebyggs 2 Om produkten ansluts direkt till eln tet m ste en flerpolig str mbrytare installeras med ett mellanrum p minst 3 mm mellan kontakterna 3 Installat ren m ste s kerst lla att...

Страница 98: ...kan uppst om produkten avyttras p ett felaktigt s tt Symbolen p produkten indikerar att den inte f r hanteras som vanligt hush llsavfall L mna den p din tervinningsstation som hanterar elektriska och...

Страница 99: ...producto 6 2 4 Principio de funcionamiento 7 2 5 Antes de usar su nueva vitrocer mica 7 2 6 Especificaciones t cnicas 7 3 Funcionamiento del producto 7 3 1 Selecci n de la bater a de cocina adecuada...

Страница 100: ...la muerte 1 2 2 Peligro de cortes Tenga cuidado porque los bordes del panel son cortantes Si no tiene precauci n podr a da arse o cortarse 1 2 3 Instrucciones importantes de seguridad Lea atentamente...

Страница 101: ...d electromagn tica No obstante las personas con marcapasos o con otro implante el ctrico como una bomba de insulina deben preguntar a su m dico o al fabricante del implante antes de usar el electrodom...

Страница 102: ...modo de encimera o como superficie para el almacenamiento Nunca deje objetos o utensilios sobre la vitrocer mica No coloque ni deje cerca del electrodom stico objetos magnetizables p ej tarjetas de cr...

Страница 103: ...de limpieza abrasivo o spero para limpiar la vitrocer mica porque podr a ara ar el cristal Si el cable de alimentaci n el ctrica est da ado el fabricante un agente del servicio t cnico o una persona...

Страница 104: ...Desconecte la vitrocer mica y cubra despu s la llama con p ej una tapa o una manta apagafuegos ADVERTENCIA peligro de incendio no almacene objetos sobre las superficies de cocci n Advertencia si la s...

Страница 105: ...producto La vitrocer mica con microordenador puede satisfacer diferentes requisitos de cocci n gracias al calentamiento del alambre de resistencia al control microcomputerizado y a la selecci n de di...

Страница 106: ...600W Dimensiones del producto P x A x H mm 590x520x55 Dimensiones de instalaci n A B mm 560x490 El peso y las dimensiones son aproximados Debido a la constante mejora de nuestros productos es posible...

Страница 107: ...t caliente 4 Directrices para cocinar Tenga cuidado cuando fr a porque el aceite y la grasa se calientan muy r pido especialmente si usa la funci n PowerBoost A temperaturas extremadamente altas el ac...

Страница 108: ...nga tierno 4 1 3 Para saltear 1 Coja un wok de base plana compatible con la cer mica o una sart n grande 2 Tenga preparados todos los ingredientes y los utensilios El salteado se debe hacer con rapide...

Страница 109: ...na rasqueta adecuada para placas vitrocer micas Tenga cuidado porque las superficies de las zonas de cocci n est n calientes 1 Desenchufe la vitrocer mica 2 Sostenga la rasqueta o el utensilio que vay...

Страница 110: ...pico a no ser que est n impregnados para evitar una descarga el ctrica o una deformaci n importante causada por la radiaci n de calor desde la placa caliente Como se muestra abajo Nota la distancia d...

Страница 111: ...e de la vitrocer mica Alrededor de la parte exterior de la placa vitrocer mica hay orificios de ventilaci n ASEG RESE de que la encimera no los tapa cuando coloque la placa vitrocer mica Tenga en cuen...

Страница 112: ...deben entran en contacto con las superficies interiores de la encimera despu s de la instalaci n ver la imagen 8 3 Precauciones 1 La vitrocer mica debe ser instalada por t cnicos o personas debidamen...

Страница 113: ...lquier tipo de accidente 2 Si el electrodom stico se ha conectado directamente a la alimentaci n el ctrica se debe instalar un disyuntor omnipolar con un hueco de al menos 3 mm entre los contactos 3 E...

Страница 114: ...a Este s mbolo en el producto indica que no puede ser considerado como un residuo dom stico normal Deber llevarse a un punto de recogida para el reciclaje de aparatos el ctricos y electr nicos Este ap...

Страница 115: ...zvodu 6 2 4 Na in rada 7 2 5 Prije kori tenja svoje nove kerami ke plo e za kuhanje 7 2 6 Tehni ke specifikacije 7 3 Upravljanje proizvodom 7 3 1 Odabir prikladnog posu a 7 3 2 Kako koristiti 8 3 2 1...

Страница 116: ...kotina Budite pa ljivi rubovi plo a su o tri Neopreznost mo e dovesti do ozljeda ili posjekotina 1 2 3 Va ne mjere sigurnosti Prije instalacije ili kori tenja ovog ure aja pa ljivo pro itajte ova uput...

Страница 117: ...pumpama moraju se posavjetovati sa svojim lije nikom ili proizvo a em implantata prije kori tenja ovog ure aja kako bi bili sigurni da elektromagnetsko polje ne e utjecati na implantate Nepridr avanje...

Страница 118: ...e npr ra unala mp3 ure aje jer na njih mo e utjecati njegovo elektromagnetsko polje Ure aj nikada nemojte koristiti za zagrijavanje ili grijanje prostorije Nakon kori tenja uvijek isklju ite zone za k...

Страница 119: ...kao to su kuhinje osoblja u trgovinama uredima i drugim radnim okru enjima ku e u seoskim gospodarstvima kori tenje od strane gostiju u hotelima motelima i ostalim stambenim prostorima kori tenje u p...

Страница 120: ...zorenje Ako je povr ina napuknuta isklju ite ure aj kako biste izbjegli mogu nost elektri nog oka za plo e za kuhanje od staklokerami kog ili sli nog materijala koji titi dijelove pod naponom Ne smije...

Страница 121: ...2 3 Informacije o proizvodu Kerami ka plo a za kuhanje s mikrora unalnim sustavom zbog grija ih elemenata s otpornicima mikrora unalnog upravljanja i odabira vi e razina snaga mo e zadovoljiti razne...

Страница 122: ...220 240 V 50 60 Hz Instalirana elektri na energija 5500 6600W Veli ina proizvoda Dx xV mm 590x520x55 Ugradbene dimenzije AxB mm 560x490 Te ina i dimenzije su pribli ne Budu i da stalno nastojimo pobol...

Страница 123: ...a koristite plo u za kuhanje koja je jo vru a 4 Smjernice za kuhanje Budite oprezni pri pr enju jer se ulje i mast vrlo brzo zagriju posebice ako koristite funkciju PowerBoost Na izuzetno visokim temp...

Страница 124: ...mekan prije serviranja 4 1 3 Za pr enje mije anjem 1 Odaberite wok prikladan za keramiku ili veliku tavu za pe enje 2 Pripremite sve sastojke i pribor Pr enje mije anjem treba se odvijati brzo Ako kuh...

Страница 125: ...etnim no em ili strugalicom o trom poput ileta prikladnom za plo u za kuhanje od kerami kog stakla no uvajte se vru ih povr ina zona za kuhanje 1 Isklju ite struju plo e za kuhanje 2 O tricu ili pribo...

Страница 126: ...titi kao materijali za radnu povr inu osim ako su impregnirani kako bi se izbjegao elektri ni udar i ja e deformacije uzrokovane toplinskim zra enjem iz plo e za kuhanje Kao to je prikazano ni e dolje...

Страница 127: ...kuhanje S vanjske strane plo e za kuhanje nalaze se ventilacijski otvori MORATE provjeriti blokira li radna ploha ventilacijske otvore kada postavite plo u za kuhanje na njezino mjesto Imajte na umu d...

Страница 128: ...dirivati s unutarnjim povr inama radne plohe nakon instalacije vidi sliku 8 3 Mjere opreza 1 Kerami ku plo u za kuhanje mora instalirati kvalificirano osoblje ili tehni ari Molimo nikada ne obavljajte...

Страница 129: ...a a u svrhu izbjegavanja bilo kakve nesre e 2 Ako se ure aj spaja izravno na sustav elektri nog napajanja mora se postaviti dvopolni strujni prekida s minimalnim razmakom od 3 mm izme u kontakata prek...

Страница 130: ...gre an na in Simbol nazna en na proizvodu upu uje da ga se ne smije tretirati kao standardni komunalni otpad Treba ga odnijeti na sabirno mjesto za recikliranje elektri ne i elektroni ke robe Za ovaj...

Страница 131: ...lo a 5 2 3 Informacije o izdelku 5 2 4 Na in delovanja 6 2 5 Pred uporabo nove kerami ne plo e 6 2 6 Tehni na specifikacija 6 3 Delovanje izdelka 6 3 1 Izbor ustrezne posode 6 3 2 Uporaba 7 3 2 1 Za e...

Страница 132: ...a ostre robove plo e Neupo tevanje tega opozorila lahko vodi do po kodb ali ureznin 1 2 3 Pomembna varnostna navodila Pred namestitvijo ali uporabo te naprave pozorno preberite navodila Na napravo ne...

Страница 133: ...dravnikom ali proizvajalcem vsadka da se prepri ajo da elektromagnetno polje ne more vplivati na njihove vsadke Neupo tevanje tega opozorila lahko vodi do smrti 1 3 3 Nevarnost zaradi vro e povr ine M...

Страница 134: ...a Po uporabi kuhali a in kuhalno plo o vedno izklopite kot je opisano v tem priro niku t j z upravljalnimi elementi na dotik Pri izklopu kuhali po odstranitvi loncev in ponev se ne zana ajte na funkci...

Страница 135: ...dzorom To napravo lahko uporabljajo otroci starej i od 8 let in osebe z zmanj animi fizi nimi senzornimi ali psihi nimi sposobnostmi ali pomanjkanjem izku enj in znanja e so pod nadzorom odgovorne ose...

Страница 136: ...lku Kerami na kuhalna plo a z mikrora unalnikom je primerna za razli ne kuharske podvige in zahteve saj deluje z grelno uporovno ico nadzira jo mikrora unalnik ter omogo a izbor razli nih stopenj mo i...

Страница 137: ...Hz Name ena elektri na mo 5500 6600W Velikost izdelka G V mm 590x520x55 Vgradne dimenzije A B mm 560x490 Te a in dimenzije so pribli ne Ker si nenehno prizadevamo izbolj ati na e izdelke lahko spremen...

Страница 138: ...je Pri pra enju bodite zelo previdni saj se olje in mast hitro segrejeta predvsem ko uporabljate funkcijo PowerBoost Pri izredno visokih temperaturah se olje in mast spontano zanetita kar predstavlja...

Страница 139: ...dnom primernim za kerami no plo o 2 Vse sestavine in opremo imejte e pripravljene Ta na in priprave mora biti hiter Pri pripravi ve jih koli in je treba kuhati v ve manj ih porcijah 3 Ponev na kratko...

Страница 140: ...te pozorni na vro e plo e 1 Izklju ite kuhalno plo o 2 Strgalnik ali pripomo ek dr ite pod kotom 30 in postrgajte zape ene sledi s kuhalne povr ine 3 Nato pobri ite s krpo za posodo ali papirnato bris...

Страница 141: ...e deformacije zaradi oddajanja toplote od kuhalne plo e Kot je prikazano spodaj Opomba varnostna razdalja med stranicami kuhalne plo e in notranjimi povr inami delovne povr ine mora biti najmanj 3 mm...

Страница 142: ...vr ini niso blokirane Upo tevajte da mora biti lepilo s katerim so zlepljeni plasti ni ali leseni materiali s pohi tvom odporno na temperature nad 150 C da se paneli ne morejo odlepiti Zadnja stena so...

Страница 143: ...rviser Tega dela nikoli ne izvajajte sami 2 Kerami ne kuhalne plo e ni dovoljeno namestiti na hladilno opremo pomivalne stroje ali centrifugalne su ilnike 3 Kerami no kuhalno plo o je treba namestiti...

Страница 144: ...djem da prepre i nesre e 2 e napravo priklju ite neposredno na elektri no napajanje je treba med kontakte z najmanj 3 mm razmikom priklju iti ve polni prekinja 3 In talater mora zagotoviti da je vzpos...

Страница 145: ...Simbol na izdelku ozna uje da naprave ni dovoljeno obravnavati kot normalen gospodinjski odpadek Odnesti jo je treba na zbirno mesto za recikliranje elektri nih in elektronskih naprav Napravo mora ods...

Страница 146: ......

Страница 147: ...service SE blaupunkt einbaugeraete com Frankreich service FR blaupunkt einbaugeraete com 00 800 32 289 000 Luxemburg service LU blaupunkt einbaugeraete com Schweiz service CH blaupunkt einbaugeraete c...

Отзывы: