background image

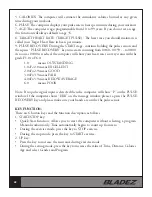
 32 

Type1:  BODY FAT% > 27

Type2:  27 ≥ BODY FAT% ≥ 20

Type3:  BODY FAT % < 20

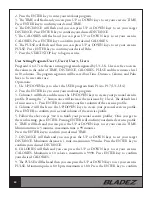
The computer will show the test results of FAT PERCENT, BMI and BMR. Operations:

1. Use UP/DOWN keys to select the BODY FAT (P24) program.   

2. Press the ENTER key to enter your workout program. 

3. The HEIGHT will flash and you can press UP or DOWN keys to set your HEIGHT. 

Press ENTER key to confirm your HEIGHT. The default HEIGHT is 170cm or 5’07” 

(5feet 7 inches).  

4. The WEIGHT will flash and you can press UP or DOWN keys to set your WEIGHT. 

Press ENTER key to confirm your WEIGHT.  The default WEIGHT is 70kgs or 155lbs. 

5. The GENDER will flash and you can press UP or DOWN keys to select your sex. Number 

1 equals male and "zero" means female. Press ENTER key to confirm your Gender. The 

default sex is 1 (MALE). 

6. The AGE will flash and you can press UP or DOWN keys to set your AGE. Press ENTER 

key to confirm your AGE. The default AGE is 35. 

7. Press the START/STOP key to begin body fat measurement. If the window show E on 

the window, please make sure your hands are on the pulse sensor. Then press the START/

STOP key again to begin body fat measurement. 

8. After your measurement is completed, the computer will show the values of BMR, BMI 

and FAT PERCENT on the LCD display. Furthermore, the computer will show your own 

exercise profile for your body type. 

9. Press START/STOP key to begin exercise. 

OPERATION GUIDE: 

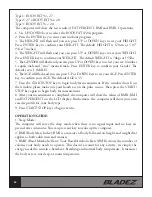
1. Sleep Mode: 

The computer will enter the sleep mode when there is no signal input and no keys are 

pressed after 4 minutes. You can press any key to wake up the computer. 

2. BMI (Body Mass Index): BMI is a measure of body fat based on height and weight that 

applies to both adult men and women. 

3. BMR (Basal Metabolic Rate): Your Basal Metabolic Rate (BMR) shows the number of 

calories your body needs to operate. This doesn’t account for any activity, it’s simply the 

energy needed to sustain a heartbeat, breathing and normal body temperature. It measures 

the body at rest, not sleep, at room temperature. 

Содержание R300II

Страница 1: ...ITNESS TOLL FREE 866 325 2339 Important Read all instructions carefully before using this product Retain this owner s manual for future reference Bladez Fitness 20155 Ellipse Foothill Ranch California 92610 p 949 206 0330 f 949 206 0013 www BladezFitness com ...

Страница 2: ... and Labels 04 Safety Information 05 Exercise Instruction 06 Training Guidelines 07 Suggested Stretching 11 Hardware and Tools 13 Assembly Instructions 14 Exploded View Drawing 24 Parts List 26 Console Operations 27 Maintenance and Cleaning 36 Warranty 37 ...

Страница 3: ...itness If you have any questions concerns or product issues please call our Customer Service Team at 1 866 325 2339 or email us at CustomerSupport BHNorthAmerica com Carefully read through the instructions contained in this manual They provide you with important information about assembly safety fitness and use of the machine Please read ALL the safety information contained on the following page ...

Страница 4: ...4 WARNINGS AND LABELS ...

Страница 5: ...itness Read manual prior to use and follow all warnings and instructions 7 Do not place sharp objects near the machine 8 Any person with physical or coordination limitations should not use the machine without the assistance of a qualified person or doctor Misuse of this machine may result in serious injury 9 Do warm up stretching exercises before using the equipment 10 Do not use the machine if it...

Страница 6: ... If you feel any pain or discomfort stop exercising immediately and consult your doctor 4 Wear appropriate clothing and footwear for the exercise do not wear loose clothing do not wear leather soled shoes or footwear with high heels 5 It is advised that you do warm up stretches before working out 6 Get on the equipment slowly and securely 7 Select the program or workout option that is most closely...

Страница 7: ...without stopping FLEXIBILITY The range of motion of your joints Improving flexibility involves the stretching of muscles and tendons to maintain or increase suppleness and it provides increased resistance to muscle injury or soreness CARDIO RESPIRATORY ENDURANCE The most essential component of physical fitness It is the efficient functioning of the heart and lungs AEROBIC FITNESS Is an exercise of...

Страница 8: ...reate an overload and therefore provide continued improvement SPECIFICS Different forms of exercise produce different results The type of exercise that is carried out is specific to the muscle groups being used and to the energy source involved There is little transfer of the effects of exercise i e from strength training to cardiovascular fitness That is why it is important to have an exercise pr...

Страница 9: ...unt 23 22 22 21 20 19 19 18 18 Beats per Minute 138 132 132 126 120 114 114 108 108 PULSE COUNT The pulse count on your wrist or carotid artery in the neck taken with two index fingers is done for ten seconds taken a few seconds after you stop exercising This is for two reasons a 10 seconds is long enough for accuracy b the pulse count is to approximate your BPM rate at the time you are exercising...

Страница 10: ...ill not restrict your movement in any way while exercising Clothes should be light enough to allow the body to cool Excessive clothing that causes you to perspire more than you normally would gives you no advantage The extra weight you lose is body fluid and will be replaced with the next glass of water you drink Always wear a pair of athletic shoes BREATHING DURING EXERCISE Do not hold your breat...

Страница 11: ...or one count Then lift your right shoulder up for one count as you lower your left shoulder Side Stretches Open your arms to the side and continue lifting them until they are over your head Reach your left arm as far upward as you can for one count Feel the stretch up your left side Repeat this action with your right arm Quadriceps Stretch With one hand against a wall for balance reach behind you ...

Страница 12: ...nd hold for 15 counts Hamstring Stretches Sit with your right leg extended Rest the soles of your left foot against your right inner thigh Stretch toward your toes as far as possible Hold for 15 counts Relax and then repeat with left leg extended Calf Achilles Stretches Lean against a wall with your right leg in front of the left and your arms forward Keep your left leg straight and the right foot...

Страница 13: ...13 HARDWARE AND TOOLS 20PCS 10PCS 18PCS 65 Bolt 20mm 4PCS ...

Страница 14: ...14 ASSEMBLY INSTRUCTIONS ...

Страница 15: ...er 65 unscrew the Mounting Plate 68 and remove 4 Hex Bolts 16 4 Washers 17 and set them aside The bolts and washers are necessary for future assembly steps 13 68 16 17 Hex Bolt 26mm 4PCS 65 Wrench 13 14 15 Washer 8mm 4PCS 16 17 ...

Страница 16: ...m aside for stabilizer attachment Assemble the Front Stabilizer 15 on the Main Frame 13 with 4 Hex Bolts 16 4 Spring Washers 8 and 4 Washers 17 Secure them with the Wrench 65 Assemble the Rear Stabilizer 26 onto the Main Frame 13 with 4 Hex Bolts 16 4 Spring Washers 8 and 4 Washers 17 Secure them with the Wrench 65 ...

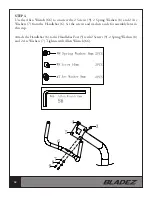
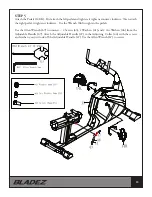
Страница 17: ...s step Slide the Post Cover 10 onto the Handlebar Post 5 and connect the Mid Sensor Wire 1 4 at the bottom of the Handlebar Post 5 with the Mide Sensor Wire 12 coming out of the Main Frame 13 Connect the Trunk Line 2 3 to Trunk Line 1 22 Slide the Handlebar Post 5 onto the Main Frame 13 and secure with 4 Screws 9 4 Spring Washers 8 and 4 Arc Washers 7 Tighten with Allen Wrench 66 4 4 4 ...

Страница 18: ... 9 2 Spring Washers 8 and 2 Arc Washers 7 from the Handlebar 6 Set the screws and washers aside for assembly later in this step Attach the Handlebar 6 to the Handlebar Post 5 with 2 Screws 9 2 Spring Washers 8 and 2 Arc Washers 7 Tighten with Allen Wrench 66 ...

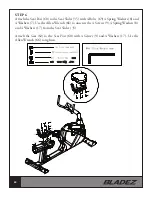
Страница 19: ...t tightens clockwise Use the Wrench 66 to tighten the pedals Use the Allen Wrench 67 to unscrew 2 Screws 43 2 Washers 41 and 2 Arc Washers 46 from the Adjustable Handle 47 Attach the Adjustable Handle 47 to the Adjusting Collar 44 with the screws and washers you just took off the Adjustable Handle 47 Use the Allen Wrench 67 to secure ...

Страница 20: ...4 Spring Washers 8 and 4 Washers 7 Use the Allen Wrench 66 to unscrew the 4 Screws 9 4 Spring Washers 8 and 4 Washers 17 from the Seat Slider 35 Attach the Seat 62 to the Seat Post 60 with 4 Screws 9 and 4 Washers 17 Use the Allen Wrench 66 to tighten 8PCS 69 Bolt 20mm 4PCS ...

Страница 21: ...Post 60 with 4 Screws 63 4 Washers 6mm 41 and 4 Washers 6mm 40 Secure with Wrench 66 Fig 1 Attach the Handlebar 49 to the Seat Post 6 with 2 Bolts 55 2 Washers 17 and 2 Nuts 51 Then connect the Hand Pulse Wire 53 to the Trunk Wire 22 coming out of the back of the Main Frame Fig 2 45mm 64 60 55 54 17 51 53 40 41 63 49 8 2 ...

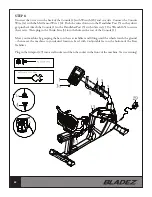
Страница 22: ... Post 5 with 4 Screws 2 Use Wrench 65 to secure the screws Then plug in the Trunk Line 3 into the hole in the rear of the Console 1 Move your machine by grasping the bar on the rear stabilizer and lifting until the wheels touch the ground then move the machine to you desired location Level with 2 adjustable feet on the bottom of the Rear Stabilizer Plug in the Adaptor 29 into a wall socket and the...

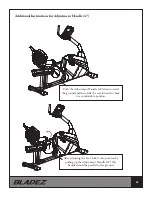
Страница 23: ... Push the Adjustment Handle 47 down toward the ground and then slide the seat forward or back to a comfortable position After adjusting the Seat lock it into position by pulling up the Adjustment Handle 47 The handle should be parallel to the ground 47 ...

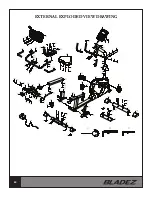
Страница 24: ...24 EXTERNAL EXPLODED VIEW DRAWING ...

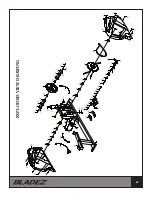
Страница 25: ...25 EXPLODED VIEW DRAWING ...

Страница 26: ...r 1 R300II 87 Belt plate 1 R300II 27 Rear stabilizer cap right 1 R300II 88 Magnet 1 R300II 28 Adjustable foot 2 R300II 89 Belt 1 R300II 29 Adaptor 1 R300II 90 Tension spring 1 R300II 30 Slider rail 1 R300II 91 Nylon nut 1 R300II 31 Cushion 2 R300II 92 Idle wheel bracket 1 R300II 32 Washer 4mm 2 R300II 93 Wave washer 2 R300II 33 Screw ST 19mm 11 R300II 94 Bearing 2 2 R300II 34 Rail Sleve 2 R300II 9...

Страница 27: ... target press START STOP key to continue exercising C Wake Up Function The monitor will enter SLEEP mode LCD off when there is no signal input and no key pressed after 4 minutes FUNCTIONS AND FEATURES 1 TIME Shows your elapsed workout time in minutes and seconds The computer will automatically count up from 0 00 to 99 59 in one second intervals You can also program the computer to count down from ...

Страница 28: ...0 means OUTSTANDING 1 0 F 2 0 means EXCELLENT 2 0 F 2 9 means GOOD 3 0 F 3 9 means FAIR 4 0 F 5 9 means BELOW AVERAGE 6 0 means POOR Note If no pulse signal input is detected then the computer will show P on the PULSE window If the computer shows ERR on the message window please re press the PULSE RECOVERY key and please make sure your hands are on the the pulse sensor KEY FUNCTION There are 6 but...

Страница 29: ... a certain distance Operations 1 Use UP DOWN keys to select the MANUAL P1 program 2 Press the ENTER key to enter MANUAL program 3 The TIME will flash and you can press UP or DOWN keys to set your exercise TIME Press ENTER key to confirm your desired TIME 4 The DISTANCE will flash and you can press UP or DOWN keys to set your target DISTANCE Press ENTER key to confirm your desired DISTANCE 5 The CA...

Страница 30: ...gram 3 Column 1 will flash and then use the UP DOWN keys to create your personal exercise profile Pressing the button once will increase the resistance by 1 level The default level of resistance is 1 Press ENTER to confirm your first column of the exercise profile 4 Column 2 will flash use the UP DOWN keys to create your personal exercise profile Press ENTER to confirm your second column of the ex...

Страница 31: ...se every 20 seconds while the heart rate detected is lower than the TARGET H R C Also the resistance level may decrease every 20 seconds while the heart rate detected is higher than the TARGET H R C Operations 1 Use UP DOWN keys to select one of the heart rate control program from P18 to P22 2 Press the ENTER key to enter your workout program 3 The AGE will flash at P18 to P21 programs and you can...

Страница 32: ...ult AGE is 35 7 Press the START STOP key to begin body fat measurement If the window show E on the window please make sure your hands are on the pulse sensor Then press the START STOP key again to begin body fat measurement 8 After your measurement is completed the computer will show the values of BMR BMI and FAT PERCENT on the LCD display Furthermore the computer will show your own exercise profi...

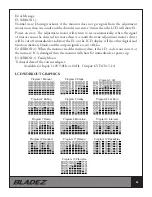
Страница 33: ...lay All the other digital and function mark are blank and the output signals are cut off also E2 ERROR 2 When the monitor read the memory data if the I D code is not correct or the memory IC is damaged then the monitor will show E2 immediately at power up E3 ERROR 3 Faulty Motor Technical data of the current adapter Available for Input 110V 50Hz or 60Hz Output 6V DC 0 5 1A LCD WORKOUT GRAPHICS Pro...

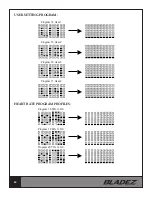
Страница 34: ...34 Program 14 User 1 Program 15 User 2 Program 16 User 3 Program 17 User 4 Program 18 55 H R C Program 19 65 H R C Program 20 75 H R C USER SETTING PROGRAM HEART RATE PROGRAM PROFILES ...

Страница 35: ...ut Time 40 minutes Workout Time 40 minutes Workout Time 40 minutes Workout Time 40 minutes Workout Time 20 minutes Workout Time 20 minutes BODY FAT STOP MODE Program 23 One of the Following Six Profiles Will Display Automatically after Measuring Your BODY FAT BODY FAT START MODE ...

Страница 36: ...s Instead seek service from an authorized service center However you may clean the outer surface Use a soft cloth dampened with warm water Do not use aerosol sprays or pump bottles as they may deposit sediments upon the console surface The use of harsh chemicals will destroy the protective coating and cause a static build up that may damage the some of the components MAINTENANCE AND CLEANING ...

Страница 37: ...pendable items which become worn during normal use Repairs necessary because of operator abuse or negligence or the failure to operate and maintain the equipment according to the instructions contained in the Owner s Manual WARRANTY Bladez Fitness BH North America Corporation 20155 Ellipse Foothill Ranch CA 92610 Phone 949 206 0330 Toll Free 866 325 2339 Fax 949 206 0013 Web www bladezfitness com ...

Страница 38: ... les instructions avant d utiliser ce produit Conservez le présent Guide d utilisation aux fins de consultation ultérieure Bladez Fitness 20155 Ellipse Foothill Ranch Californie 92610 tél 949 206 0330 téléc 949 206 0013 www BladezFitness com R300II R300II V1 ...

Страница 39: ...ifs à la sécurité 39 Instructions relatives à l exercice 40 Lignes directrices sur l entraînement 41 Étirements suggérés 45 Pièces et outils 50 Instructions d assemblage 51 Croquis en vue éclatée 61 Liste des pièces 63 Fonctionnement de la console 64 Maintenance et entretien 73 Garantie 74 R300II V1 ...

Страница 40: ... vous avez des questions ou en cas de problème relatif à l appareil communiquez avec notre Service à la clientèle au 1 866 325 2339 ou à CustomerSupport BHNorthAmerica com Lisez attentivement les instructions figurant dans ce guide Vous y trouverez des renseignements importants sur l assemblage la sécurité la forme physique et l utilisation de l appareil Veuillez lire TOUTES les informations de sé...

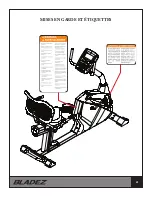
Страница 41: ...41 MISES EN GARDE ET ÉTIQUETTES ...

Страница 42: ...utiliser et respectez toutes les mises en garde et instructions 7 Ne placez pas d objets tranchants près de l appareil 8 Quiconque présente un handicap physique ou des troubles de la coordination doit toujours utiliser l appareil avec l assistance d une personne qualifiée ou d un médecin Mal utilisé l appareil peut causer des blessures graves 9 Faites des exercices de réchauffement avant d utilise...

Страница 43: ...médiatement votre séance d exercice et consultez votre médecin 4 Portez des vêtements et des chaussures adaptés à l exercice Ne portez pas de vêtements amples ni de chaussures à semelles de cuir ou à talons hauts 5 Il est recommandé de commencer votre séance d exercice par des étirements afin de vous réchauffer 6 Enfourchez la bicyclette lentement et prudemment 7 Sélectionnez le programme ou l opt...

Страница 44: ...ent de vos articulations Pour améliorer sa flexibilité il faut étirer ses muscles et ses tendons afin de maintenir ou d augmenter sa souplesse laquelle accroît la résistance aux lésions ou douleurs musculaires ENDURANCE CARDIO RESPIRATOIRE L élément le plus important de la forme physique Il s agit du fonctionnement efficace du cœur et des poumons CONDITIONNEMENT PHYSIQUE AÉROBIQUE C est un exercic...

Страница 45: ...ainsi de vous améliorer SPÉCIFICITÉ Différentes formes d exercice produisent différents résultats Le type d exercice effectué est propre aux groupes musculaires sollicités et à la source d énergie en cause Le transfert des effets de l exercice est faible par exemple de l entraînement de la force à celui de la capacité cardio vasculaire Voilà pourquoi il est si important d adapter son programme d e...

Страница 46: ...ence cardiaque cible 25 30 35 40 45 50 55 60 65 Compte de 10 secondes 23 22 22 21 20 19 19 18 18 Battements par minute 138 132 132 126 120 114 114 108 108 POULS Le pouls ou nombre de pulsations se calcule au poignet ou au cou sur la carotide au moyen de l index et du majeur durant 10 secondes quelques secondes après l exercice Il y a deux raisons à cela a 10 secondes c est assez long pour garantir...

Страница 47: ...essez de faire de l exercice et consultez votre médecin VÊTEMENTS RECOMMANDÉS Portez des vêtements qui ne gêneront aucunement vos mouvements durant l entraînement Ils devraient être assez légers pour laisser le corps se refroidir De plus le fait de trop vous habiller vous ferait transpirer plus que la normale sans que vous en tiriez aucun avantage Le surplus de poids que vous perdriez alors serait...

Страница 48: ...oreille sur un temps Soulevez ensuite l épaule droite sur un temps en abaissant l épaule gauche Étirements latéraux Ouvrez les bras sur le côté puis soulevez les au dessus de la tête Poussez le bras gauche aussi haut que possible sur un temps Sentez l étirement du côté gauche Répétez avec le bras droit Étirement des quadriceps En vous appuyant sur le mur d une main pour garder l équilibre attrapez...

Страница 49: ...15 temps Étirements des ischio jambiers En position assise étendez la jambe droite Appuyez la plante du pied gauche contre l intérieur de la cuisse droite Étirez vous vers les orteils aussi loin que possible Comptez 15 temps Relâchez puis répétez avec la jambe gauche en extension Étirements des mollets et des tendons d Achille Appuyez vous contre un mur la jambe droite devant la gauche et les bras...

Страница 50: ...cs 51 Écrou 2pcs 65 Clé 13 14 15mm 66 Clé Allen 6mm 67 Clé Allen 5mm 16 Boulon hexagonal 26mm 12pcs 9 Vis 16mm 10pcs 63 Vis 40mm 4pcs 2 Vis 2pcs 7 Rondelle en arc 8mm 6pcs 40 Rondelle 6mm 4pcs 41 Rondelle 6mm 6pcs 46 Rondelle en arc 6mm 2pcs 43 Vis 6mm 2pcs 17 Rondelle 8mm 20pcs 8 Rondelle à ressort 8mm 18pcs 65 Boulon 20mm 4pcs ...

Страница 51: ...51 INSTRUCTIONS D ASSEMBLAGE ...

Страница 52: ...plaque de montage 68 ainsi que pour enlever 4 boulons hexagonaux 16 et 4 rondelles 17 avant de les mettre de côté 13 68 16 17 Hex Bolt 26mm 4PCS 65 Wrench 13 14 15 Washer 8mm 4PCS 16 Boulon hexagonal 26mm 4pcs 17 Rondelle 8mm 4pcs 65 Clé 13 14 15mm ...

Страница 53: ...isateur avant 15 au châssis principal 13 utiliser 4 boulon hexagonaux 16 4 rondelles à ressort 8 et 4 rondelles 17 à l aide d une clé 65 Pour fixer le stabilisateur 26 au châssis principal 13 utiliser 4 boulons hex 16 4 rondelles à ressort 8 et 4 rondelles 17 à l aide d une clé 65 16 Boulon hexagonal 26mm 8pcs 8 Rondelle à ressort 8mm 8pcs 17 Rondelle 8mm 8pcs 65 Clé 13 14 15mm ...

Страница 54: ...teur de tige 10 sur la potence du guidon 5 Ensuite branchez le fil de mesure du pouls 4 de la potence du guidon 5 au fil de mesure du pouls 12 du châssis principal 13 Par la suite brancher le fil 2 3 au fil 1 22 Placer la potence du guidon 5 sur le châssis principal 13 avec 2 vis 9 2 rondelles à ressort 8 et 2 rondelles courbées 7 à l aide de la clé Allen 66 9 Vis 16mm 4pcs 7 Rondelle en arc 8mm 4...

Страница 55: ...de de la clé Allen 66 Utiliser la clé Allen 66 pour dévisser les 2 vis de 16 mm 9 les 2 rondelles à ressorts 8 et les 2 rondelles courbées 7 du guidon 6 Mettre les vis et les rondelles sur le côté ils seront utiles ultérieurement 66 Clé Allen 6mm 8 Rondelle à ressort 8mm 2pcs 9 Vis 16mm 2pcs 8 Rondelle à ressort 8mm 2pcs ...

Страница 56: ...utiliser les clés 66 Enfin enlevez les 2 vis 43 les 2 rondelles 41 et les rondelles courbées 46 de la poignée réglable 47 à l aide de la clé Allen 67 Par la suite installer la poignée réglable 47 à l axe de levier de réglage 44 avec les vis et les rondelles qui viennent d être retirées de la poignée de réglage 47 à l aide de la clé Allen 67 65 Clé 13 14 15mm 41 Rondelle 6mm 2pcs 46 Rondelle en arc...

Страница 57: ... 66 Utiliser la clé Allen 66 pour dévisser les 4 vis de 16 mm 9 les 4 rondelles à ressorts 8 et les 4 rondelles courbées 7 de la glissière de siège 35 Installer le siège 62 à la tige de siège 60 avec 4 vis 9 4 rondelles 17 à l aide de la clé Allen 66 9 Vis 16mm 8pcs 8 Rondelle à ressort 8mm 4pcs 17 Rondelle 8mm 10pcs 66 Clé Allen 6mm 8PCS 69 Bolt 20mm 4PCS ...

Страница 58: ...ce du guidon 6 avec 2 boulons 55 2 rondelles 17 et 2 écrous 51 Ensuite brancher le fil de capteur à fréquence cardiaque 53 au fil 1 du châssis principal fig 2 64 60 55 54 17 51 53 40 41 63 49 8 17 Rondelle 8mm 2pcs 65 Clé 13 14 15mm 66 Clé Allen 6mm 63 Vis 40mm 4pcs 40 Rondelle 6mm 4pcs 41 Rondelle 6mm 4pcs 55 Boulon 45mm 2pcs 51 Écrou 2pcs 8 Rondelle à ressort 8mm 2pcs ...

Страница 59: ...s le trou arrière de la console 1 Il faut déplacer l équipement en tenant la barre à l arrière du stabilisateur arrière et en le soulevant jusqu à ce que les roues touchent le sol Ensuite déplacer l équipement à l emplacement désiré avant d ajuster son niveau à l aide des pieds ajustables au bas du stabilisateur arrière Brancher l adapteur 29 à une prise murale avant de le brancher à l avant de l ...

Страница 60: ...ble 47 Poussez la Poignée réglable 47 vers le sol puis faites glisser le siège vers l avant ou l arrière dans une position confortable Après ajustement du siège bloquer en position en tirant la Poignée réglable 47 La poignée doit être parallèle au sol 47 ...

Страница 61: ...61 CROQUIS EN VUE ÉCLATÉE ...

Страница 62: ...62 CROQUIS EN VUE ÉCLATÉE ...

Страница 63: ...1 R300II 27 Capuchon du stabilisateur arrière droit 1 R300II 87 Plaque de la courroie 1 R300II 28 Levier de la pédale 2 R300II 88 Aimant 1 R300II 29 Adaptateur 1 R300II 89 Courroie 1 R300II 30 Rail de la glissière 1 R300II 90 Ressort de tension 1 R300II 31 Coussin 2 R300II 91 Écrou en nylon 1 R300II 32 Rondelle 4 mm 2 R300II 92 Support de la roue d inertie 1 R300II 33 Vis ST 19 mm 11 R300II 93 Ron...

Страница 64: ...înement C Fonction de réveil L ordinateur entre en mode de veille l écran s éteint lorsqu il ne reçoit aucun signal et qu aucune touche n est activée durant 4 minutes FONCTIONS ET CARACTÉRISTIQUES 1 TEMPS Affiche le temps d entraînement qui s est écoulé en minutes et en secondes L ordinateur compte automatiquement de 0 00 à 99 59 en intervalles d une seconde Vous pouvez aussi programmer l ordinate...

Страница 65: ...n signal de pouls il affiche P dans la fenêtre PULSE pouls Si la fenêtre de message affiche ERR appuyez de nouveau sur la touche PULSE RECOVERY récupération et vérifiez que vos mains sont bien en place sur le capteur de pouls FONCTIONS DES TOUCHES Il y a six touches de fonction dont voici la description 1 Touche START STOP marche arrêt Fonction de démarrage rapide Vous permet de démarrer l ordinat...

Страница 66: ...oins pour régler la durée de l exercice Appuyez sur ENTER entrée pour confirmer la durée voulue 4 Le voyant DISTANCE clignote appuyez sur les touches UP plus ou DOWN moins pour régler la DISTANCE visée Appuyez sur ENTER entrée pour confirmer la distance voulue 5 Le voyant CALORIES clignote appuyez sur les touches UP plus ou DOWN moins pour régler le nombre de calories à brûler durant l exercice Ap...

Страница 67: ... entraînement 4 Quand la colonne 2 clignotera appuyer sur les touches UP DOWN afin de personnaliser votre profil d entraînement Ensuite appuyer sur la touche ENTER pour sélectionner la deuxième colonne de la programmation du programme d entraînement 5 Répéter les mêmes étapes pour les étapes 3 et 4 pour terminer la configuration du profil d entraînement Quand vous serez arrivé à la dixième program...

Страница 68: ...ardiaque mesuré par la machine Par exemple la résistance augmenterait à toutes les 20 secondes quand la fréquence cardiaque est inférieure au TARGET H R C fréquence cardiaque visée Ainsi la résistance diminuerait à toutes les 20 secondes quand la fréquence cardiaque est supérieure au TARGET H R C Opérations 1 Appuyer les touches UP DOWN pour sélectionner l un des programmes de contrôle de fréquenc...

Страница 69: ...a touche ENTER entrée pour confirmer votre sexe Le sexe est réglé par défaut à masculin 6 Le voyant AGE âge clignote appuyez sur les touches UP plus ou DOWN moins pour régler votre âge Appuyez sur la touche ENTER entrée pour confirmer votre âge L âge est réglé par défaut à 35 ans 7 Appuyez sur la touche START STOP marche arrêt pour commencer le calcul de la masse grasse Si la fenêtre affiche un E ...

Страница 70: ...les signaux de sortie se coupent aussi E2 ERREUR 2 L ordinateur affiche immédiatement un message E2 au démarrage après avoir lu les données en mémoire si le code d identification est incorrect ou que le circuit intégré de la mémoire est endommagé E3 ERREUR 3 Moteur défectueux Données techniques de l adaptateur Disponibilité à l entrée 110 V 50 Hz ou 60 Hz Sortie 6V c c 0 5 1 A AFFICHAGE DES GRAPHI...

Страница 71: ...ur 2 Programme 16 Utilisateur 3 Programme 17 Utilisateur 4 Programme 18 Fréquence cardiaque à 55 Programme 19 Fréquence cardiaque à 65 Programme 20 Fréquence cardiaque à 75 PROGRAMMES DÉFINIS PAR L UTILISATEUR PROGRAMMES DE PROFILS DE FRÉQUENCE CARDIAQUE ...

Страница 72: ...raînement 40 minutes Durée de l entraînement 40 minutes Durée de l entraînement 40 minutes Durée de l entraînement 40 minutes Durée de l entraînement 20 minutes Durée de l entraînement 20 minutes MASSE GRASSE MODE ARRÊT Programme 23 Un des profils suivant s affiche automatiquement après le calcul de la masse grasse MASSE GRASSE MODE MARCHE ...

Страница 73: ...vez toutefois nettoyer la surface extérieure Utilisez pour ce faire un linge doux humecté avec de l eau tiède N utilisez pas de flacons en aérosol ou à pompe car ils risqueraient de déposer des sédiments sur la console L utilisation de produits chimiques durs en détruirait la couche protectrice et causerait une accumulation de statique qui risquerait d endommager certains des composants MAINTENANC...

Страница 74: ...par un usage normal les réparations devenues nécessaires par suite d un usage abusif de négligence ou d un fonctionnement ou d un entretien non conformes aux instructions formulées dans le Guide d utilisation GARANTIE Bladez Fitness BH North America Corporation 20155 Ellipse Foothill Ranch CA 92610 Téléphone 949 206 0330 sans frais 866 325 2339 télécopieur 949 206 0013 Web www bladezfitness com Du...

Отзывы: