background image

IMPORTANT SAFETY ADVICE

KEEP THESE INSTRUCTIONS SAFE FOR FUTURE USE

1

Carefully read through the instructions contained in this manual. It provides you with important

information about assembly, safety and use of the machine.

1 This unit has been designed for home use. The weight of the user must not exceed 275 lbs. (125

kg.)

2 Parents and/or those responsible for children should always take their curious nature into account

and how this can often lead to hazardous situations and behavior resulting in accidents. Under no

circumstances should this appliance be used as a toy.

3 The owner is responsible for ensuring that anyone who uses the machine is duly informed about the

necessary precautions.

PRECAUTIONS

This bike has been designed and constructed to provide maximum safety. Nevertheless, certain
precautions should be taken when using exercise equipment. Read the whole manual before assembling
and using the bike. The following safety precautions should also be observed:
1. Keep children or pets away from this equipment at all times. DO NOT leave them unsupervised in the

room where this bike is kept.

2. This bike does not free-wheel. You can stop the bike immediately by pushing down the emergency

brake on the tension knob while you are exercising.

3. It can only be used by one person at a time.
4. If you experience dizziness, nausea, chest pains or any other symptom while using this appliance

STOP the exercise. SEEK MEDICAL ATTENTION IMMEDIATELY!

5. Use the unit on a mat placed level, solid surface. Adjust the stabilizer for assure stability.
6. Keep your hands well away from any of the moving parts.
7. Wear clothing suitable for doing exercise. Do not use baggy clothing that might get caught up in the

bike. Always wear running shoes or trainers when using the machine.

8. This appliance must only be used for the purposes described in this manual. DO NOT use accessories

that are not recommended by the manufacturer.

9. Do not place sharp objects near the machine.
10. Disabled person should not use the machine without the assistance of a qualified trainer or a doctor.
11. Do warm up stretching exercises before using the equipment.
12. Do not use the bike if it is not working correctly
13. Review all the warnings affixed to the machine and replace all the labels if damaged, illegible, or

removed.

14. Functional and visual inspections of the equipment shall be made after assembly is complete.
15. Don’t exceed the MAX mark when you’re adjusting the handlebar post or seat post.

Содержание 21976

Страница 1: ...customarily done on this equipment should not be undertaken without first consulting a physician No specific health claims are made or implied as they relate to the equipment IMPORTANT Read all instru...

Страница 2: ...TABLE OF CONTENTS Training 3 Assembly Instructions 9 Monitor Operations 13 Maintenance 14 Troubleshooting 15 Exploded View 16 Parts List 17 Safety 1 Warranty 18 Pre Assembly Instructions 8...

Страница 3: ...l You can stop the bike immediately by pushing down the emergency brake on the tension knob while you are exercising 3 It can only be used by one person at a time 4 If you experience dizziness nausea...

Страница 4: ...d over time 20 This bike is not suitable for therapeutic use Consult a physician prior to starting an exercise program 21 This bike should only be used after a thorough review of the assembly operatio...

Страница 5: ...of physical fitness It is the efficient functioning of the heart and lungs Aerobic Fitness The largest amount of oxygen that you can use per minute during exercise is called your maximum oxygen uptake...

Страница 6: ...is not returned promptly to the central circulation pooling of blood may occur in the muscles Heart Rate As you exercise the rate at which your heart beat increases This is often used as a measure of...

Страница 7: ...slight soreness in most major muscle groups This is quite normal and will disappear in a matter of days If you experience major discomfort you may be on a program that is too advanced or you have incr...

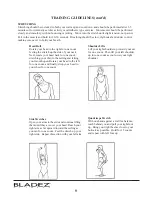
Страница 8: ...ead back for one count stretching your chin to the ceiling and letting your mouth open Rotate your head to the left for one count and finally drop your head to your chest for one count Shoulder Lifts...

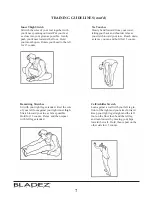
Страница 9: ...ward your toes Reach down as far as you can and hold for 15 counts Hamstring Stretches Sit with your right leg extended Rest the sole of your left foot against your right inner thigh Stretch toward yo...

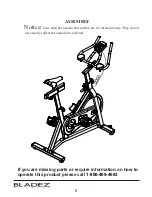
Страница 10: ...e missing parts or require information on how to operate this product please call 1 800 469 4663 Notice Line sketches used in this section are for reference only They do not reflect the actual unit in...

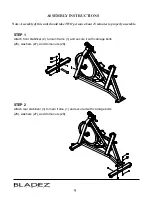
Страница 11: ...and secure it with carriage bolts 26 washers 27 and dome nuts 28 STEP 2 Attach rear stabilizer 3 to main frame 1 and secure it with carriage bolts 26 washers 27 and dome nuts 28 9 Note Assembly of th...

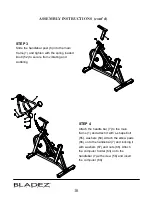
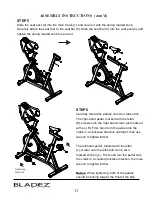
Страница 12: ...52 to secure from vibrating and wobbling STEP 4 Attach the handle bar 7 to the main frame 1 and attach it with L shape bolt 55 washers 54 Attach the elbow pads 66 on to the handlebar 7 and locking it...

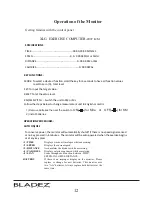
Страница 13: ...e is no speed signal sensed or no key pressed in 4 minutes The monitor will be auto powered when the exercise begins or at any key press 1 TIME Displays work out time lapse while exercising 2 SPEED Di...

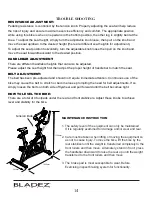
Страница 14: ...tter R screws onto the right hand crank also marked with an R First hand turn the pedal onto the crank in a clockwise direction until tight then use wrench to tighten further The left hand pedal marke...

Страница 15: ...the original finish Cleaning metal surfaces may be accomplished by using a soft cotton or terry cloth rag with a light application of car wax Do not use aerosol spray or pump bottles as they may depo...

Страница 16: ...belt has been pre adjusted and should not require immediate attention Continuous use of the bike may cause the belt to stretch or become loose prompting the need for belt adjustments If so simply loo...

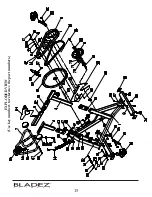
Страница 17: ...15 EXPLODED VIEW Use key numbers to reference the part numbers...

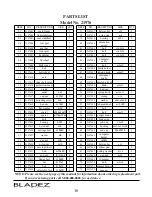
Страница 18: ...2 1 15 2197615 crank 1 51 2197651 End cap 2 16 2197616 pedal set 1 52 2197652 spring knob m16x1 5 3 17 2197617 cap nut m12x1 2 53 2197653 clamp 14 1 18 2197618 adjusting screw m6 2 54 2197654 washer 3...

Страница 19: ...protection agreement U S A or maintenance agreement Canada on a product serviced by Sears 1 800 827 6655 U S A 1 800 361 6665 Canada Para pedir servicio de reparaci n a domicilio y para ordenar pieza...

Отзывы: