Blackmagic Design - Leading the creative video revolution
™
Windows XP
™
Getting Connected: Display Settings
1. After completing the software and hardware installation, connect your
DeckLink card to an external device such as a broadcast monitor, tape
deck or Blackmagic HDLink. Connection diagrams, for the DeckLink
family of cards, can be found towards the end of this manual from page
21 onwards.
2. Go to
Control Panels -> Displays
and click on the Settings tab.
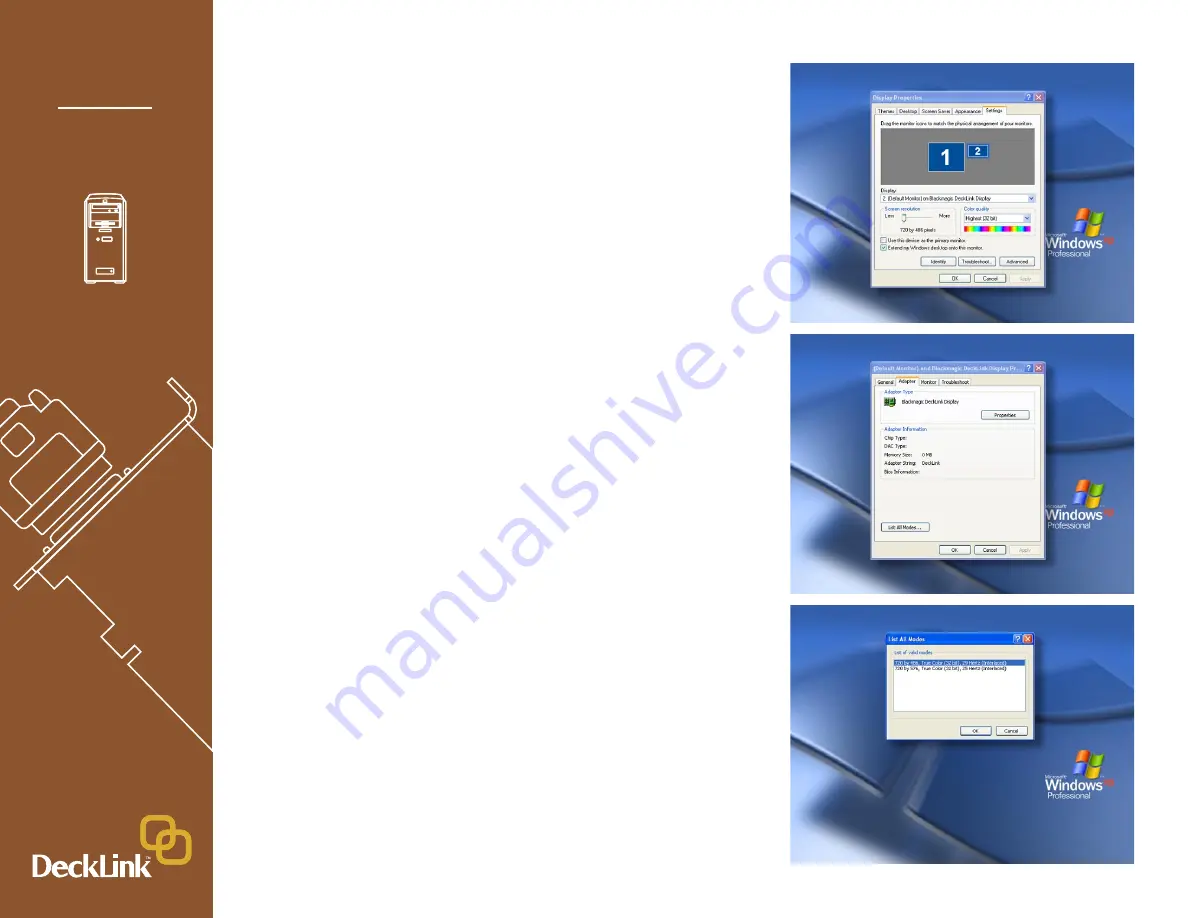
Select the DeckLink display which is shown as “Display 2” in the
accompanying screenshot of the “Display Properties.” In this diagram,
the Screen Resolution is set to 720 x 486 which is the setting for
NTSC. If you need to switch to PAL or a HDTV resolution, click on the
“Advanced” button.
3. When the new window opens, click on the Adapter tab and it should
list “Blackmagic DeckLink Display” for the Adapter Type. Click the “List
All Modes” button shown in the Default Monitor screenshot.
4. The “List All Modes” window will show you all of the modes supported
by your model of DeckLink card. The standard definition DeckLink
cards will list two modes, NTSC (720 x 486, 29 Hz) and PAL (720 x
576, 25 Hz), as shown in the screenshot. The high definition DeckLink
cards will list many more modes.
Select the desired mode and then click OK. In the Default Monitor
window, click “Apply.”
Note:
DeckLink HD cards can display only 720x486 or 720x576 in
desktop mode.
11


