background image

SC-16 User Manual v1.3 June 2017 


To utilise button activation of the SC-16 you must wire buttons to 
the designated terminals. Simply insert button wire ends and screw 
in place using the provided screwdriver. 


Connecting Volume Buttons 

The SC-16 has dedicated volume terminals, allowing you to give 
visitors the ability to increase or lower the volume.  Connect 2 
buttons to the designated terminal to do so. Simply insert button 
wire ends and screw in place with the provided screwdriver. 
 

Connecting Lighting 

To add lighting (we recommend LED strip lighting) to the SC-16 you 
must wire them to the designated ‘GPIO / 12v Out’ terminal. As 
standard the lights will be activated when content is playing and 
deactivated when content stops. 
 

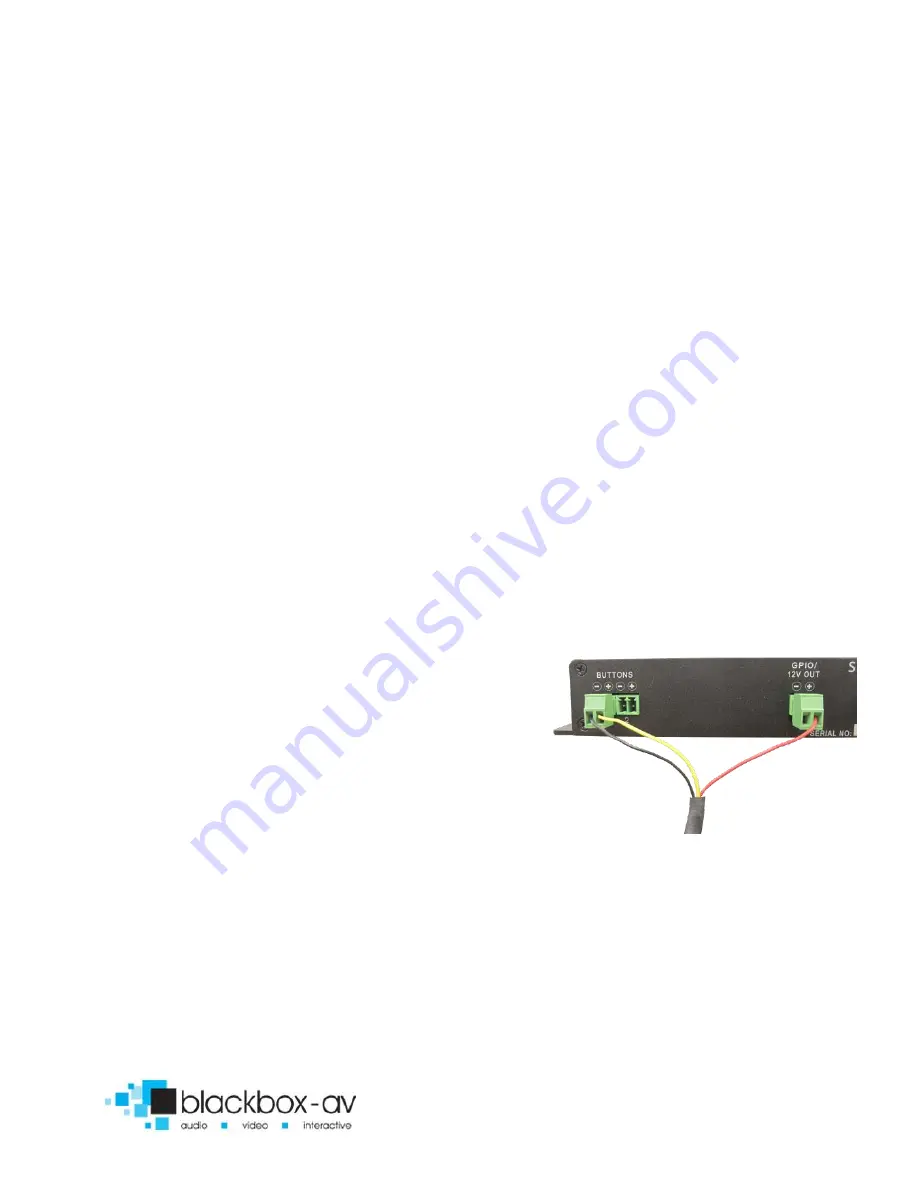
Connect PIR 

(SC-2 pictured)


The SC-16 can be PIR (Passive Infra-red) 
activated, to add a PIR you must wire it 
into the button 1 terminal with the 
power connection wired into the + ‘12v 
Out’ terminal (as pictured on a sc-2). 
 

Add content to your SC-16 

To add content to your SC-16 you must first add it to the supplied 
MicroSD Card and insert this into the MicroSD slot: see the 
‘Programming Content’ section below for more details. 
 

Configuring the SC-16 

Содержание SC-8L

Страница 1: ...SoundClip 16 Manual v1 3 June 2017 ...

Страница 2: ...ne 2017 3 Contents 1 What is the SC 16 4 2 Supported Media Formats 4 3 In the Box 5 4 Setup Instructions 6 5 Programming Content 9 6 Content Configuration 11 7 Delay and Master Volume Control 14 8 Status LED 15 Update Notes 16 ...

Страница 3: ...is the SC 16 The SoundClip 16 is from our range of compact stand alone high quality stereo audio players It can be used to present audio through headphones via two 3 5mm audio jacks or 2 speakers via wired terminal The SC 16 can present audio in a looping fashion or be activated via 16 buttons with one button for a single message each It can also work in a Play all function upon button PIR activat...

Страница 4: ...u have issues playing any audio content we recommend you convert your audio using Format Factory This can be downloaded for free here http www pcfreetime com 3 In the Box 1 SoundClip 16 2 Terminal Blocks 3 Power Supply 4 Plug Adapters 5 Screwdriver MicroSD to USB Converter MicroSD Card ...

Страница 5: ... following The SoundClip 16 12V DC Power Adapter Buttons or PIR if using button or PIR activated content not included Headphones or speakers not included MicroSD Card with content on see programming section Terminal blocks for buttons and speakers Screwdriver for wiring terminal blocks REAR VIEW FRONT VIEW ...

Страница 6: ... Connecting headphones to your SC 16 The SC 16 can support up to 2 headphones with the built in 3 5mm jack simply connect them via the headphone 1 and 2 output Connecting AutoPlay headphones device The SC 16 can support our range of AutoPlay handsets and devices supplied separately simply connect the device as explained in the separate manual supplied with said device Connecting Speakers Wire spea...

Страница 7: ...ver Connecting Lighting To add lighting we recommend LED strip lighting to the SC 16 you must wire them to the designated GPIO 12v Out terminal As standard the lights will be activated when content is playing and deactivated when content stops Connect PIR SC 2 pictured The SC 16 can be PIR Passive Infra red activated to add a PIR you must wire it into the button 1 terminal with the power connectio...

Страница 8: ...ports up to 99 audio files 2 A PC or laptop with Windows OS 3 MicroSD Card supplied 4 MicroSD to USB convertor supplied How the content you add will be played looping button activated etc will depend on your configuration choices find out more on this in the following Content Configuration section The name of your audio files when added to the MicroSD card will determine the order in which they pl...

Страница 9: ...s long as they are properly named Step1 Prepare your audio files for transfer we recommend you use mp3 files however wav files are also supported Rename them 001 002 003 etc depending on the order you want them played Step2 Insert the MicroSD card into the MicroSD USB convertor and connect to your PC Step3 Transfer all of your content onto the SD card ...

Страница 10: ...s content is played is set via the dip switches located on the front of the device Using a screwdriver click these switches into either a Down or Up position to turn On or Off Dip Switch Settings Down On Up Off 1 Interruptible Playback When switch 1 is in the Down on position the SC 16 is set to uninterruptible this means when a file starts to play it will finish no matter if an additional input i...

Страница 11: ...ith switch 1 set to Up off 4 Next Previous When switch 4 is in the Down on position the SC 16 is in Next Previous mode This means users can navigate through all files on the MicroSD card by pressing button 1 for next and button 2 for previous When powered on in this mode the SC 16 will always start on audio file 1 it will then remain on the last file it played 5 AutoPlay Auto Retract Mode If using...

Страница 12: ...io file a new file can be activated When switch 7 is in the Up off position the control ranges from 0 60 seconds When switch 7 is in the Down on position the delay control will range from 0 4 minutes 8 Currently Unassigned on this Model This will put the SC 8L into programming mode for the lighting controller However in the SC 2 8 16 the lighting simply turns on when audio is being played and off ...

Страница 13: ...o specify how long between playing content the unit must wait before more content can play This is mainly used in conjunction with a PIR input establishing how long between activation the unit must wait to play more content However it can also be used with all other modes if desired Switch 7 when Off up makes the delay control range from 0 60 seconds when On down it ranges from 0 4 minutes Master ...

Страница 14: ...ough button controls before deciding what the maximum volume you require is 8 Status LED Red On Off The red LED will be lit when unit is powered on and off when unit is powered down Green Status The Green LED will be lit when content is being played and blink on off in 1 second intervals when unit is in Delay Mode to indicate this ...

Страница 15: ... Minor formatting changes V1 2 AutoPlay Support Added autoplay support functionality Button 2 becomes next track in AutoPlay Mode Delay timer sets when to revert to track 001 in above modes V1 3 AutoPlay Instructions Added instructions for AutoPlay range ...

Отзывы: