


12
USING THE INFLATOR
Before starting run through this simple list;
1. Fully assembled.
2. Drain tap – open and drain tank
3. Drain tap – close fully
4. Check power lead for any damage. If damaged
have replaced by an authorised service centre.
5. Plug inflator into a standard 240V 10Amp AC
power point and turn ON.
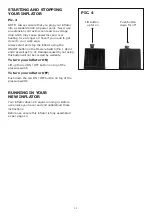
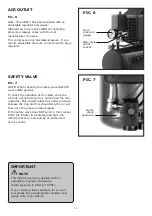
6. Lift the red button to turn ON, see page 11,
Pic.4.
7. Allow the inflator to fill the air tank.
8. Turn the inflator OFF.
9. Turn the power point OFF and disconnect the
power lead from the power point.
10. Connect your air hose and air tools.
11. Reconnect to the power lead to the power
point and turn ON.
12. Turn your inflator ON.
13. Once turned on and you begin using the
connected air tools the inflator will start and
stop without warning. This is controlled by the
pressure switch. These pressure settings are
factory set and should not be changed.
Pumping starts at (minimum) 85PSI and stops
at (maximum) 115PSI. Once the initial pump
up stage has finished you can use the inflator.
Remember air pressure is not regulated. If low
pressure is required buy a regulator.
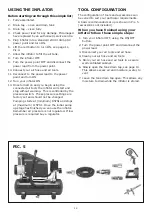
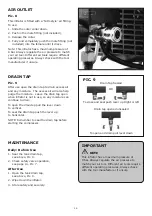
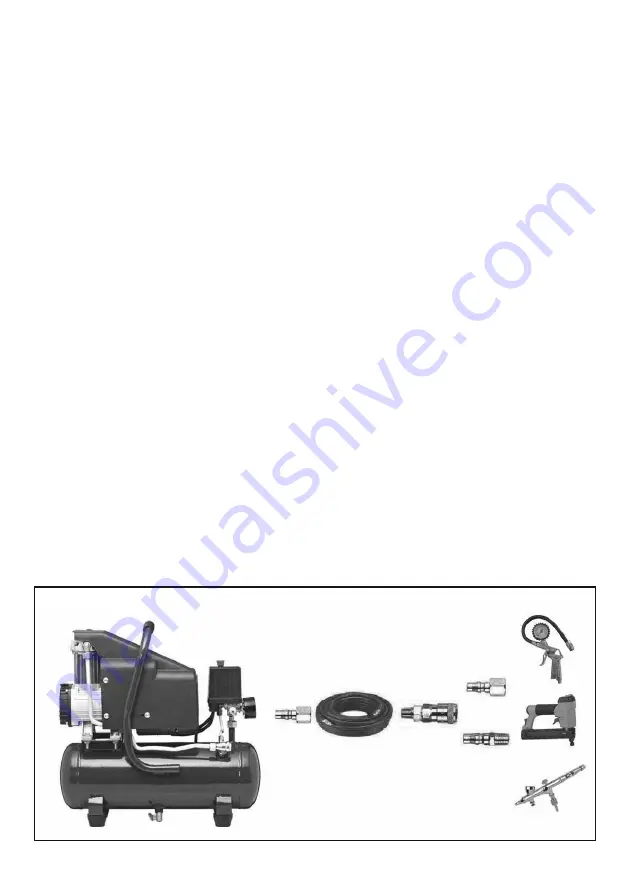
TOOL CONFIGURATION
The configuration of tools and accessories can
be varied to suit your particular requirements.
A basic recommended set up is shown in Pic. 5
(accessories not included).
When you have finished using your
inflator follow these simple steps:
1. Turn your inflator OFF, using the ON/OFF
button.
2. Turn the power point OFF and disconnect the
power lead.
3. Disconnect your air tools and air hose.
4. Clean your air hose and air tools.
5. Store your air hose and air tools in a secure
well ventilated cabinet.
6. Slowly open the tank drain tap, see page 14.
This allows excess air and moisture, water, to
vent.
7. Leave the tank drain tap open. This allows any
moisture to drain while the inflator is stored.
PIC. 5


