background image

14

15

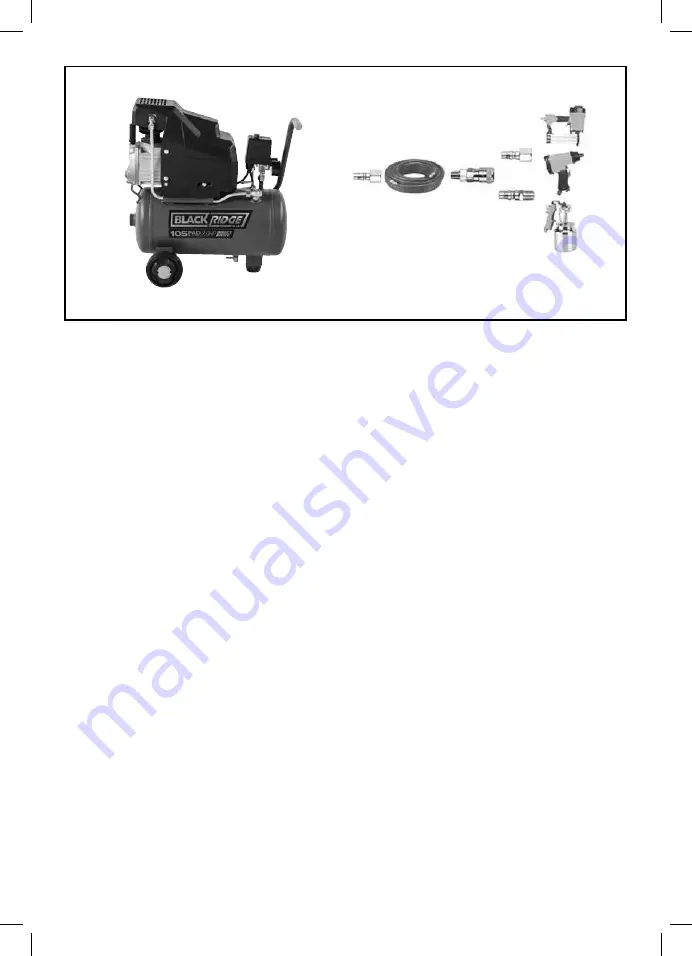
PIC. 9

The configuration of tools and accessories can be varied to 
suit your particular requirements. A basic recommended set 
up is shown in Pic. 9.

When you have finished using your air compressor 

follow these simple steps;

1.   Turn your air compressor OFF, using the ON/OFF switch.
2.   Turn the power point OFF and disconnect the power 

lead.

3.   Disconnect your air tools and air hose.
4.   Clean your air hose and air tools.
5.   Store your air hose and air tools in a secure well 

ventilated cabinet.

6.   Slowly open the tank drain tap, see page 16. This allows 

excess air and moisture, water, to vent.

7.   Leave the tank drain tap open. This allows any moisture 

to drain while the air compressor is stored.

NOTE: Use of a water trap may be of benefit to ensure no water or

moisture reaches your air tool.

Above accessories and tools Not supplied, purchased separately.

Содержание BR105D

Страница 1: ...arts or product information please contact Smart Marketing Group Pty Ltd AUST 1300 660 457 N Z 0800 474 876 Recyclable Cardboard Portable compressor for general light duty task around the home MODEL N...

Страница 2: ...ed air tools and accessories above are not included with this air compressor Section Page Contents 2 Suggested Applications 2 Introduction 3 Guarantee 3 4 General Safety Instructions 5 7 Electrical In...

Страница 3: ...f the product with parts and components of similar quality grade and composition where an identical part or component is not available Products presented for repair may be replaced by refurbished prod...

Страница 4: ...where an identical part or component is not available Products presented for repair may be replaced by refurbished products of the same type rather than being repaired Refurbished parts may be used to...

Страница 5: ...for use by young children or infirm persons without supervision The air compressor and tools should be kept out of reach of children preferably stored or locked in a secure cabinet or room when not i...

Страница 6: ...dust at all times Blocked ventilation slots can cause overheating and damage to the motor DISCONNECT AIR COMPRESSOR Ensure that the air compressor is disconnected from the mains supply when not in us...

Страница 7: ...o not have safety lenses Footwear Where there is the risk of heavy objects or if there is a risk of slipping on wet or slippery floors suitable non slip safety footwear should be worn Protect your fee...

Страница 8: ...re that the air compressor is disconnected from the mains supply when not in use before servicing lubricating making changes and when changing attachments such as air hoses tools Always use the correc...

Страница 9: ...n tap 8 Rubber stopper 9 Safety Valve 10 Tank pressure gauge large 11 Front handle 12 Pressure switch 13 On Off button red colour 14 Outlet pressure gauge small 15 Air outlet nitto style socket 16 Out...

Страница 10: ...nd up about 20cm hold for about 1 minute and place back on ground Look at the sight glass and ensure the oil is above the red dot on the sight glass as per the OIL LEVEL GAUGE label see Pic 3 and Pic...

Страница 11: ...the bracket located on the bottom of the tank 1 Undo the nut and remove the washer 2 Push through the bracket and replace the washer 3 Tighten the nut Pic 5 WHEELS 1 Insert a bolt through the wheel 2...

Страница 12: ...y warranty To turn your air compressor ON Lift up the red ON OFF switch on top of the pressure switch To turn your air compressor OFF Push down the red ON OFF switch on top of the pressure switch AIR...

Страница 13: ...inflator does not get covered in dust or paint use a longer air hose to ensure inflator is in clean air USING THE AIR COMPRESSOR Before starting run through this simple list 1 Transport plug removed...

Страница 14: ...the power lead 3 Disconnect your air tools and air hose 4 Clean your air hose and air tools 5 Store your air hose and air tools in a secure well ventilated cabinet 6 Slowly open the tank drain tap se...

Страница 15: ...t the correct working pressure Note Different air tools require different operating pressures Always check with the tool manufacturer if unsure SAFETY VALVE Pic 11 NOTE When checking the safety valve...

Страница 16: ...lots are kept clean and free from dust dirt build up STORAGE When storing ensure the air tank has been emptied as per Drain Tap above Always store away from children preferable in a locked room Drain...

Страница 17: ...4 876 PIC 14 MAINTENANCE Daily Before use 1 Seal the tank drain tap see Pic 13 2 Check the oil level see page 10 Pic 4 3 Check safety valve operation see page 16 Pic 12 After use 1 Open the tank drain...

Страница 18: ...sher 2 95 BRC95RS Part Description Qty SMG Part No 14 Screw 2 95 BRC95RS 15 Unloading Tube Nut 2 95 BRC95UT 15 Unloading Tube 1 95 BRC95UT 19 Safety Valve 1 95 BRC95SPV 20 Pressure Gauge Large 1 95 BR...

Страница 19: ...19 NOTES...

Страница 20: ...equired to make any claims under the 12 month warranty Specifications Air Compressor BR105D Voltage 240V AC 50Hz Motor Electric 2 HP Wattage 1500W No Load Speed 2800 RPM FAD Free Air Delivery 105L per...

Отзывы: