background image

wel

c

ome

c

ontent

s

inst

all

ation 


&

op

era

tion

sp

ecial


c

onfigura

tion

fur

t

er

informa

tion

®

Installation & Operation

Connections

Installation of the ServSwitch CX Remote modules is straightforward and minimal 
configuration is required in most cases. Each of the (up to) two moulded SAMs 
(

Server Access Modules

) connect directly to a computer system, while the remote 

ServSwitch CX Remote module is at the other end of the twisted pair cable run(s) 
and attaches to the keyboard, mouse, etc.
ServSwitch CX Remote receiver units can also be used with ServSwitch CX digital 
switches to allow one or more user consoles to be placed remotely from the 
central unit.

• 

Connections.at.each.SAM.(local).unit

• 

Connections.at.the.Servswitch.CX.Remote.(PS/2).module

• 

Connections.at.the.Servswitch.CX.Remote.USB.module

Cable length advice

The ServSwitch CX Remote modules support twisted-pair structured cabling 
within categories 5, 5e and 6. Of these three cable types, category 5 generally 
provides the best transmission of video signals because its four pairs of 
conductors are the most evenly twisted. 
Category 5e and 6 cables use conductor pairs that are unevenly twisted in 
order to combat interference effects encountered within higher frequency 
networks. While these uneven twists work well for Ethernet signals, they 
can impose problems for the video signals transceived by the ServSwitch CX 
Remote modules. The SAMs send the red, green and blue video signals on 
separate twisted pairs within the cable. If any of the colour signals are made to 
travel slightly further or shorter distances than the others, the result is seen as 
misaligned colours on screen. This is called 

skew

 and becomes more noticeable 

as cable runs become longer and screen resolutions/refresh rates increase. 
As an approximate guide, you should expect the following maximum cable 
lengths:

Resolution 

ServSwitch CX Remote  

ServSwitch CX Remote 


without de-skew 

with de-skew 

1920 x 1200  

50m 

50m

1600 x 1200 

100m 

200m

1280 x 1024 

300m


When used with an ServSwitch CX switch

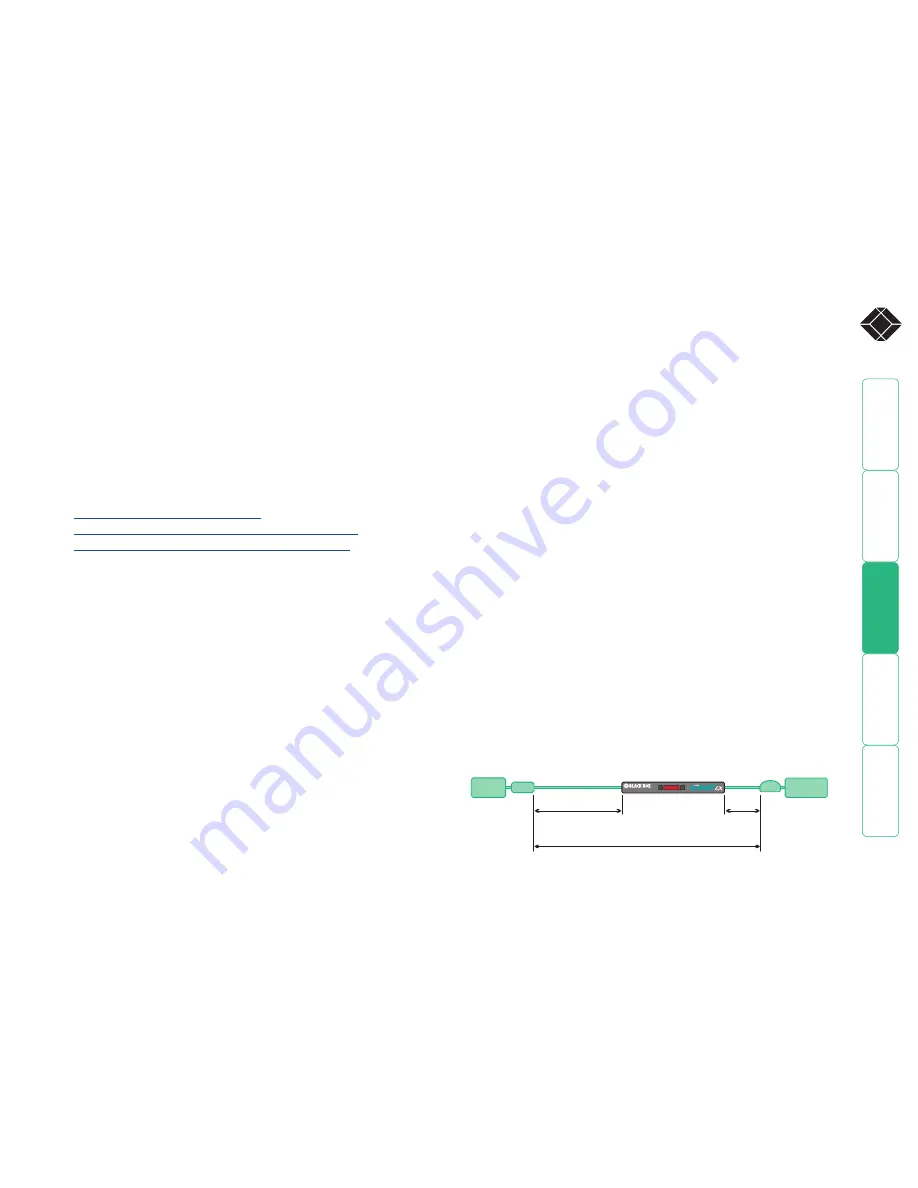
It is possible to locate each SAM up to 50 metres from the ServSwitch CX 
switch. This distance must be taken into account when planning the cable run 
from the ServSwitch CX Remote to the CX switch. The total distance from any 
ServSwitch CX Remote to any SAM must not exceed 980 feet (300 metres) or 
less if an ServSwitch CX Remote without de-skew is used. 

HT

REMOTE

USER

Overall maximum length between any remote user and

any host system must not exceed 300 metres (980 feet)

300 metres (980 feet)

maximum

50 metres
(160 feet)
maximum

CX R

SAM

SERVER

SYSTEM

®

724-746-5500

®

Содержание ServSwitch KV1400A

Страница 1: ...Call 724 746 5500 or fax 724 746 0746 Mailing address Black Box Corporation 1000 Park Drive Lawrence PA 15055 1018 Web site www blackbox com E mail info blackbox com CUSTOMER SUPPORT INFORMATION Novem...

Страница 2: ...10 Entering using and exiting configuration mode 10 Password setting 11 Mouse switching control USB models 11 Hot plugging PS 2 style connections and mouse restoration 12 Which restore setting do I us...

Страница 3: ...ows you to make adjustments to the sharpness and brightness settings to suit your own preferences Audio equipped A or AS models required for speakers Skew compensation AS models required for full 980...

Страница 4: ...de cable 4 way jack connector to 9 way D type male serial connector not pictured Server Access Module supplied items Video PS 2 style mouse PS 2 style keyboard Audio USB keyboard mouse Sun keyboard mo...

Страница 5: ...gher frequency networks While these uneven twists work well for Ethernet signals they can impose problems for the video signals transceived by the ServSwitch CX Remote modules The SAMs send the red gr...

Страница 6: ...SAM The other end of each cable run will attach to the remote ServSwitch CX Remote module Server Access Module Category 5 5e or 6 cable to ServSwitch CX Remote module Green indicator power present Yel...

Страница 7: ...m mouse From keyboard From video monitor CX Remote module 4 Insert the output connector of the power supply into the socket at the front edge of the CX Remote module labelled POWER 5 Insert the IEC co...

Страница 8: ...ule labelled PWR 5 Insert the IEC connector of the supplied power lead into the corresponding socket of the power supply Connect the other end of the power lead to a nearby mains socket 6 Where necess...

Страница 9: ...1 OFF Normal operation ON Before power is applied Places the ServSwitch CX Remote module into flash upgrade mode so that the internal software can be changed Please see the Flash upgrade section in th...

Страница 10: ...CX Remote module will be lit To unlock the system 1 Enter the correct password and press Note Passwords are NOT case sensitive Note If an invalid password has been entered and the keyboard indicators...

Страница 11: ...he standard and hotkeys are also needed for computer tasks you can change them for another combination using switches 2 and 3 on the ServSwitch CX Remote remote module 2 OFF 3 OFF Hotkeys and default...

Страница 12: ...t function covered within the Miscellaneous settings section the ServSwitch CX Remote USB model may also be reset using this method 1 Connect the ServSwitch CX Remote module to a computer in the same...

Страница 13: ...t is likely to support the Intellimouse format If you have a Microsoft mouse then it will usually state that it is an Intellimouse on its underside label Recognising an Intellimouse driver Before hot...

Страница 14: ...d indicators Num Lock Caps Lock and Scroll Lock will now begin to flash in sequence The speed of the sequence indicates the level of the sharpness adjustment currently applied the slower the rate the...

Страница 15: ...Data signal Red video signal Green video signal Blue video signal 7 3 4 1 7 3 4 1 To use skew adjustment 1 Display a skew pattern on the appropriate computer You can either use the supplied skew patte...

Страница 16: ...responding keyboard indicators will flash rapidly to show which channel is currently selected for adjustment Num Lock for Red Caps Lock for Green and Scroll Lock for Blue Advance colour timing Retard...

Страница 17: ...llows you to check the current revision of the ServSwitch CX Remote USB firmware PC USB VIDEO PS 2 KEYBOARD PS 2 MOUSE PSU CX Remote SAM Leave the video monitor connected to the computer so that you c...

Страница 18: ...nd to establish the existing firmware details Note The computer to which each SAM is connected must be powered before the respective SAM can be accessed If the application cannot contact the module re...

Страница 19: ...is greater than the Current firmware version 5 To begin the upgrade process click the Upload Now button The progress will be shown within the dialog Should you decide not to continue with the upload...

Страница 20: ...ocket outlet close to the ServSwitch CX Remote module that it is powering Replace the power adapter with a manufacturer approved type only Do not use the power adapter if the power adapter case become...

Страница 21: ...b Increase the separation between the equipment and the receiver c Connect the equipment to an outlet on a circuit different from that to which the receiver is connected d Consult the supplier or an e...

Страница 22: ...ort the need for service to the supplier or to an authorized agent Certification notice for equipment used in Canada The Canadian Department of Communications label identifies certified equipment This...

Страница 23: ...netes que impidan el flujo de aire por los orificios de ventilaci n 10 El equipo el ctrico deber ser situado fuera del alcance de fuentes de calor como radiadores registros de calor estufas u otros ap...

Страница 24: ...uration further information 23 www ctxd com Documentation by 2007 Black Box Corporation All trademarks are acknowledged Black Box Corporation 1000 Park Drive Lawrence PA 15055 1018 United States of Am...

Страница 25: ...www blackbox fr 33 1 45 606 717 33 1 45 606 747 tech blackbox fr Germany www black box de 49 811 5541 110 49 811 5541 499 techsupp black box de Italy www blackbox it 39 02 27 404 700 39 02 27 400 219...

Отзывы: