


9
®
Stage B - Create a startup diskette
For this stage you will need a
3½
floppy diskette that is either blank or
has existing contents that are no longer required. The write protect
tab must be moved to the ‘unprotected’ position. Depending on your
operating system, use one of the following to create a startup disk:
To create a startup disk in Windows XP
1 Insert a diskette into the floppy disk drive.
2 Select ‘Start’ and then ‘My Computer’.
3 Right mouse click on the ‘3½ Floppy (A:)’ icon and select ‘Format’.
4 Check the ‘Create an MS-DOS startup disk’ box and select ‘Start’.
To create a startup disk in Windows 95/98/Me
1 Insert a formatted diskette into the floppy disk drive.
2 Select ‘Start’, then ‘Settings’ and then ‘Control Panel’.
3 Double click on the ‘Add/Remove Programs’ icon.
4 Select the ‘Startup Disk’ tab.
5 Click ‘Create Disk’ and follow the instructions.
To create a startup disk in Windows 95/98 (alternative method)
1 Insert a diskette into the floppy disk drive.
2 Right mouse click on the ‘3½ Floppy (A:)’ icon and select ‘Format’.
3 Select the ‘Full format’ option and ensure that the ‘Copy system
files’ box is checked.
4 Select ‘Start’ to format the disk.
To create a startup disk from MS-DOS or a DOS window within
Windows 95/98
1 Insert a diskette into the floppy disk drive and check that the drive
is configured as drive A (it usually is).
2 At the DOS prompt (C:\>) type:
FORMAT A: /S
and follow the instructions given by DOS.
Copy the downloaded files to the disk
Once the diskette has been formatted, using Windows Explorer or the
My Computer option, copy the downloaded and decompressed files
from your computer to the floppy diskette.
Now please follow Stage C.
Stage C – Reconfigure the connections and begin
1 On the computer from which you will run the upgrade, ensure that
its BIOS settings will allow it to boot from the floppy diskette drive,
rather than booting immediately from the hard drive.
2 Switch off the computer and Wizard Extender ACU5013A (if a
power supply is connected).
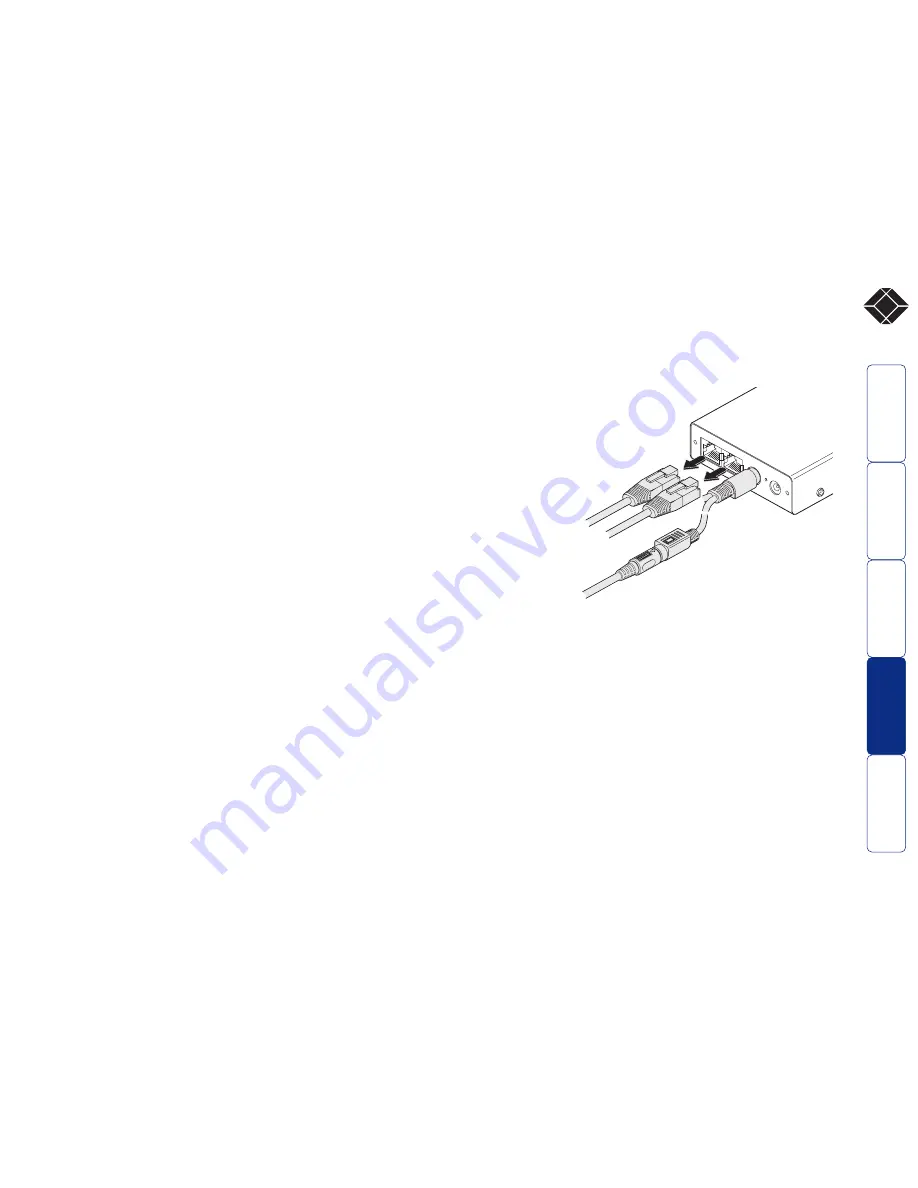
3 Disconnect both twisted pair cables from
the Wizard Extender ACU5013A. For
the upgrade process, the only
connection that is essential,
between the computer and
the Wizard Extender
ACU5013A, is the
keyboard port
connection.
4 So that you can
check upgrade
progress,
connect a
monitor directly
to the primary
video port of the
computer.
5 On the Wizard Extender ACU5013A, change switch 1 to the ON
position. Ensure that the upgrade diskette is in the floppy disk
drive of the computer.
6 Power on the computer (and Wizard Extender ACU5013A, if it is
using the power adapter). The upgrade process will start
automatically and confirmation will be given on screen.
Now please follow Stage D.
Remove the twisted pair
connections and ensure that the
link to the computer’s keyboard
port is correct - the mouse and
video port connections are
unimportant for this operation


