background image

6

5

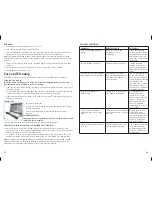
HELPFUL HINTS ABOUT YOUR OVEN

•  When the oven is turned on, the blue light will come on and remain illuminated until the oven 

is turned off manually or automatically when the timer has been used.

•  When selecting baking time for a particular product or recipe, include preheat time.

•  This oven has a 60 minute timer. If baking something that will take 

longer than 60 minutes, we suggest you use the STAY ON feature 

(F)

.

•  Metal, ovenproof glass and ceramic bakeware without lids can be 

used in the oven.  If foods require covering, use aluminum foil.

•  Be sure the top of the container or food being baked or broiled  

is at least 1½ inches away from the upper heating elements.

•  Turn all controls to OFF before inserting or removing plug from 

electrical outlet.

•  Do not put any container directly on the lower heating element.

•  To obtain the best performance from this toaster oven:
  • Do not overfill the oven;
  • To avoid heat loss do not open the door too frequently; 
  • When using foil to cover a food, tuck the edges of the foil against the sides of the baking  

    dish or pan.

OVERVIEW OF THE FUNCTIONS
Important: This oven gets hot. When in use, always use oven mitts or potholders when touching 

any outer or inner surface of the oven.  

For best results, preheat oven for 15 minutes at desired baking temperature before baking food.

F

Position 4

Use upper slots 

along oven walls. 

Insert rack using a 

rack-up position.

Position 2

Use lower slots 

along oven walls. 

Insert rack using a 

rack-up position.

Position 3

Use upper slots 

along oven walls. 

Insert rack using a 

rack-down position.

Position 1

Use lower slots 

along oven walls. 

Insert rack using a 

rack-down position

.

E

SLIDE RACK POSITIONS

There are 4 possible positions for the slide rack.  There is an upper and a lower slot; the 

rack can also be inverted for 2 additional positions 

(E)

.

NOTE:

 The articulated hooks only function with the rack in the lower position.

How to Use

This product is for household use only.

GETTING STARTED

•  Remove all packing material and any stickers; peel off clear protective film from control panel.
•  Wash all removable parts as instructed in CARE AND CLEANINg section of this manual.
•  Select a location where this unit is to be used, allowing enough space between back of the unit 

and the wall to allow heat to flow without damage to cabinets and walls.

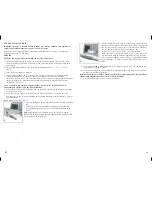
•  Insert crumb tray below lower heating elements.

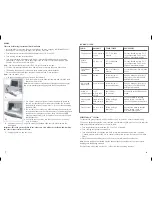
•  Insert slide rack halfway into lower rack position

 (C)

.

•  Lift the oven door to bring up the hooks, and then slide the rack 

until it engages the hooks.

Important: The rack will not slide forward unless the rack is inside 

the hooks on the door.

•  Close the oven door, noting that rack slides completely into oven.
•  Remove tie from cord and unwind.
•  Plug unit into electrical outlet

Important:


This oven gets hot. When in use, always use oven  

mitts or potholders when touching any outer or inner surface of  

the oven (D)

Note:

 Before first use, run this oven empty for 15 minutes to remove/

burn off any possible residues from manufacturing. You may notice 

some slight smoke and odor escaping from the oven. This is normal 

and will disappear with use.

C

$ "65 *0/

THIS OVEN GETS HOT. WHEN

IN USE, ALWAYS USE OVEN

MITTS OR POT HOLDERS

WHEN TOUCHING ANY OUTER

OR INNER SURFACE OF THE

OVEN

THIS OVEN GETS HOT. 

WHEN IN USE, ALWAYS USE OVEN 

MITTS OR POT HOLDERS WHEN 

TOUCHING ANY OUTER OR INNER 

SURFACE OF THE OVEN. 

CAUTION

D

Содержание Perfect Broil CTO4300B

Страница 1: ...essoires Pièces É U Canada 1 800 738 0245 USA Canada 1 800 231 9786 Mexico 01 800 714 2503 www applicaconsumerproductsinc com Register your product online at www prodprotect com applica for a chance to WIN 100 000 For US residents only Registre su producto en la Internet en el sitio Web www prodprotect com applica y tendrá la oportunidad de GANAR 100 000 Solamente para los residentes de EE UU Insc...

Страница 2: ...ted oven Extreme caution must be used when moving an appliance containing hot oil or other hot liquid To disconnect turn any control to OFF then remove plug from wall outlet Do not use appliance for other than intended use Oversized foods or metal utensils must not be inserted in this appliance as they may create a fire or risk of electric shock A fire may occur if the toaster oven is covered or t...

Страница 3: ...c shock Consult a qualified electrician if you are in doubt as to whether the outlet is properly grounded ELECTRICAL CORD a A short power supply cord is to be provided to reduce the risk resulting from becoming entangled in or tripping over a longer cord b Longer extension cords are available and may be used if care is exercised in their use c If an extension cord is used 1 The marked electrical r...

Страница 4: ... lower slots along oven walls Insert rack using a rack down position E SLIDE RACK POSITIONS There are 4 possible positions for the slide rack There is an upper and a lower slot the rack can also be inverted for 2 additional positions E NOTE The articulated hooks only function with the rack in the lower position How to Use This product is for household use only GETTING STARTED Remove all packing ma...

Страница 5: ...ping onto the heating elements Be sure the top of the food is at least 1 inches from the top heating element BAKING This oven bakes using conventional heat distribution 1 Insert the slide rack into the lower rack position of the oven engaging articulated hooks as directed You may also use the upper rack position if desired 2 Turn temperature selector to desired temperature from 150 F to 450 F 3 Tu...

Страница 6: ...t turn the toast shade selector to OFF to discontinue toasting 2 For best results when making consecutive batches of toast allow a short cool down period between toasting cycles I J 5 Insert food into oven and close door leaving it ajar at about inch from the fully closed position 6 Broil food according to recipe or package directions and check for doneness at minimum suggested broiling time 7 If ...

Страница 7: ...ion should only be used for short periods of time To prevent food from drying out cover with foil 4 When cycle is complete there will be an audible signal The oven and the on indicator light will go off 5 If not using the oven timer turn the oven to Off once warming cycle is complete 6 Unplug appliance when not in use Care and Cleaning This product contains no user serviceable parts Refer service ...

Страница 8: ...ut 6 servings RECIPES BLACK DECKER TUNA MELT 1 medium onion cut in wedges cup parsley leaves 2 tbsp lemon juice cup mayonnaise 2 cans 6 oz ea tuna drained 1 cup shredded Swiss cheese 4 English muffins halved and toasted 2 medium tomatoes sliced 6 ounces sliced Provolone cheese Preheat oven on BROIL at 400 F In bowl of Black Decker food processor or chopper combine onion and parsley Process until f...

Страница 9: ...SAUCE cup mayonnaise 1 green onion chopped about 2 tbsp 1 medium clove garlic minced tsp saffron threads 1 tbsp lime juice 6 loin or rib lamb chops cut about 1 inch thick Salt Garlic pepper Preheat oven on BROIL at 450 F In small bowl combine mayonnaise green onion garlic saffron and lime juice Cover and let stand at room temperature to blend flavors Place lamb chops on broil rack in bake pan drip...

Страница 10: ...OILED CURRIED CHICKEN FINGERS cup bottled ranch dressing cup chopped green onions 2 tbsp chopped parsley 1 cup Japanese dry breadcrumbs Panko tsp salt tsp black pepper 1 lb chicken tenderloin strips Cooking spray Dipping Sauce cup bottled ranch dressing 2 tbsp honey mustard tsp curry powder Preheat oven on BROIL at 400 F In medium bowl combine cup dressing green onions and parsley In shallow dish ...

Страница 11: ...r o en la presencia de menores de edad Desconecte el aparato de la toma de corriente cuando no esté en uso y antes de limpiarlo Espere que el aparato se enfríe antes de instalar o retirar los accesorios No se debe utilizar ningún aparato eléctrico que tenga el cable o el enchufe averiado que presente un problema de funcionamiento o que esté dañado Devuelva el aparato al centro de servicio autoriza...

Страница 12: ...ctor de tierra puede resultar en un riesgo de choque eléctrico Si tiene alguna duda consulte con un eléctricista calificado para asegurarse de que la toma de corriente sea una de tierra CABLE ELÉCTRICO a El producto debe proporcionarse con un cable corto para reducir el riesgo de enredarse o de tropezar con un cable largo b Se encuentran disponibles cables de extensión más largos que es posible ut...

Страница 13: ... calor fluya sin dañar armarios y paredes Inserte la bandeja de migas por debajo de la puerta de cristal Inserte la rejilla deslizante en la parte central en la posición inferior de rejilla C Levante la puerta del horno para sacar los ganchos y a continuación deslice la rejilla hasta que encaje con estos ganchos Importante La rejilla no se deslizará hacia adelante a menos que se encuentre dentro d...

Страница 14: ...o de distribución de calor convencional 1 Inserte la rejilla deslizante en la posición inferior del horno uniéndola a los ganchos como hemos explicado previamente Si lo desea puede utilizar también la posición de rejilla de la parte superior 2 Ponga el selector de temperatura a la temperatura deseada entre 65 C 150 F y 230 C 450 F 3 Seleccione la función BAKE hornear 4 Ponga el temporizador a 20 y...

Страница 15: ...agarradores baje la puerta del horno hasta que esté completamente abierta Deslice la rejilla hacia el exterior junto con la bandeja de horno para sacar la comida ya cocinada Importante Este horno se calienta Cuando lo utilice lleve siempre manoplas o use agarradores cuando toque cualquier superficie exterior o interior del horno 10 Desenchufe el aparato cuando no lo esté utilizando GUÍA DE COCCIÓN...

Страница 16: ...e poner el selector de tostado en posición OFF apagado 2 Para obtener los mejores resultados cuando esté haciendo hornadas consecutivas de tostadas deje un corto periodo de enfriamiento entre los ciclos de tostado I J GUÍA DE ASAR PRODUCTO PESO TEMPERATURA TIEMPO PROCEDIMIENTO CANTIDAD DEL ASADOR APROXIMADO DE COCINADO Pollo empanado Trozos de pollo Filetes de pescado como salmón o tilapia Verdura...

Страница 17: ...con papel de aluminio 4 Cuando se haya completado el ciclo el aparato emitirá una señal audible El horno y el indicador de encendido se apagarán 5 Si no está utilizando el temporizador del horno apague el horno OFF una vez que se haya completado 6 Desenchufe el aparato cuando no lo esté utilizando Cuidado y limpieza Este producto contiene piezas que no pueden ser reemplazadas o mantenidas por el u...

Страница 18: ...ta del horno entreabierta por 20 minutos o hasta que el pescado esté bien cocido Sirva con el aderezo y adórnelo con ramitas de eneldo fresco si lo desea Resulta delicioso cuando se sirve con una mezcle de arroz blanco e integral cocido y con espárragos al vapor Aproximadamente 3 raciones DETECCIÓN DE FALLAS PROBLEMA POSIBLE CAUSA SOLUCIÓN El aparato no calienta o deja de calentar La toma de corri...

Страница 19: ...n tenedor los jugos deben salir claros y el termómetro instantáneo de comida tiene que registrar una temperatura de unos 75 C 170 F cuando se inserte en la pechuga Sáquelo del horno cúbralo sin ajustar con papel de aluminio y déjelo reposar al menos 10 minutos antes de servir 4 ó 5 raciones SENCILLOS ROLLITOS DE PASAS Y CANELA 5 ml 1 cucharadita de azúcar 1 ml cucharadita de canela molida Una pizc...

Страница 20: ...l 1 tazas de queso ricotta 60 ml taza de queso parmesano para gratinar 10 ml 2 cucharaditas de perejil cortado 2 dientes de ajos grandes picados 2 ml cucharadita de albahaca seca machacada 1 tarro aproximadamente 1 kg 32 onzas de salsa de tomate y albahaca para pasta Precaliente el horno a 191 C 375 F en la posición BAKE En un bol grande combine la pasta y 1 taza de mozzarella añada el resto de lo...

Страница 21: ...brancher ou de débrancher l appareil Utiliser l appareil seulement aux fins qu il est prévu Ne pas introduire dans l appareil des aliments grandes dimensions ni des ustensiles en métal qui pourraient provoquer des risques d incendies ou de secousses électriques Il y a risque d incendie lorsque le grille pain est recouvert de matériaux inflammables comme des rideaux des draperies ou des revêtements...

Страница 22: ...ercle extérieur Pour réduire les risques d incendie ou de secousses électriques ne pas tenter de retirer le couvercle extérieur L utilisateur ne peut pas remplacer les pièces de l appareil En confier la réparation seulement au personnel des centres de service autorisés Note Lorsque le cordon d alimentation est endommagé il faut le faire remplacer par du personnel qualifié ou en Amérique latine par...

Страница 23: ...nt 15 minutes pour éliminer dissiper tout résidu de fabrication Vous remarquerez peut être une légère odeur et de la fumée s échappant du four Cela est tout à fait normal et ne se produira plus après quelques utilisations C D 65 0 THIS OVEN GETS HOT WHEN IN USE ALWAYS USE OVEN MITTS OR POT HOLDERS WHEN TOUCHING ANY OUTER OR INNER SURFACE OF THE OVEN LE FOUR DEVIENT CHAUD LORSQU IL EST EN MARCHE TO...

Страница 24: ...sur les éléments chauffants G RENSEIGNEMENTS UTILES À PROPOS DU FOUR Lorsque le four est mis en marche le témoin de fonctionnement bleu s allume et reste allumé jusqu à ce que le four soit éteint soit manuellement soit automatiquement si la minuterie a été utilisée La sélection du temps de cuisson pour un produit ou une recette en particulier doit inclure le délai de préchauffage Le four est muni ...

Страница 25: ... en une seule rangée jusqu à ce qu ils soient entièrement cuits et légèrement dorés Cuire sur la plaque de cuisson en une seule rangée jusqu à ce qu ils soient entièrement cuits et légèrement dorés Percer à l aide d une fourchette et faire cuire jusqu à tendreté Tourner à la mi cuisson si indiqué et vérifier au temps de cuisson minimal Tourner à la mi cuisson et vérifier au temps de cuisson minima...

Страница 26: ...à 12 minutes De 10 à 12 minutes retourner à la mi cuisson 18 minutes pour une cuisson à point retourner à la mi cuisson GRILLAGE PARFAIT Pour obtenir de meilleurs résultats préchauffer le four au moins 5 minutes à une température de 230 C 450 F la porte du four fermée avant de commencer la cuisson Le mode grillage du four est conçu pour fonctionner pendant que la porte du four est légèrement entro...

Страница 27: ...s vous recommandons fortement de laver le plat de cuisson plateau d égouttage et la grille de lèchefrite à la main à l eau chaude savonneuse plutôt que de les laver au lave vaisselle Le fait de les laver au lave vaisselle entraînera leur décoloration mais ne nuira pas à leur bon fonctionnement K Laver la lèchefrite et nettoyer l intérieur du four après chaque usage à l aide d un produit nettoyant ...

Страница 28: ... n est pas branché S assurer que la prise de courant fonctionne bien Le régulateur de température et la minuterie doivent être réglés pour que le four fonctionne Le deuxième grillage est trop foncé Le four est réglé à un degré de grillage trop foncé Si vous effectuez des grillages répétés dans le four sélectionner un degré de grillage un peu moins élevé que le réglage précédent Une buée se forme à...

Страница 29: ...de terres fouettées à l ail et d une salade verte fraîche Donne 6 portions SAUMON GRILLÉ SAUCE À L ORANGE ET AU GINGEMBRE 50 ml de tasse de mayonnaise 30 ml 2 c à table d oignon vert haché 10 ml 2 c à thé d aneth frais haché 5 ml 1 c à thé de gingembre moulu 15 ml 1 c à table de confiture d oranges 0 45 kg 1 lb de filet de saumon 15 ml 1 c à table d huile d olive 3 ml c à thé de sel 1 ml c à thé d...

Страница 30: ...et à la mi cuisson POULET RÔTI AUX FINES HERBES 50 ml de tasse de persil haché 5 ml 1 c à thé d assaisonnement pour poulet aux fines herbes 3 ml c à thé de zeste de citron 3 ml c à thé de sel assaisonné 3 ml c à thé de poivre noir 3 ml c à thé de sel d ail 30 ml 2 c à table d huile de maïs 1 58 kg 3 lb de poulet à rôtir Préchauffer le four en mode BAKE cuisson à 191 C 375 F Dans un petit bol combi...

Страница 31: ...ion or limitation of consequential or incidental damages so this limitation may not apply to you How does state law relate to this warranty This warranty gives you specific legal rights and you may also have other rights that vary from state to state or province to province Délicieux accompagné de pommes de terres fouettées à l ail de pois mange tout à la vapeur et de châtaignes d eau Donne enviro...

Страница 32: ... NECESITA AYUDA Para servicio reparaciones o preguntas relacionadas al producto por favor llame gratis al número 800 que aparece en la cubierta de este manual No devuelva el producto al establecimiento de compra No envíe el producto por correo al fabricante ni lo lleve a un centro de servicio También puede consultar el sitio web que aparece en la cubierta de este manual Un año de garantía limitada...

Страница 33: ...e Chine Imprimé en République populaire de Chine is a trademark of The Black Decker Corporation Towson Maryland USA Marca registrada de The Black Decker Corporation Towson Maryland E U Marque de commerce déposée de la société The Black Decker Corporation Towson Maryland É U R12007 10 16 71E S F 1500 W 120 V 60 Hz CAT NO EHB500 TYPE 1 160 W 120 V AC ONLY 60Hz Printed on recycled paper Impreso en pa...

Отзывы: