background image

3

What is PlantSmart?

PlantSmart is comprised of two basic elements:

The PlantSmart Sensor

helps you select the right plants for each location and to monitor existing plants. The reusable indoor/outdoor plant sen-

sor logs sunlight, temperature, moisture, soil conditions and more—in any location where it is placed. Also includes a fertilizer sensor that can be

activated for an additional charge.

The PlantSmart Website

(http://myplantsmart.com): The data collected by the

PlantSmart Sensor

is

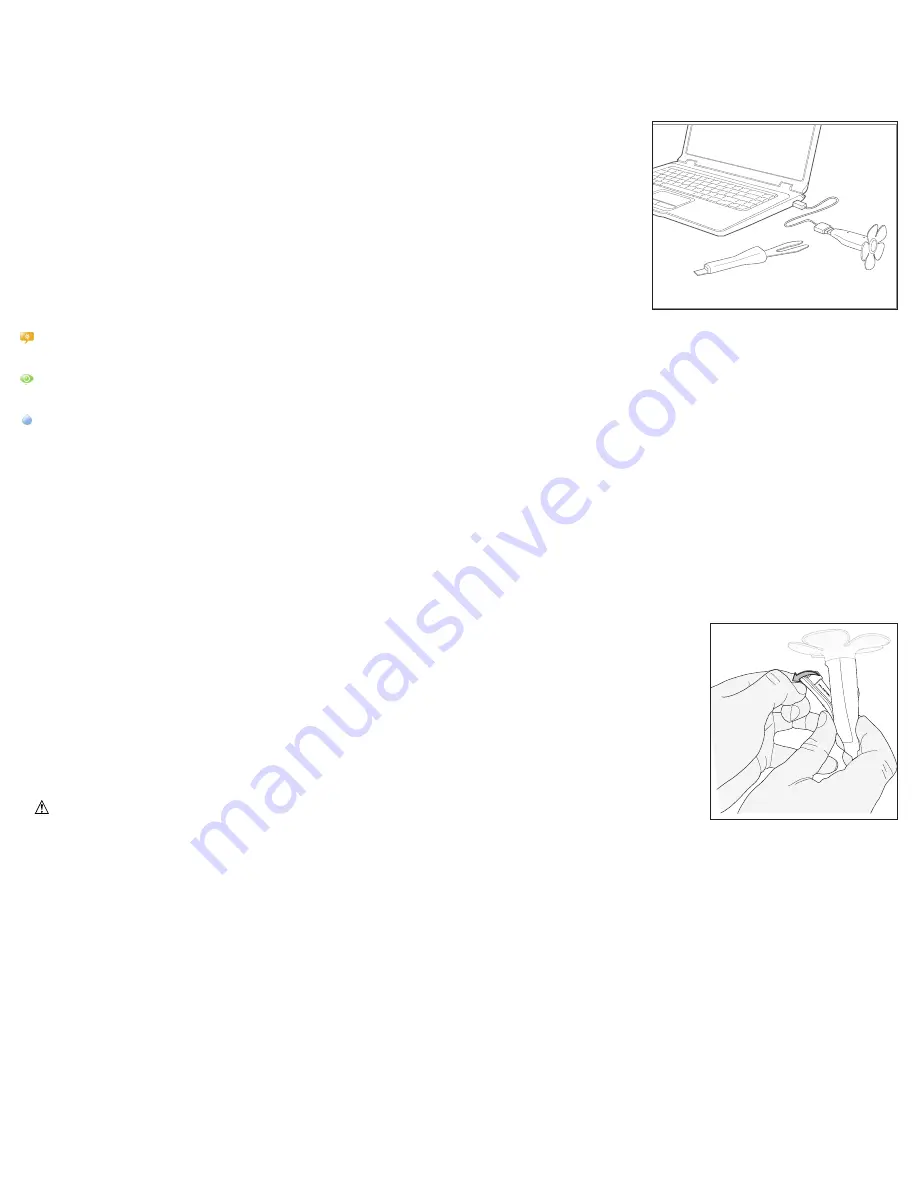
uploaded to the website via a USB port on your computer (

Please note: Always use the provided

USB cable when connecting to a computer). P

lantSmartʼs exclusive plant science software then

processes the data, taking into account your geography, the local weather conditions on the day(s) that

the garden sensor was in use, and how weather is expected to be during different periods of the year.

The PlantSmart website also includes forums where you can learn and share information with other

users. You can also find and save plants you own or want to own to your personal database (My Plants)

and consult the entire PlantSmart plant database for plant care information.

What PlantSmart Does

The PlantSmart Sensor and website can be used in three modes:

Recommend:

In this mode, PlantSmart will find the optimal plant for each location where you do a reading. Leave the plant sensor out for a minimum of

24 hours in any place where you want to put a plant. Then, plug the sensor into your computer and the website will launch revealing a listing of the optimal

plants for that location.

Monitor:

PlantSmart tells you how your plants are doing. It can tell you if they need more or less water, if the soil is not draining well, or if the spot is too

sunny/shady for the plant you placed there. It then suggests corrective action as necessary. In addition, your sensor is able to recommend the best

fertilizer for all of your plants. The fertilizer capability is available for an additional charge.

Water:

In this mode, you get instant feedback as to whether your plants need water or not. Set the sensor to Water mode, turn it on, and move from

plant to plant as you insert the sensor into the soil; if it chirps, water the plant. Itʼs that simple!

Note: If you open the battery door, PlantSmart will switch to Water mode without connecting to your PC or MAC.

Quick Tips

The following are a few recommendations for getting the best results when using the PlantSmart Sensor.

When placing the PlantSmart Sensor in your lawn, garden or within a container, make sure that there is nothing blocking or overhanging the top of your

PlantSmart Sensor. If leaves are obstructing it, your reading will not be as accurate. Also make sure your sensor is completely upright to ensure accuracy.

If the sensor (bottom) cannot easily be inserted into the soil, you may need to loosen the soil. Also, the soil sensor needs to be placed all the way into the

soil so you cannot see the black portion.

Plug the USB extension cable that was provided into the port, and then plug your plant sensorʼs USB controller into the USB extension cable.

Getting Started

1. Open a web browser. Type: http://go.myplantsmart.com in the address bar and press the enter key.

2. Fill in the registration information on screen.

3. After registering, you will be taken to the PlantSmart Companion Software download page. Select the

Companion Software to download that corresponds to your operating system - PlantSmartSetup.exe (win-

dows) / PlantSmartSetup.mpkg.zip (MAC).

4. When asked to Run, Open or Save the file, choose Run or Open. Your PlantSmart Companion Software will

then install automatically. (If Save is your only option, choose Save, and save the file to your desktop. Then

open the PlantSmartSetup file on your desktop). During software installation, make sure to use the same login

information that you entered in Step 2.

5. Remove the battery compartment cover. Insert 1 fresh 1.5 volt AAA alkaline battery making sure to match (+)

and (-) terminals correctly. You should hear two rapid beeps that let you know the battery is installed correctly.

Replace battery compartment cover.

WARNING: Battery can explode, or leak, and can cause injury or fire.

To reduce this risk:

• Carefully follow all instructions and warnings on the battery label and package.

• Always insert battery correctly with regard to polarity (+ and -), marked on the battery and the equipment.

• Do not short battery terminals.

• Do not charge battery.

• Remove dead battery immediately and dispose of per local codes.

• Do not dispose of battery in fire.

• Keep batteries out of reach of children.

• Remove battery if the device will not be used for several months.

“Transporting batteries can possibly cause fires if the battery terminals inadvertently come in contact with conductive materials such as keys,

coins, hand tools and the like. The US Department of Transportation Hazardous Material Regulations (HMR) actually prohibit transporting bat-

teries in commerce or on airplanes (i.e. packed in suitcases and carryon luggage) UNLESS they are properly protected from short circuits. So

when transporting individual batteries, make sure that the battery terminals are protected and well insulated from materials that could contact

them and cause a short circuit.”

6. Insert your plant sensor into the USB port using the USB cable that was included. If you are using Windows, when you plug in your PlantSmart

device into the USB port, you may get the “Found New Hardware” wizard. Click through the wizard, select “Search files or the Internet for drivers” if

asked, and click “finish” at the end.

You are now ready to start using the PlantSmart Sensor! In the future, when you insert your PlantSmart Sensor into the USB port on your computer, the

PlantSmart website will be launched automatically.

Содержание PCS10

Страница 1: ...R ANY REASON If you have a question or experience a problem with your Black Decker purchase go to HTTP WWW BLACKANDDECKER COM INSTANTANSWERS for instant answers 24 hours a day If you canʼt find the answer or do not have access to the internet call 1 800 544 6986 from 8 a m to 5 p m EST Mon Fri to speak with an agent Please have the catalog number available when you call SAVE THIS INSTRUCTION MANUA...

Страница 2: ...en 2 What is PlantSmart 3 What PlantSmart Does 3 Quick Tips 3 Getting Started 3 Recommend Mode 4 Monitor Mode 4 Water Mode 5 Visual and Audio Feedback 5 My Plants My Readings 6 Glossary 6 Care and Maintenance 6 Other Notes 7 Warranty 7 PlantSmart A New Way to Garden The PlantSmart Sensor is a revolutionary product that makes it easy for you to select and grow thriving plants PlantSmart takes the g...

Страница 3: ...tom cannot easily be inserted into the soil you may need to loosen the soil Also the soil sensor needs to be placed all the way into the soil so you cannot see the black portion Plug the USB extension cable that was provided into the port and then plug your plant sensorʼs USB controller into the USB extension cable Getting Started 1 Open a web browser Type http go myplantsmart com in the address b...

Страница 4: ...est to learn more about the plant 8 When you find a plant you would like to remember or one that you have purchased click on ADD TO MY PLANTS within that plantʼs page Monitor Mode SET UP If you have a plant that is not doing well you can use the PlantSmart Sensor to diagnose it 1 Plug your plant sensor into the USB port on your computer using the USB cable that was included You will automatically ...

Страница 5: ...ve the sensor from the USB port and put the plant sensor together top and bottom 4 Press the START STOP button on the sensor to begin Water mode HOLD THE SENSOR BY THE TOP The sensor light will blink green and the sensor will emit three ascending tones to let you know that it is in Water mode The light will stay green while it is on 5 Insert the soil sensor fully in the soil near the roots of the ...

Страница 6: ...r password name or offer information about you etc Plant Library The PlantSmart Plant Library is the entire set of plants in our database which today numbers over 6000 The plants we recommend and that you can monitor come from this Library If there are plants you would like to see added please email us at plants easybloom com Reading A reading consists of the entire data you collect from one time ...

Страница 7: ... at no charge in either of two ways The first which will result in exchanges only is to return the product to the retailer from whom it was purchased provided that the store is a participating retailer Returns should be made within the time period of the retailerʼs policy for exchanges usually 30 to 90 days after the sale Proof of purchase may be required Please check with the retailer for their s...

Страница 8: ... 1 800 544 6986 de lunes a viernes de 8 a m a 5 p m hora del Este para hablar con un agente Cuando llame tenga a mano el número de catálogo para obtener respuestas instantáneas las 24 horas del día Gracias por elegir Black Decker Visite www BlackandDecker com NewOwner para registrar su nuevo producto PlantSmart Sensor digital para el cuidado de plantas MANUAL DE INSTRUCCIONES Catálogo N PCS10 NOTA...

Страница 9: ...s 10 Preparación 10 Modo Recomendación Recommend 11 Modo Control Monitor 11 Modo Agua Water 12 Retroalimentación visual y auditiva 12 Mis plantas My Plants y Mis lecturas My Readings 13 Glosario 13 Cuidado y mantenimiento 13 Otras notas 13 Garantía 14 PlantSmart Una nueva forma de cultivar el jardín El sensor PlantSmart es un producto revolucionario que le facilita la selección y el cultivo de pla...

Страница 10: ...nsor para suelos en la tierra de modo que no pueda verse la parte negra Conecte el cable prolongador USB provisto en el puerto y luego conecte el controlador USB del sensor para plantas en el cable prolongador USB Preparación 1 Abra un explorador web Escriba http go myplantsmart com en la barra de direcciones y oprima la tecla Entrar 2 Rellene la información de registro en la pantalla 3 Luego de r...

Страница 11: ...racterísticas específicas que seleccionó 7 Haga clic en cualquiera de las plantas de su interés para conocer más acerca de las mismas 8 Cuando encuentre una planta que le gustaría recordar o una que haya comprado haga clic en AGREGAR A MIS PLANTAS ADD TO MY PLANTS dentro de la página de dicha planta Modo Control Monitor CONFIGURACIÓN Si tiene una planta que no está en buenas condiciones puede util...

Страница 12: ...ar el sensor para plantas partes superior e inferior 4 Oprima el botón de INICIO DETENCIÓN START STOP del sensor para iniciar el modo Agua SOSTENGA EL SENSOR POR LA PARTE SUPERIOR La luz del sensor se encenderá intermitentemente en verde y el dispositivo emitirá tres tonos ascendentes para indicarle que está en el modo Agua La luz se mantendrá verde mientras esté activo 5 Introduzca la totalidad d...

Страница 13: ...ardar todas las plantas en MIS PLANTAS MY PLANTS acabará teniendo una biblioteca personalizada de las plantas en su hogar y jardín Puede consultarla para el cuidado de las plantas con el paso del tiempo Mi perfil My Profile Este es el lugar en el que puede cambiar su contraseña nombre u otra información sobre usted etc Biblioteca de plantas Plant Library La Biblioteca de plantas de PlantSmart Plan...

Страница 14: ...s Electric de las páginas amarillas llame al 1 800 544 6986 o visite nuestro sitio www blackanddecker com GARANTÍA COMPLETA DE UN AÑO PARA USO DOMÉSTICO Black Decker U S Inc garantiza este producto durante un año contra cualquier defecto de material o mano de obra El producto defectuoso se reemplazará o reparará sin costo alguno de una de dos maneras La primera opción el reemplazo es devolver el p...

Отзывы: