background image

6

IMPORTANT:  The batteries in your tool 

are not fully charged at the factory. Before 

attempting to charge them, thoroughly read 

all of the safety instructions.

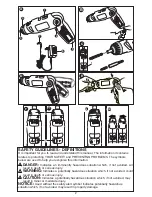
•  The charging socket (5) is keyed to 

lock out other chargers. Align the tab in 

the charger plug (7) with the key in the 

charging socket. 

•  Insert charger plug into the charging 

socket of the tool as shown in figure B

•  Plug the charger into any standard 120 

Volt 60 Hz electrical outlet.

•  Let the tool charge initially for at least 16 hours. 

After the initial charge, your tool should be fully 

charged in 12 hours from a fully discharged 

condition. Recharge discharged batteries 

as soon as possible after use or battery 

life may be greatly diminished. for longest 

battery life, do not discharge batteries 

fully. It is recommended that the batteries be 

recharged after each use.

WARNINg:

 Do not use tool while it is 

connected to the charger.

WARNINg:

 fire hazard. When 

disconnecting the charger from the tool, be 

sure to unplug the charger from the outlet 

first, then disconnect the charger cord 

from the tool. 

Important Charging Notes

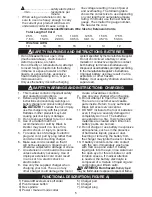
 1.  Your tool was sent from the factory 

in an uncharged condition. Before 

attempting to use it, it must be charged 

for at least 16 hours.

 2. 

CAUTION:

 To reduce the risk of 

damage to the batteries, NEVER charge 

them in an air temperature below 40°F 

(4,5°C) or above 105°F (40,5°C).  Also, 

NEVER charge them if the battery 

temperature is below 40°F (4,5°C) or 

above 105°F (40,5°C). Longest life and 

best performance occurs when batteries 

are charged with an air temperature of 

approximately 75°F (24°C).   

3.  While charging, the charger may hum and 

become warm to touch. This is a normal 

condition and does not indicate a problem.

 4.  If the batteries do not charge properly—

(1) Check current at receptacle by 

plugging in a lamp or other appliance. 

(2) Check to see if receptacle is 

connected to a light switch which turns 

power off when you turn out the lights. 

(3) Check that the charger plug is fully 

inserted into the charger port on the 

tool.  (4) If the receptacle is Ok, and 

you do not get proper charging, take or 

send the tool and charger to your local 

Black & Decker service center. See 

Tools Electric in yellow pages.

 5.  The tool should be recharged when 

it fails to produce sufficient power on 

jobs which were easily done previously. 

Battery life may be greatly diminished 

if batteries are discharged deeply. DO 

NOT CONTINUE using product with 

its batteries in a depleted condition. 

Recharge discharged batteries promptly.

 6.  To maximize battery life:

   a. Do not fully discharge batteries.

   b. Fully recharge batteries after each use.

   c. Store tool in a location where 

the surrounding air temperature is 

approximately 40°F - 75°F (4.5°C - 24°C).

   d. Disconnect charger from tool after 

charge is complete.  

WARNINg:


Fire Hazard. When disconnecting the 

charger from the tool, be sure to unplug 

the charger from the outlet first, then 

disconnect the charger cord from the tool. 

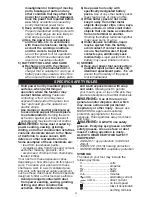
Safety Warnings and 

Instructions: Drilling

WARNINg: 

Tool may stall (if 

overloaded or improperly used) 

causing a twist.  To reduce the risk of 

injury always expect the stall. Grip the 

tool firmly to control the twisting action and 

prevent loss of control which could cause 

personal injury. If a stall does occur,release 

the trigger immediately and determine the 

reason for the stall before re-starting.

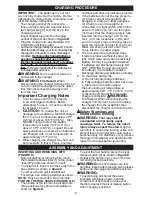
ASSeMBLy AND ADjUSTMeNT

ChARgINg PROCeDURe

INSeRTINg AND ReMOvINg BITS 

(fIgURe C)

•  Before installing or removing bits, move 

the forward/ reverse slider (1) to the center 

“lock-off” position as shown in insert.

•  To install a bit, insert it into the cavity in the 

hex spindle as shown in figure C

•  To remove the bit pull it straight out.

•  For bit tips, use a bit tip extender as shown.

NOTe: Only hex end bits will fit in spindle.

PIvOTINg The TOOL hANDLe (fIgUReS D, e)

•  The handle of the tool can be pivoted into 

three positions for optimum versatility as 

shown in figure D.

•  To pivot the tool handle, press the pivot 

release button (2) as shown in figure e.

•  Release the button in any one of the two 

remaining locked positions.

WARNINg: 

Check to make sure tool 

handle is locked after pressing pivot release 

button and changing screwdriver positions.

WARNINg:

•  To avoid being pinched at the areas 

indicated with black arrows, hold the 

screwdriver at both ends and use your 

thumb to depress the pivot release button 

when changing positions.

Содержание LI2000

Страница 1: ...chase go to http www blackanddecker com instantanswers If you can t find the answer or do not have access to the Internet call 1 800 544 6986 from 8 a m to 5 p m EST Mon Fri to speak with an agent Please have the catalog number available when you call Save this manual for future reference VEA EL ESPANOL EN LA CONTRAPORTADA INSTRUCTIVO DE OPERACIÓN CENTROS DE SERVICIO Y PÓLIZA DE GARANTÍA ADVERTENC...

Страница 2: ... situation which if not avoided will result in death or serious injury WARNING Indicates a potentially hazardous situation which if not avoided could result in death or serious injury CAUTION Indicates a potentially haz ard ous situation which if not avoided may result in minor or mod er ate injury NOTICE Used without the safety alert symbol indicates potentially hazardous situation which if not a...

Страница 3: ...drugs alcohol or medication A moment of inattention while operating power tools may result in serious personal injury b Use personal protective equipment Always wear eye protection Protective equipment such as dust mask nonskid safety shoes hard hat or hearing protection used for appropriate conditions will reduce personal injuries c Prevent unintentional starting Ensure the switch is in the off p...

Страница 4: ...ing a live wire may make exposed metal parts of the power tool live and could give the operator an electric shock Use clamps or another practical way to secure and support the workpiece to a stable platform Holding the work by hand or against your body leaves it unstable and may lead to loss of control WARNING Some dust created by power sanding sawing grinding drilling and other construction activ...

Страница 5: ... products may burst causing personal injury or damage 3 Do not expose charger to rain or snow 4 Use of an attachment not recommended or sold by Black Decker may result in a risk of fire electric shock or injury to persons 5 To reduce risk of damage to electric plug and cord pull by plug rather than cord when disconnecting charger 6 Make sure cord is located so that it will not be stepped on trippe...

Страница 6: ...ake or send the tool and charger to your local Black Decker service center See Tools Electric in yellow pages 5 The tool should be recharged when it fails to produce sufficient power on jobs which were easily done previously Battery life may be greatly diminished if batteries are discharged deeply DO NOT CONTINUE using product with its batteries in a depleted condition Recharge discharged batterie...

Страница 7: ... inserting the hex shank into the spindle and running the tool in the reverse direction General Drilling Tips This tool is not recommended for drilling in masonry Use sharp drill bits only Drill bits for metal can be used for drilling holes in wood These bits must be sharp and should be pulled out frequently when drilling to clear chips from the flutes Support and secure work properly as instructe...

Страница 8: ...lly inserted into tool charging socket For assistance with your product visit our website www blackanddecker com for the location of the service center nearest you or call the BLACK DECKER help line at 1 800 544 6986 The RBRC Rechargeable Battery Recycling Corporation Seal on the lithium ion battery or battery pack indicates that the costs to recycle the battery or battery pack at the end of its u...

Страница 9: ...ou de graves blessures MISE EN GARDE Indique une situation potentiellement dangereuse qui si elle n est pas évitée pourrait causer des blessures mineures ou modérées AVIS Utilisé sans le symbole d alerte à la sécurité indique une situationvpotentiellement dangereuse qui si elle n est pas évitée peut résulter en des dommages à la propriété the retailer s policy for exchanges usually 30 to 90 days a...

Страница 10: ... se servir d une rallonge convenant à une telle utilisation L utilisation d une rallonge conçue pour l extérieur réduit les risques de choc électrique f S il est impossible d éviter l utilisation d un outil électrique dans un endroit humide brancher l outil dans une prise ou sur un circuit d alimentation dotés d un disjoncteur de fuite à la terre GFCI L utilisation de ce type de disjoncteur réduit...

Страница 11: ...ation d un chargeur qui convient à un type de bloc piles risque de provoquer un incendie s il est utilisé avec un autre type de bloc piles b Utiliser les outils électriques uniquement avec les blocs piles conçus à cet effet L utilisation de tout autre bloc piles risque de causer des blessures ou un incendie c Lorsque le bloc piles n est pas utilisé le tenir éloigné des objets métalliques notamment...

Страница 12: ...trique Lorsque qu une rallonge électrique est utilisée s assurer d en utiliser une de calibre suffisamment élevé pour assurer le transport du courant nécessaire au fonctionnement de votre appareil Un cordon de calibre inférieur causera une chute de tension de ligne et donc une perte de puissance et une surchauffe Le tableau suivant indique le calibre approprié à utiliser selon la longueur du cordo...

Страница 13: ...tement la zone touchée au savon doux et à l eau Si le liquide du bloc piles entre en contact avec les yeux rincer l oeil ouvert à l eau pendant trois minutes ou jusqu à ce que l irritation cesse Si des soins médicaux sont nécessaires l électrolyte du bloc piles est composé d un mélange de carbonates organiques liquides et de sels de lithium AVERTISSEMENT risque de brûlure Le liquide du bloc piles ...

Страница 14: ...utateur coulissant avant arrière 1 à la position de verrouillage centrale comme le montre la notice Pour utiliser un embout il suffit de l insérer dans la cavité de la broche hexagonale comme l illustre la figure C Pour retirer l embout tirer en ligne droite sur celui ci Pour les embouts utiliser une rallonge pour embout comme le montre l illustration REMARQUE Seuls les embouts hexagonaux s insére...

Страница 15: ... droite avec la mèche Exercer suffisamment de pression pour faire mordre la mèche mais ne pas appuyer à l excès pour éviter de caler le moteur ou de faire dévier la mèche Tenir firmement l outil afin de controler sa torsion NE PAS TENTER DE FAIRE DÉMARRER UNE PERCEUSE BLOQUÉE EN UTILISANT LE DÉCLENCHEUR IL Y A RISQUE D ENDOMMAGER L OUTIL Pour la retirer faire bouger la pointe d avant en arrière pu...

Страница 16: ...it s avérer dangereux d utiliser des accessoires autres que ceux recommandés pour cet outil Le sceau SRPRCMC Société de Recyclage des Piles Rechargeables au Canada sur la pile lithium ion ou sur le bloc piles indique que son coût de recyclage ou celui du bloc piles à la fin de sa vie utile sera payé par Black Decker Dans certaines régions il est illégal de jeter les piles lithium ion dans les poub...

Страница 17: ...de chez vous Ce produit n est pas destiné à un usage commercial Remplacement gratuit des étiquettes d avertissement si les étiquettes d avertissement deviennent illisibles ou sont manquantes composer le 1 800 544 6986 pour en obtenir le remplacement gratuit manual de instrucciones Gracias por elegir Black Decker Visite www BlackandDecker com NewOwner para registrar su nuevo producto LEA EL MANUAL ...

Страница 18: ...ca e Al operar una herramienta eléctrica en el exterior utilice un cable prolongador adecuado para tal uso Utilice un cable adecuado para uso en exteriores a fin de reducir el riesgo de descarga eléctrica f Si el uso de una herramienta eléctrica en un lugar húmedo es imposible de evitar utilice un suministro protegido con un interruptor de circuito por falla a tierra GFCI El uso de un GFCI reduce ...

Страница 19: ... propensas a trabarse y son más fáciles de controlar g Utilice la herramienta eléctrica los accesorios y las brocas de la herramienta etc de acuerdo con estas instrucciones y teniendo en cuenta las condiciones de trabajo y el trabajo que debe realizarse El uso de la herramienta eléctrica para operaciones diferentes de aquéllas para las que fue diseñada podría originar una situación peligrosa 5 Uso...

Страница 20: ...irija las partículas lejos de su cara o su cuerpo ADVERTENCIA USE SIEMPRE LENTES DE SEGURIDAD Los anteojos de uso diario NO son lentes de seguridad Utilice también máscaras faciales o para polvo si el corte produce polvillo UTILICE SIEMPRE EQUIPOS DE SEGURIDAD CERTIFICADOS Protección para los ojos según la norma ANSI Z87 1 CAN CSA Z94 3 Protección auditiva según la norma ANSI S12 6 S3 19 Protecció...

Страница 21: ...s advertencias preventivas en el cargador de la batería y en el producto que utiliza la batería PRECAUCIÓN Para reducir el riesgo de lesión utilice el cargador solamente con este producto Las baterías en otros productos pueden estallar y provocar daños personales o materiales 3 No exponga el cargador a la lluvia ni a la nieve 4 El uso de un accesorio no recomendado o no vendido por Black Decker pu...

Страница 22: ...ONTINÚE utilizando el producto con sus baterías agotadas Recargue de inmediato las baterías descargadas 6 Para maximizar la vida útil de las baterías a No descargue completamente las baterías b Recargue completamente las baterías después de cada uso c Guarde la herramienta en un lugar donde la temperatura ambiente esté aproximadamente entre 4 5 C y 24 C 40 F y 75 F d Desconecte el cargador de la h...

Страница 23: ...rte la punta para destornillador adecuada con vástago hexagonal en el eje Seleccione la rotación de avance o de reversa Taladrado Antes de instalar brocas mueva el interruptor deslizante de avance reversa 1 a la posición central de bloqueo en apagado Inserte la broca para taladro de vástago hexagonal adecuada Seleccione la rotación de avance NOTA Al taladrar es posible que la broca se desconecte d...

Страница 24: ... o dónde dejar las baterías o llame al 1 800 8 BATTERY Todos los Centros de servicio de Black Decker cuentan con personal altamente capacitado dispuesto a brindar a todos los clientes un servicio eficiente y confiable en la reparación de herramientas eléctricas Si necesita consejo técnico reparaciones o piezas de repuesto originales de fábrica póngase en contacto con el centro de servicio de Black...

Страница 25: ...erechos que pueden variar según el estado o la provincia Si tiene alguna pregunta comuníquese con el gerente del Centro de servicio de Black Decker de su zona Este producto no está diseñado para uso comercial AMÉRICA LATINA esta garantía no se aplica a los productos que se venden en América Latina Para los productos que se venden en América Latina debe consultar la información de la garantía espec...

Страница 26: ...26 ...
Страница 27: ... sin cargo alguno para el cliente incluyendo la mano de obra esta incluye los gastos de trasportación erogados para lograr cumplimiento de esta garantía en los domicilios diversos señalados Para hacer efectiva esta garantía deberá presentar su herramienta y esta póliza sellada por el establecimiento comercial donde se adquirió el producto Nos comprometemos a entregar el producto en un lapso no may...

Страница 28: ...ndustriales Robles S A de C V Tezozomoc No 89 Col La Preciosa Distrito Federal Tel 55 61 86 82 Gpo Comercial de Htas y Refacciones de Occidente S A de C V Av La Paz No 1779 Col Americana S Juaréz Guadalajara Jalisco Tel 01 33 38 25 69 78 Herramientas y Equipos Profesionales Av Colón 2915 Ote Col Francisco I Madero Monterrey Nvo León Tel 01 81 83 54 60 06 Htas Portátiles de Chihuahua S A de C V Av ...

Отзывы: