background image

7

4. If the batteries do not charge properly—(1) 

Check current at receptacle by plugging in a 
lamp or other appliance. (2) Check to see if 
receptacle is connected to a light switch which 
turns power off when you turn out the lights. 
(3) Move charger and tool to a surrounding air 
temperature of 40°F (4,5° C) to 105°F (40,5° 
C). (4) If the receptacle and temperature are 
ok, and you do not get proper charging, take 
or send the tool and charger to your local 
Black & Decker service center. See Tools 
Electric in yellow pages.

5. The tool should be recharged when it fails to 

produce sufficient power on jobs which were 
easily done previously. DO NOT CONTINUE 
using product with its batteries in a depleted 
condition.

OPERATING INSTRUCTIONS

Quick Release Chuck (figure B)

To install an accessory:

•  Hold the tool as shown in 

figure B

 and push the 

chuck collar away from the tool.

•  Insert a hex shank accessory and release the 

collar.

•  The accessory is locked in place.

NOTE: 

Use 2” bits or 1” bits with a bit tip holder 

(not provided).
To remove an accessory:

•  Hold the tool as shown in 

figure B

 and push the  

chuck collar away from the tool.

•  Remove the accessory and release the collar.

Trigger Switch & Reversing Button (Figure C)

•  The drill is turned ON and OFF by pulling and 

releasing the trigger (1).

•  A forward/reverse control button (2) determines 

the direction of the tool and also serves as a 
lock off button. 

•  To select forward rotation, release the trigger 

switch and depress the forward/reverse control 
button to the left. 

•  To select reverse, depress the forward/ reverse 

control button the opposite direction.

•  To avoid being turned on accidentally, do not 

carry in your pocket. 

NOTE:

 The center position of the control button 

locks the tool in the off position. 
When changing the position of the control button, 
be sure the trigger is released. 

SCREW DRIVING

For driving fasteners, the foward/reverse button 
should be pushed to the left. Use reverse (button 
pushed to the right) for removing fasteners. When 
moving from forward to reverse, or vice versa, 
always release the trigger switch first. Release 
trigger when the fastener is at the desired depth.

NOTE: 

For best performance, use 2” fasteners or 

smaller, or screw into pre-drilled holes.

NOTE: 

The impact mechanism of the screwdriver 

creates a loud, impacting noise when extra force is 
needed. This noise is normal; the screwdriver is not 
malfunctioning or broken.

IMPACT DRIVER WARNINGS: 

•  Hold the tool as shown in 

figure D

.

•  Do not use tool as a pry bar. 
•  To avoid being turned on accidentally, do not carry 

in your pocket.

ON BOARD BIT STORAGE (FIGURE E)

A magnetic bit holder(4) is built-in to the area 
on top of the screwdriver for easy storage and 
access.

DRILLING

•  Use sharp drill bits only.
•  Screwdriver is ideal for bits 1/4” or smaller.
•  Support and secure work properly, as instructed 

in the Safety Instructions. 

•  Use appropriate and required safety equipment, 

as instructed in the Safety Instructions. 

•  Secure and maintain work area, as instructed in 

the Safety Instructions. 

•  Apply pressure in a straight line with the bit. Use 

enough pressure to keep the bit biting but not so 
much as to stall the motor or deflect the bit.

•  DO NOT CLICK THE TRIGGER OF A STALLED 

SCREWDRIVER OFF AND ON IN AN ATTEMPT TO 
START IT. DAMAGE TO ThE SCREWDRIVER CAN 
RESULT.

•  Minimize stalling on breakthrough by reducing 

pressure and slowly drilling through the last part 
of the hole.

•  Keep the motor running while pulling the bit out 

of a drilled hole. This will help reduce jamming.

• 

Make sure switch turns screwdriver on and 

off.

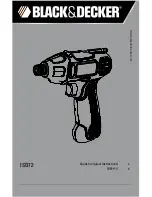
Содержание ISD72

Страница 1: ...ISD72 www blackanddecker com 4 English original instructions 9 ...

Страница 2: ...2 3 1 2 5 6 4 7 A 5 7 6 B C 1 2 D E ...

Страница 3: ...AVE THESE INSTRUCTIONS 1 WORK AREA SAFETY a Keep work area clean and well lit Cluttered or dark areas invite accidents b Do not operate power tools in explosive atmospheres such as in the presence of flammable liquids gases or dust Power tools create sparks which may ignite the dust or fumes c Keep children and bystanders away while operating a power tool Distractions can cause you to lose control...

Страница 4: ...ing power tools Such preventive safety measures reduce the risk of starting the power tool accidentally d Store idle power tools out of the reach of children and do not allow persons unfamiliar with the power tool or these instructions to operate the power tool Power tools are dangerous in the hands of untrained users e Maintain power tools Check for misalignment or binding of moving parts breakag...

Страница 5: ...g port 6 Charging indicator 7 Charger safety wARNINGS AND INSTRUCTIONS BATTERIES Do not disassemble or open drop mechanical abuse crush bend or deform puncture or shred Do not modify or remanufacture attempt to insert foreign objects into the battery immerse or expose to water or other liquids or expose to fire excessive heat including soldering irons or put in microwave oven Only use the battery ...

Страница 6: ...ker service center 11 DO NOT incinerate the tool or batteries even if they are severely damaged or completely worn out The batteries can explode in a fire 12 Do not incinerate the battery even if it is severely damaged or is completely worn out The batteries can explode in a fire Toxic fumes and materials are created when lithium ion batteries are burned 13 Do not charge or use battery in explosiv...

Страница 7: ... center position of the control button locks the tool in the off position When changing the position of the control button be sure the trigger is released Screw Driving For driving fasteners the foward reverse button should be pushed to the left Use reverse button pushed to the right for removing fasteners When moving from forward to reverse or vice versa always release the trigger switch first Re...

Страница 8: ... those listed in this manual should be performed by authorized service centers or other qualified service person nel always using identical replacement parts PROTECTING THE ENVIRONMENT Separate collection This product must not be disposed of with normal household waste Should you find one day that your Black Decker product needs replacement or if it is of no further use to you do not dispose of it...

Страница 9: ...具只供一般使用 安全說明 電動工具之一般安全警告 警告 請閱讀所有安全警告及說明 不遵 循這些警告和說明可能會導致觸電 火災及 或嚴重傷害 請妥善保存所有的警告和使用手 冊以備將來查閱 警告中的名詞 電動工具 是指電源驅動 插電 電動工具 或者電池驅動 充電 電動工具 請保存這些說明 1 工作場地安全 a 保持工作場地清潔和明亮 混亂或黑暗 的場地會引發事故 b 不要在易爆環境 如有易燃液體 氣體或 塵埃的環境中操作電動工具 電動工具產 生的火花會點燃塵埃或氣體 c 請等待兒童和旁觀者離開之後才操作電動 工具 分心會導致您疏於控制 2 電器安全 a 電動工具插頭必須與插座相符 請勿 以任何方式改裝插頭 需接地的電動工 具不能使用任何配接器插頭 未經改 裝的插頭和相符的插座可以減少觸電 危險 b 避免人體接觸接地表面 如管道 散熱 片 爐灶和冰箱 若您的身體接地可增加 觸電危險 c 不得將電...

Страница 10: ...用與注意事項 a 請勿超負荷使用電動工具 根據您的用 途使用適當的電動工具 使用適當的電 動工具在其設計可負荷的應用內 會讓 您更有效 更安全地執行工作 b 若開關不能開 或關閉電源 請勿使用 該電動工具 不能用開關來控制的電動 工具將存在危險 必須進行維修 c 在執行任何調整 更換配件或儲存電動 工具之前 必須從電源上拔掉插頭及 或卸下電池組 這類防護性安全措施可 降低電動工具意外啟動的風險 d 將閒置的電動工具儲存在兒童無法接觸的 地方 並且不要讓不熟悉電動工具或對這 些說明不瞭解的人員操作電動工具 電 動工具在未經培訓的使用者手中會發生 危險 e 維護電動工具 檢查活動部件是否對準 或卡住 破損情況以及是否存在影響電 動工具運行的其他情況 若有損毀 必 須在使用之前修理電動工具 許多事故 都是由於欠缺維護電動工具所導致 f 保持刀具鋒利和清潔 妥善維護 切削 鋒利的切割工具不會輕易卡...

Страница 11: ...接觸到 帶電 導線 電動工具金屬部 件表面就會 帶電 從而導致操作人員 觸電 請保存這些說明 符號 您的工具上可能包含下列符號 符號及其定 義如下 V 伏特 A 安培 Hz 赫茲 W 瓦特 min 分鐘 或 AC 交流電流 或 DC 直流電流 no 空載轉速 I 級結構 接地 接地終端 安全警告符號 II 級 結構 雙重絕緣 分鐘或轉 分 每分鐘旋轉 或鋸切數 SPM 每分鐘行程 使用前請閱讀使用手冊 使用合適的護目鏡 使用合適的聽力保護裝備 使用合適的呼吸保護裝置 功能描述 1 無段變速開關 2 正 反轉按鈕 3 快速釋放夾頭 4 磁力鑽頭夾持器 5 充電孔 6 充電指示燈 7 充電器 安全警告及說明 電池 請勿拆卸或打開 跌落 機械濫用 擠 壓 彎曲或變形 刺穿或切碎 請勿改裝或重新製造 嘗試在電池中插入異 物 浸入或暴露於水或其他液體中 暴露於 火或過熱 包括烙鐵 或放入微波爐中 僅...

Страница 12: ...線護罩上的 W 或 WA 表示該電線適 合戶外使用 b 為保安全和防止功率損失及過熱 延長電 線必須具備足夠的電線尺寸 AWG 或美國 線規 電線的線規數字越小 電纜的承 載電流能力越高 即16號線規比18號線規 的承載電流能力高 若要使用多條延長電 線補足長度 請確保每條延長電線至少達 到最小的電線尺寸 延長線的最小導線尺寸 AWG 圖 銘牌額定值 AMPS 0 10 0 延長線總長度 英呎 0 25 26 50 51 100 101 150 0 7 6m 7 6 15 2m 15 2 30 4m 30 4 45 7m 線規 18 16 16 14 8 請在為工具充電時僅使用隨附的充電器 使用任何其他充電器會損壞工具或導致 危險 9 切勿試圖打開充電器 充電器或電鑽內部 零件不能單獨維修 請整組送回經授權的 Black Decker維修中心 10 即使工具或電池已嚴重損毀或磨損 請勿 焚...

Страница 13: ...法像從前一樣為作業輕鬆提供足 夠的電量時 應該對其充電 在電池電量 耗盡的情況下 請不要繼續使用本產品 操作說明 快速釋放夾頭 圖 B 若要安裝配件 如圖 B 所示握住工具 將夾頭調整環推離 工具 將六角形軸插入配件並鬆開調整環 配件就會鎖入定位 註 將 2 英吋鑽頭或 1 英吋鑽頭與鑽頭夾持 器 未隨附 結合使用 若要拆下配件 如圖 B 所示握住工具 將夾頭調整環推離 工具 然後拆下配件並且鬆開夾頭 觸發開關和反轉按鈕 圖 C 電鑽透過拉動和鬆開無段變速開關 1 來 開啟和關閉 正 反轉控制按鈕 2 決定工具的方向 同 時具備鎖定關閉功能 若要選擇正轉 請鬆開觸發開關 然後按 下正 反轉控制按鈕到左側 若要選擇反轉 請向相反方向按下正 反轉 控制按鈕 為避免意外開啟 請勿放入袋子裡攜帶 註 當控制按鈕處於中心位置時 工具會被 鎖定在 off 關閉 位置 要改變控制按鈕的位置時 請確定開關...

Страница 14: ...不使用 的工具應重新 潤滑後再使用 警告 由於非 Black Decker 所提供的配 件未在本產品上進行過使用測試 在本產品上 使用這些配件可能會導致危險 為了減低受傷 風險 只可以使用 Black Decker 推薦的配件 清潔 請僅使用中性肥皂和略微打濕的布條清洗角 磨機 許多家用清潔劑包含可能嚴重損壞塑 料的化學物質 另外 請勿使用汽油 松節 油 漆或油漆稀釋劑或類似的產品 不要讓 任何液體進入工具 也不要讓工具的任何部 分浸入液體中 重要資訊 為了確保產品安全及可靠 所有 的維修 維護和調整 除了本手冊中列出的 之外 都應該由授權的 維修中心或合格維修人員執行 並始終使用 相同的替換部件 保護環境 分類收集 本產品必須與一般家居廢 物分開處置 若您發現您的 Black Decker 產品需 要進行替換 或您已經不再需要使用 這些產品 請不要將它們與家庭廢物 一起處置 務必將本產品...

Страница 15: ...15 注意 Black Decker 的政策是持續改善我們的產 品 因此 我們保留隨時變更產品規格的 權利 恕不另行通知 標準裝置和配件可能會根據不同的國家 地 區而有所不同 產品規格可能會根據不同的國家而有所 不同 並非所有的國家 地區都將提供完整的產品 系列 ...

Страница 16: ...90603895 10 2013 ...

Отзывы: