6
ENGLISH
(Original instructions)
7
ENGLISH
(Original instructions)
6
7
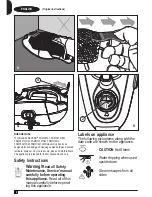
Do not leave unsuper-
vised with young children
Hand wash only
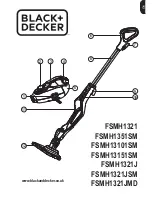
Features
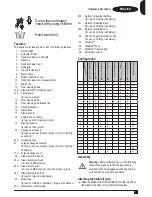
This appliance includes some or all of the following features.
1. On/off switch
2. Autoselect
TM
dial
3. Hand held steam unit handle
4. Filler cap
5. Hand held steam unit
6. Hand grip
7. Top cable tidy hook
8. Main handle
9. Bottom cable tidy hook
10. Hand held steam unit release button
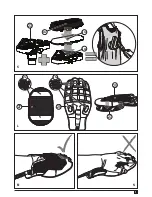
11. Main body
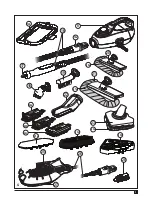
12. Floor cleaning head
12a. Steam burst floor cleaning head
12b. Carpet glider
(for use on carpets)
13. Floor cleaning pad
14. Floor cleaning pad release tab
15. Hanging Bracket
16. Steam hose
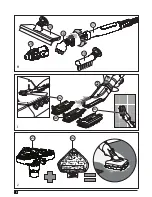
17. Steam nozzle
18. Angle brush accessory
(for use on hard to remove stains)
19. Brush accessory
(for use on tiles / grout)
20. Squeegee accessory
(for use on shower screens / glass / mirrors / clothing /
upholstery)
20a. Squeegee sock
21. Large squeegee accessory
(for use on shower screens / glass / mirrors / clothing /
upholstery)
21a. Large squeegee sock
22. Steam burst brush unit
22a. Steam burst wire brush
( for use on BBQ / ovens)
22b. Steam burst brush
( for use on BBQ / ovens / oven hobs / taps / grout)
22c. Steam burst wide brush
(for use on larger work surfaces)
23. Delta head
(for use on clothing / upholstery / larger work surfaces)
23a. Flat surface cleaning pad
23b. Garment steaming interface
(for use on clothing / upholstery)
23c. Garment steaming brush
(for use on clothing / upholstery)
23d. Garment steaming pad
(for use on clothing / upholstery)
24. Fabric and garment steamer pad
(for use on clothing / upholstery)
25. SteaMitt
TM
26. SteaMitt
TM
hose
27. SteaMitt
TM
cleaning pad
28. Adjustable nozzle
Configuration
F
S
M
H
1
3
2
1
F
S
M
H
1
3
5
1
S
M
F
S
H
1
3
1
0
1
S
M
F
S
M
H
1
3
1
5
1
S
M
F
S
M
H
1
3
1
5
1
S
M
F
S
M
H
1
3
2
1
J
F
S
M
H
1
3
2
1
J
S
M
F
S
M
H
1
3
2
1
J
M
D
S
E
T
T
I
N
G
S
12
All
12a
All
12b
All
13
All
16
All
18
●
19
● ● ●
20
●
20a
●
21
●
21a
●
22
All
22a
All
22b
All
22c
All
23
All
23a
All
23b
●
23c
●
23d
●
24
●
25
N/A
28
ALL
Assembly
@
Warning!
Before attempting any of the following
instructions, make sure that the appliance is
switched off and unplugged and the appliance is
cold and does not contain any water.
A
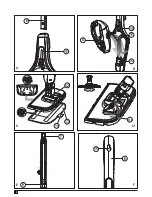
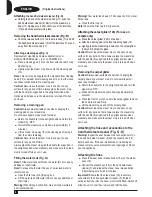
ttaching the handle (Fig. A)
u
Slide the bottom end of the handle (8) into the top end of
the steam mop body (11) until it clicks into place.
Содержание FSMH1321
Страница 2: ...2 12a 5 10 11 11a C1 8 11 B A 12 13 14 C 7 9 E 15 6 F ...
Страница 3: ...3 5 16 26 17 19 20 21 22 22a 25 18 27 22b 22c 23 21a 20a 23a 16a 12b 23b 23c 23d 28 G ...
Страница 4: ...4 18 17 20 28 19 H 22 22a 22c 22b I 23 23a J ...
Страница 5: ...5 N 23 23b 23d 23c K 27 25 25 27 27a 25a L M ...
Страница 13: ...13 ENGLISH Original instructions ...
Страница 14: ...14 ENGLISH Original instructions ...
Страница 15: ...15 ENGLISH Original instructions ...

