7
ENGLISH
(Original instructions)
u
Or run the battery down completely if it is integral and then
switch off.
u
Unplug the charger before cleaning it. Your charger does
not require any maintenance apart from regular cleaning.
u
Regularly clean the ventilation slots in your appliance/tool/
charger using a soft brush or dry cloth.
u
Regularly clean the motor housing using a damp cloth. Do
not use any abrasive or solvent-based cleaner.
Protecting the environment
Z
Separate collection. This product must not be
disposed of with normal household waste.
Should you find one day that your Black & Decker product
needs replacement, or if it is of no further use to you, do not
dispose of it with household waste. Make this product avail-
able for separate collection.
z
Separate collection of used products and packaging
allows materials to be recycled and used again.
Re-use of recycled materials helps prevent environ-
mental pollution and reduces the demand for raw
materials.
Local regulations may provide for separate collection of elec-
trical products from the household, at municipal waste sites or
by the retailer when you purchase a new product.
Black & Decker provides a facility for the collection and
recycling of Black & Decker products once they have reached
the end of their working life. To take advantage of this service
please return your product to any authorised repair agent who
will collect them on our behalf.
You can check the location of your nearest authorised repair
agent by contacting your local Black & Decker office at
the address indicated in this manual. Alternatively, a list of
authorised Black & Decker repair agents and full details of our
after-sales service and contacts are available on the Internet
at: www.2helpU.com
Battery
Z
If you want to dispose of the product yourself, the
battery must be removed as described below and
disposed of in accordance with local regulations.
u
Preferably discharge the battery by operating the appli-
ance until the motor stops.
u
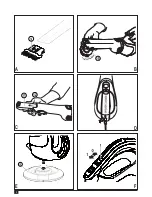
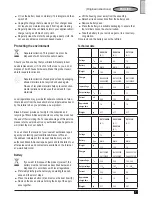
Press the release button (2) and remove the dust bowl (5).
u
Remove the seven screws holding the body of the appli-
ance together.
u
Lift the housing cover away from the assembly.
u
Detach all lead connections from the battery pack.
u
Remove battery pack.
u
Place the battery in a suitable packaging to ensure that
the terminals cannot be short-circuited.
u
Take the battery to your service agent or to a local recy-
cling station.
Once removed, the battery cannot be refitted.
Technical data
DV4810N
(H1)
DV6010N
(H1)
DV7210N
(H1)
Voltage
V
dc
4.8
6.2
7.2
Battery
Type
NiMH
NiMH
NiMH
Weight
kg
1.03
1.09
1.13
Charger
BA090020D
VA090020D
BA100015D
VA100015D
BA110020D
VA110020D
Input voltage
V
ac
230
230
230
Output voltage
V
ac
9
10
11
Current
mA
200
150
200
Approximate
charge time
h
16
16
16
Weight
kg
0.17
0.17
0.17
DV7210NWH
(H1)
DV9610AN
(H1)
DV9610N
(H1)
DV1210N
(H1)
Voltage
V
dc
7.2
9.6
12
Battery
Type
NiMH
NiMH
NiMH
Weight
kg
1.13
1.26
1.4
Charger
BA110020D
VA110020D
BA140020D
VA140020D
CHA002014G
CHA002014B
Input voltage
V
ac
230
230
120 - 240
Output voltage
11V
ac
14V
ac
7.2 - 24V
dc
Current
mA
200
200
85
Approximate
charge time
h
16
16
28
Weight
kg
0.17
0.22
0.07
Содержание DV1210N
Страница 1: ...DV4810N DV6010N DV7210N DV7210NWH DV9610N DV9610AN DV1210N ...
Страница 2: ...2 C E B A E D F ...
Страница 3: ...3 I K H G J L ...


