background image

2

3

KEEP WARM FUNCTION

1.  Set temperature control to Min setting (minimum temperature).
2.  Set cooking FUnCTIon (Mode) selector to Keep Warm position.
3.  Turn timer past 20 and then turn back or forward and set to desired number of minutes 

or to Stay on position.

Care and Cleaning

This product contains no user serviceable parts. Refer service to qualified service personnel.

CLEANING YOUR OVEN
Important: Before cleaning any part, be sure the oven is off, unplugged and cool. Always 

dry parts thoroughly before using oven after cleaning.

1.  Clean the glass door with a sponge, soft cloth or nylon pad and sudsy water. do not use a 

spray glass cleaner.

2.  To remove the slide rack, open the door, pull the rack forward and out. Wash the slide 

rack in sudsy water or in a dishwasher. To remove stubborn spots, use a polyester or 

nylon pad.

3.  Wash the bake pan in sudsy water or in dishwasher. To minimize scratching, use a 

polyester or nylon pad.

CRUMB TRAY

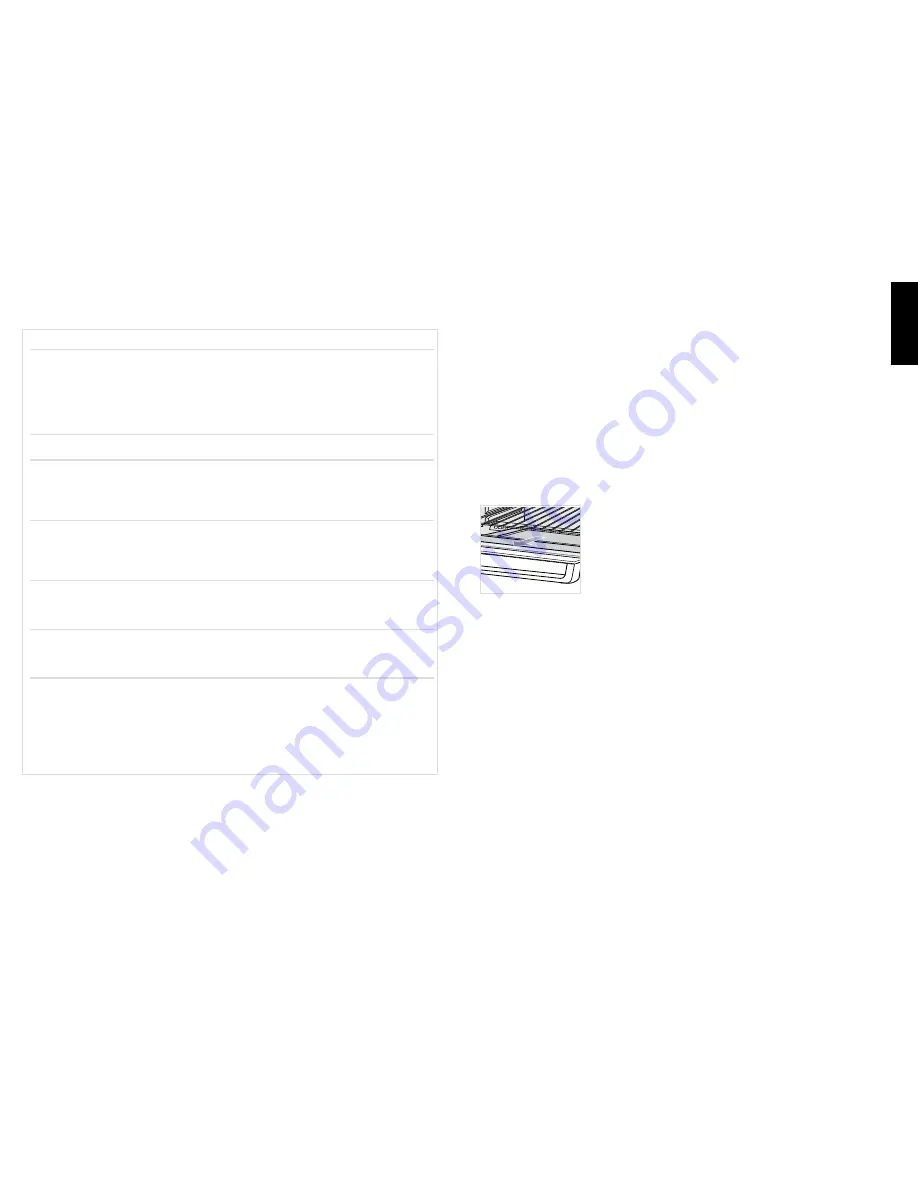
1.  open oven door and pull out crumb tray 

(E)

.

2.  dispose of crumbs and wipe the tray with a dampened cloth, or 

wash in sudsy water or in the dishwasher.

3.  Be sure to dry thoroughly before inserting the tray back into the 

oven.

ExTERIOR SURFACES
Important: The oven top surface gets hot; be sure the oven has cooled completely before 

cleaning. 

Wipe the top and exterior walls with a damp cloth or sponge. dry thoroughly.

COOKING CONTAINERS

Metal, ovenproof glass or ceramic bakeware without glass lids can be used in your oven. 

Follow manufacturer’s instructions. Be sure the top edge of the container is at least  

1½” (3.81 cm) away from the upper heating elements.

E

FOOD 

AMOUNT 

TIME 

PROCEDURE

Chicken pieces 

1-4 pieces 

30-40 minutes 

Arrange pieces skin-side  


down; turn after  


15-25 minutes.  


Continue broiling until  


170°F (77 °C) on meat  


thermometer, or juices  


run clear.

Frankfurters 

1-8 frankfurters  8-12 minutes 

For uniform browning,  


turn frequently.

Hamburgers 

1-4 (1/4 lb. 

12-18 minutes 

Turn after 8 minutes;  


(0,11 kg) each) 


continue broiling until  


145°F (63 °C) on meat  


thermometer, or done  


as desired.

Beef steaks 

1-2 (3/4" 

18-25 minutes 

Turn after 10 minutes;  


(19mm) thick) 


continue broiling until  


145°F (63 °C) on meat  


thermometer, or done  


as desired.

Pork chops 

1-4 (3/4" 

20-30 minutes 

Turn after 12 minutes;  


(19mm) thick) 


continue broiling until  


160°F (71 °C) on meat  


thermometer.

Fish steaks 

1-4 (1"  

10-18 minutes 

Broil until fish flakes 


(26mm) thick) 


easily with a fork  


or 145°F (63 °C) on meat  


thermometer.

open-faced 

1-4 slices 

7-10 minutes 

For crispier sandwich,  

cheese sandwich 


toast bread first. Top   


bread with tomato  


and sliced cheese,  


if desired. Broil until  


tomato is hot and  


cheese  is melted.

BROILING GUIDE

Note: 

When broiling foods, slide the bake pan/drip tray underneath the slide rack/broil rack 

using the rack support rails. Insert rack into upper slot. Broiling times are approximate. do not 

undercook ground beef, fish or poultry.

ENGLISH

Содержание Distinction TRO4075BDC

Страница 1: ...ir for cooking an 11 casserole fast and evenly Cuisson par convection L air chaud circule permettant de cuire rapidement et uniformément une casserole de 28 cm Model ModÈle TRO4075BDC For online customer service and to register your product go to www prodprotect com applica CustomerCare Line USA Canada 1 800 231 9786 Accessories Parts USA Canada Accessoires Pièces É U Canada 1 800 738 0245 ...

Страница 2: ...n a risk of electric shock Extreme caution should be exercised when using containers constructed of other than metal or glass Do not store any material other than manufacturer s recommended accessories in this oven when not in use Do not place any of the following materials in the oven paper cardboard plastic and the like Do not cover crumb tray or any part of this oven with metal foil This will c...

Страница 3: ...utrients cook evenly in less time Use this countertop oven from breakfast to dinner as you enjoy cooking your favorite foods for the whole family GETTING FAMILIAR WITH YOUR UNIT Product may vary slightly from what is illustrated 1 Power indicator light 2 Temperature control Part TRO4070DC 01 3 Cooking FUNCTION MODE selector Part TRO4070DC 02 4 60 minute TIMER TOAST shade selector Part TRO4070DC 03...

Страница 4: ...just lighter or darker to suit your taste The Power indicator light comes on and stays on during the toasting cycle When toasting is done the signal bell sounds the oven automatically shuts off and the indicator light goes off Helpful Tip for Multiple Toasting Cycles For best results when making three or more consecutive batches of toast allow a short cool down period between toasting cycles 6 Ope...

Страница 5: ...han 60 minutes turn the timer counterclockwise C 6 You can cook your food two ways In the bake pan placed on the slide rack Da OR Directly on the slide rack using the bake pan as a drip tray inserted in the rack support rails underneath the slide rack Db The Power indicator light comes on and stays on during cooking cycle The heating elements cycle on and off to maintain the temperature Note Be su...

Страница 6: ...goes off 9 Using an oven mitt or pot holder slide out broil rack together with bake pan to remove food Important Always use an oven mitt or pot holder to remove food from the oven as the door and the slide rack will be hot FOOD AMOUNT TEMPERATURE TIME PROCEDURE Chicken pieces to fit bake pan 375 F 191 C Bake until 1 4 pieces 45 55 minutes chicken registers 180 F 82 C on meat thermometer Ham lamb t...

Страница 7: ...cloth or sponge Dry thoroughly Cooking Containers Metal ovenproof glass or ceramic bakeware without glass lids can be used in your oven Follow manufacturer s instructions Be sure the top edge of the container is at least 1 3 81 cm away from the upper heating elements E FOOD AMOUNT TIME PROCEDURE Chicken pieces 1 4 pieces 30 40 minutes Arrange pieces skin side down turn after 15 25 minutes Continue...

Страница 8: ...ur appliance call the appropriate 800 number on cover of this book Please DO NOT return the product to the place of purchase Also please DO NOT mail product back to manufacturer nor bring it to a service center You may also want to consult the website listed on the cover of this manual Two Year Limited Warranty Applies only in the United States and Canada What does it cover Any defect in material ...

Страница 9: ...ontenant de l huile brulante ou autre liquide chaud Toujours brancher la fiche de l appareil d abord puis brancher le cordon dans la prise murale Pour debrancher l appareil placer toutes les commandes a la position off arret et retirer la fiche de la prise Utiliser l appareil uniquement aux fins pour lesquelles il a ete concu Faire preuve de grande prudence pour deplacer le plateau ou jeter la gra...

Страница 10: ...u moins égale à celle de l appareil et que 2 lorsque l appareil est de type mis à la terre il faut utiliser un cordon de rallonge mis à la terre à trois broches et 3 le cordon plus long soit placé de sorte qu il ne soit pas étalé sur le comptoir ou la table d où des enfants pourraient le tirer ni placé de manière à provoquer un trébuchement Note Lorsque le cordon d alimentation est endommagé il fa...

Страница 11: ...TRO4070DC 06 9 Porte en verre transparente 10 Fente pour la grille 11 Intérieur courbé très profond Remarque indique que la pièce est remplaçable par l utilisateur amovible 1 Témoin de fonctionnement 2 Sélecteur de la température de cuisson grillage 3 Sélecteur de la fonction MODE de cuisson 4 Minuterie de 60 minutes sélecteur de grillage B Important Lorsque vous utilisez la fonction GRILLAGE MINU...

Страница 12: ...R OR INNER SURFACE OF THE OVEN ATTENTION LE FOUR DEVIENT CHAUD LORSQU IL EST EN MARCHE TOUJOURS UTILISER DES MITAINES DE CUISINE OU DES POIGNÉES POUR TOUCHER LES SURFACES EXTÉRIEURES OU INTÉRIEURES DU FOUR PRÉPARATIFS Retirer le matériau d emballage et les autocollants enlever la pellicule protectrice transparente du tableau de commande Veuillez aller à l adresse www prodprotect com applica pour e...

Страница 13: ...ctions de cuisson sur la d oignons cuisson sur l emballage grille Vérifier et autres articles souvent pour panés surgelés empêcher de trop collations surgelées dorer Pizza surgelée suivre les Placer la pizza instructions directement sur la sur l emballage grille pour obtenir une croûte croustillante ou dans le plat de cuisson pour obtenir un croûte moelleuse 7 Refermer la porte du four 8 Lors de l...

Страница 14: ...érieure de la grille Tourner le sélecteur de la fonction MODE de cuisson à Rôtissage Broil 4 Ouvrir la porte du four et se servir du plat comme lèchefrite en l insérant sous la grille coulissante dans les rails de soutien de la grille Db Important Il faut régler la minuterie ou choisir la position de fonctionnement continu Stay On pour activer le four 5 Tourner le sélecteur de minuterie de façon à...

Страница 15: ...oyant à vitres en vaporisateur 2 Laver la grille dans de l eau chaude savonneuse ou au lave vaisselle Pour enlever les taches tenaces utiliser un tampon en nylon ou en polyester 3 Laver le plat de cuisson dans de l eau chaude savonneuse Utiliser un tampon en nylon ou en polyester pour minimiser les égratignures Plateau à miettes 1 Ouvrir la porte du four et sortir le plateau E 2 Jeter les miettes ...

Страница 16: ...er le numéro sans frais approprié indiqué sur la page couverture Ne pas retourner le produit où il a été acheté Ne pas poster le produit au fabricant ni le porter dans un centre de service On peut également consulter le site web indiqué sur la page couverture Garantie limitée de deux ans Valable seulement aux États Unis et au Canada Quelle est la couverture Tout défaut de main d oeuvre ou de matér...

Страница 17: ...32 Printed on recycled paper Imprimé sur du papier recyclé 2009 7 6 10E F Copyright 2009 Applica Consumer Products Inc ...

Отзывы: