7
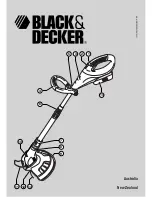
5. Handle knob
6. Handle adjustment collar
7. Mode adjustment collar
8. Motor housing
9. Guard
10. Line trimming blade
11. Edge guide
12. Spool housing
13. Cutting line
14. Battery
Fig. A
15. Charger
16. Charging indicator
17. End of charge indicator
Assembly
Warning!
Before assembly, remove the battery from the tool.
Fitting and removing the battery (fig. B)
◆
To fit the battery (14), line it up with the receptacle on the
tool. Slide the battery into the receptacle and push until
the battery snaps into place.
◆
To remove the battery, push the release button (18) while
at the same time pulling the battery out of the receptacle.
Fitting the guard (fig. C)
Warning!
Never operate the tool with damaged guards or
shields or without guards or shield in place.
◆
Place the guard (9) onto the tool as shown, aligning the
holes (19) with the lugs (20) on the tool.
◆
Press the guard until it snaps into place (A).
◆
Push the guard forward (B).
◆
Securely tighten the screws (21).
Warning!
Never use the tool unless the guard is properly fitted.
Fitting a new spool of cutting line (fig. D)
Replacement spools of cutting line are available from your
Black & Decker dealer (cat. no. A6481).
◆
Keep the tabs (22) on the spool cover (23) depressed and
remove the spool cover from the housing (12).
◆
Remove the empty spool (24) from the housing.
◆
Remove any dirt or grass from the housing.
◆
Take the new spool and unwind approx. 12 cm of cutting
line.
◆
Feed the cutting line through the eyelet (25).
◆
Push the spool onto the drive shaft (26) and rotate it
slightly until it is seated. Make sure that the cutting line
is not trapped under the spool and that 10-12 cm of line
protrudes from the housing.
◆
Align the tabs on the spool cover with the holes in the
housing.
◆
Push the cover onto the housing until it snaps into place.
Warning!
If the cutting line protrudes beyond the trimming
blade (11), cut it off so that it just reaches the blade.
Winding new line onto an empty spool (fig. E - G)
You may wind new cutting line onto an empty spool.
Replacement packs of cutting line are available from your
Black & Decker dealer (cat. no. A6170 (25 m), A6171 (40 m)).
◆
Remove the empty spool from the tool as described above.
◆
Remove any old cutting line from the spool (27) (fig. E).
◆
Feed 2 cm of cutting line into one of the holes (28) in the
spool as shown (fig. F).
◆
Bend the cutting line and anchor it in the L-shaped slot (29).
◆
Wind the cutting line onto the spool in the direction of the
arrow. Make sure to wind the line on neatly and in layers.
Do not criss-cross (fig. G).
◆
When the wound cutting line reaches the recesses (30),
cut the line. Let the line protrude approx. 12 cm from the
spool and hold a finger on the line to keep it in place (fig. E).
◆
Proceed as described above to fit the spool on the tool.
Warning!
Only use the appropriate type of Black & Decker
cutting line.
Use
Warning!
Let the tool work at its own pace. Do not overload.
Charging the battery (fig. A)1
The battery needs to be charged before first use and
whenever it fails to produce sufficient power on jobs that
were easily done before. When charging the battery for the
first time, or after prolonged storage, it will only accept an
80% charge. After several charge and discharge cycles, the
battery will attain full capacity. The battery may become warm
while charging; this is normal and does not indicate a problem.
Warning!
Do not charge the battery at ambient temperatures
below 4
°
C or above 40
°
C. Recommended charging
temperature: approx. 24
°
C.
◆
To charge the battery (14), remove it from the tool and
insert it into the charger (15). The battery will only fit into
the charger in one way. Do not force. Be sure that the
battery is fully seated in the charger.
◆
Plug in the charger.
Содержание BST2018
Страница 1: ...1 Australia New Zealand www blackanddecker com 7 8 9 13 12 11 10 6 14 4 5 3 2 1 ...
Страница 2: ...2 29 28 30 27 12 24 26 23 22 25 14 18 17 16 15 15 E C B D A F 19 21 9 20 29 28 ...
Страница 3: ...3 4 5 K I H J G 31 6 2 1 K ...
Страница 4: ...4 7 11 M L ...
Страница 11: ...11 ...


