

ENGLISH
ENGLISH
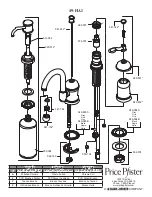
DRAIN BODY INSTALLATION
FAUCET FUNCTIONS
MAINTENANCE & CARE
11
12
13
15
16
14
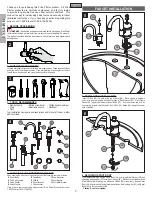
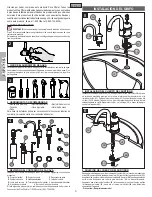
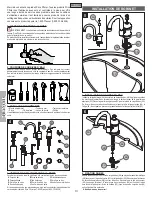
11 WATER SUPPLY LINES
Gently separate hot and cold supply tubes (
11A
), approximately three inches apart.
Connect water Supply Lines (
11C
) to Faucet Inlets (
11B
). Hot water supply line goes
to hot inlet fitting indicated by red tag (
11D
). (
Supply lines not included
). Follow
manufacturer’s instructions when installing supply lines.
Do not twist Inlets (
11A
)!
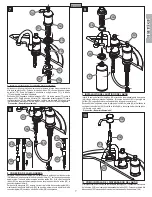
12 POP-UP INSTALLATION
Install and adjust Pop-Up (
12A
) using separate instructions supplied with the Pop-Up
assembly.
13 UNIT START UP
Turn on hot and cold water supplies, and check for leaks above and below the sink.
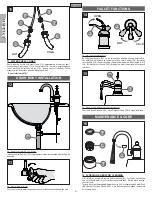
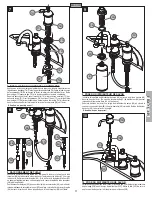
14 VALVE FUNCTION
By lifting Lever Handle (
14A
) up, the valve will be activated allowing water to flow.
The water flow will increase by continuing to lift up Lever Handle (
14A
). By rotating
Lever Handle (
14A
) counterclockwise, the water temperature will decreased to fully
cold. By rotating Lever Handle (
14A
) clockwise, the water temperature will increased
to fully hot.
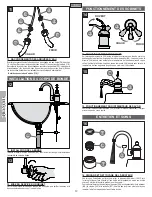
15 SOAP DISPENSER OPERATION
To activate Soap Dispenser (
15A
), press Dispenser Head (
15B
) to spray liquid soap.
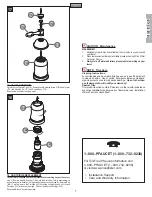
16 FLUSHING & AERATOR CLEANING
After installation is complete, remove Aerator Housing (
16A
). Turn Valve on and allow
both hot and cold water to run for at least one minute each. While water is running,
check for leaks.
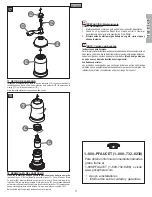
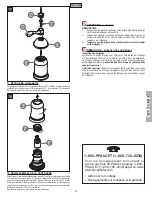
To clean the aerator, disassemble Aerator Housing (
16A
) by separating the Aerator Shell
(
16B
), Basket (
16C
), and Washer (
16D
). Once parts have been cleaned, reassemble
by reversing steps.
4
11C
11B
11B
11D
11C
11A
11A
12A
14A
14A
15A
15B
16D
16C
16B
16A
HOT
HOT
COLD
COLD
OPEN