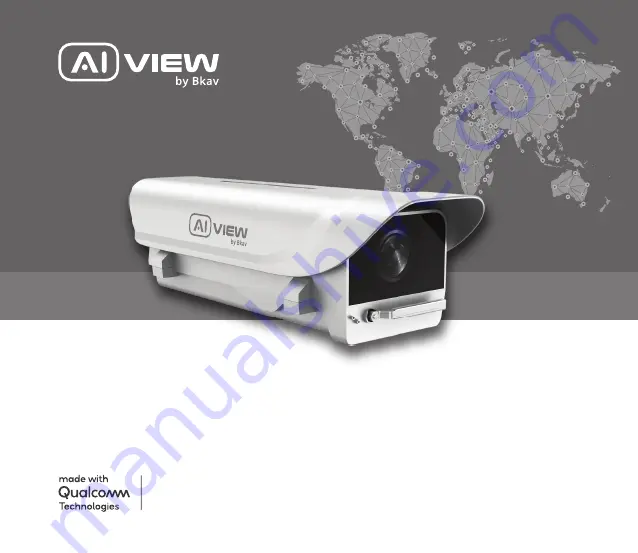
background image

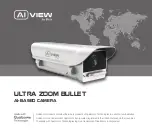
ULTRA ZOOM bullet

AI-based Camera

Qualcomm products contained herein are products of Qualcomm Technologies, Inc. and/or its subsidiaries.
Qualcomm is a trademark of Qualcomm Incorporated, registered in the United States and other countries. 

The Made with Qualcomm Technologies logo is a trademark of Qualcomm Incorporated.

Содержание 0233

Страница 1: ...ined herein are products of Qualcomm Technologies Inc and or its subsidiaries Qualcomm is a trademark of Qualcomm Incorporated registered in the United States and other countries The Made with Qualcomm Technologies logo is a trademark of Qualcomm Incorporated ...

Страница 2: ...Model S200 INSTALLATION GUIDE Product Number 0233 ...

Страница 3: ...al ULTRA ZOOM bullet AI based Camera Qualcomm products contained herein are products of Qualcomm Technologies Inc and or its subsidiaries Qualcomm is a trademark of Qualcomm Incorporated registered in the United States and other countries The Made with Qualcomm Technologies logo is a trademark of Qualcomm Incorporated Thank you letter ...

Страница 4: ...4 PRODUCT KIT Power supply Optional Wi Fi Antenna Optional Set 4 of screws and anchors Hex key Water supply tank Optional IR led Optional Water supply tank accessories Optional ...

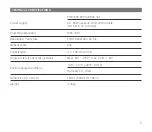
Страница 5: ... 60 fps Optical zoom 33x Focal length 4 5 148 5mm 5 Angle of view horizontal vertical Near 60 1 36 2 Far 2 28 1 29 Environmental conditions Dimensions L x W x H L503 x W242 x H170mm 4 05kg Weight 40 C 60 C 40 F 140 F Humidity 10 100 POE IEEE 802 3af 802 3at 30 80W depends on IR LED module IR LED 6 12 24 48W ...

Страница 6: ...6 Water and dust camera shield PRODUCT OVERVIEW Lens protection Lens wiper GPS antenna Wall bracket Safety cable ...

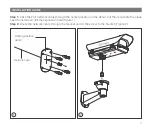
Страница 7: ...osition on the decal Put the decal onto the place need to install and drill the expansion hole Figure 1 Step 2 Route the network cable through the bracket and fix the screw to the bracket Figure 2 INSTALLATION GUIDE 1 Network cable 2 Drilling position decal ...

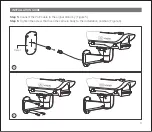
Страница 8: ...8 Step 3 Put the camera onto the fixed bracket with hinge bolt and safety cable Figure 3 Step 4 Tighten the screw that fixes the camera body to the bracket Figure 4 INSTALLATION GUIDE 3 4 ...

Страница 9: ...9 INSTALLATION GUIDE Step 5 Connect the PoE cable to the signal stand by Figure 5 Step 6 Tighten the screw that fixes the camera body to the installation position Figure 6 6 5 Decal ...

Страница 10: ...10 ADJUSTING THE CAMERA VIEWING ANGLE 130 65 Loosen the screw then turn camera to the right position ...

Страница 11: ...o reset the device Memory card Open the protective cover you can find the location of Micro SD card Reset installation Power off the camera press and hold the factory reset button Continue to hold the factory reset button for another 10 seconds while powering the camera the camera will be restored to factory settings Note Mirco SD card ...

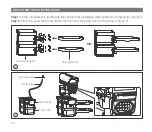
Страница 12: ... the camera on the wall the following installation steps are similar to these steps above Note IR LED INSTALLATION GUIDE Step 1 Remove fixing screws and the IR LED connector protection element Figure 1 Step 2 Insert IR LED into the camera and fix with 2 screws as figure 2 1 2 ...

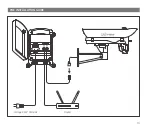
Страница 13: ...13 POE INSTALLATION GUIDE N L Router Voltage 240V 50 60Hz ...

Страница 14: ...fix the water tank frame to the installation place tighten the components in figure 1 Step 2 Place the water tank in the frame then connect the water hose to the camera figure 2 2 1 Water tank frame Steel fasteners Sprinkler head Water pipe Control box Water tank ...

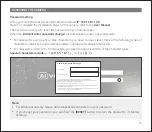
Страница 15: ...es of characters uppercase and lowercase letters numbers and special characters For passwords using 10 to 15 characters you need to use at least two of the character types Special characters include _ User name Password Administrator password change New password Confirm new password For a new password with 8 to 9 digits you must use at least 3 of the following uppercase lowercase letters numbers a...

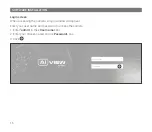
Страница 16: ...ng the camera a login window will appear Enter your user name and password to access the camera 1 Enter admin in the User name box 2 Enter your chosen password in Password box 3 Click SOFTWARE INSTALLATION User name Password 16 ...

Страница 17: ...t or authorized Bkav agents if you experience any problems This equipment has been tested and found to comply with the limits for a Class A digital device pursuant to part 15 of the FCC rules These limit are designed to provide reasonable protection against harmful interference when the equipment is operated in a commercial environment This equipment generates uses and can radiate radio frequency ...

Страница 18: ......

Страница 19: ......

Страница 20: ...BKAV CORPORATION Address 2nd Floor HH1 Building Yen Hoa Ward Cau Giay District Ha Noi Viet Nam Website www aiview ai Email aiview bkav com ...

Отзывы: