DB-300-9
30
7.1.1
OAC series
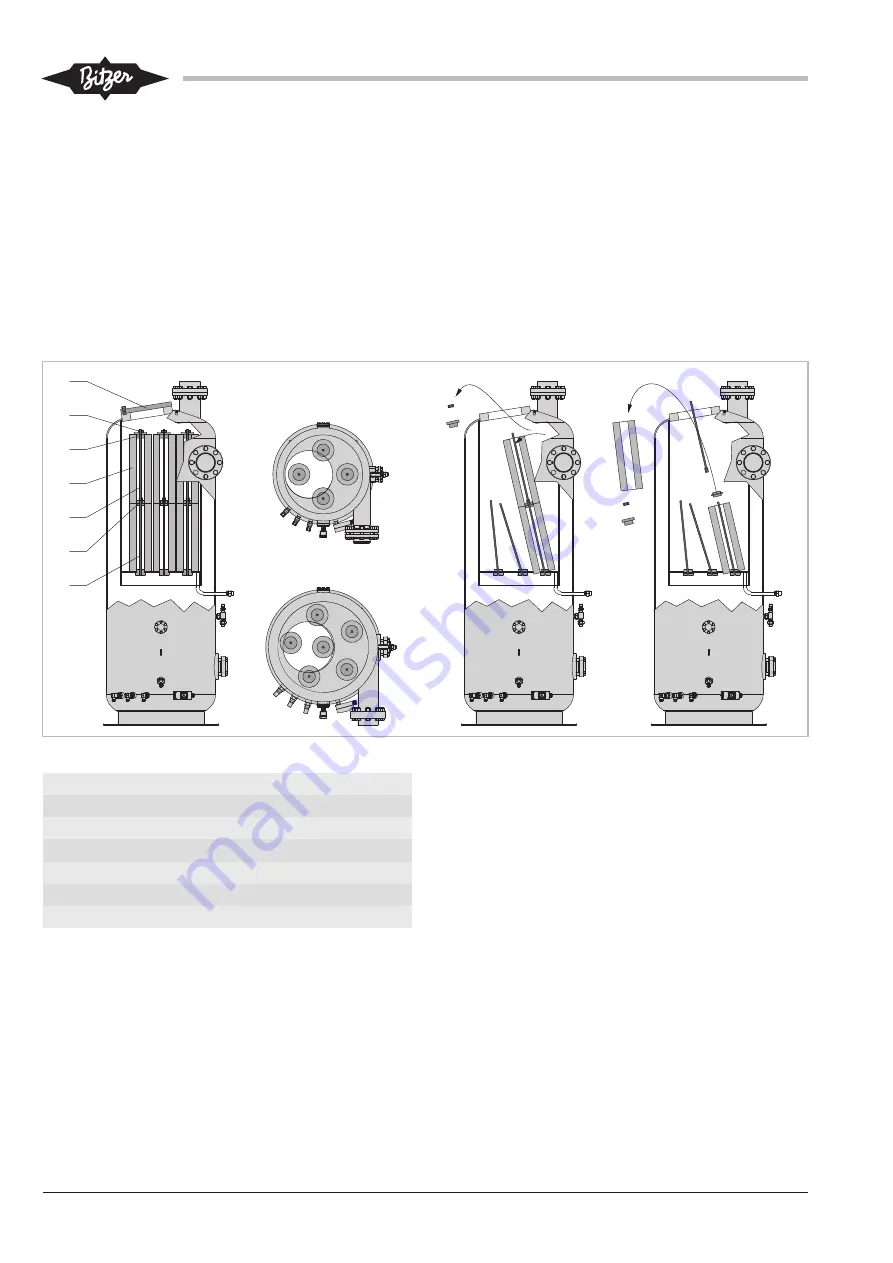
• Open the service flange (1).
• The filter cartridges are arranged in pairs one above
the other: The OAC14011A contains 4 cartridge
pairs, the OAC25112A contains 6.
• Remove the cartridge pairs one after the other: Re-
move the sealing nut (2) and centring piece (3). Take
out the upper filter cartridge (4). Remove the upper
guide bar (5). Remove the connecting piece (6).
Take out the lower filter cartridge. The lower guide
bar (7) remains in the combined oil separator.
• Remove the other cartridge pairs accordingly.
• Once the sealing nut (2) and the centring piece (3)
have been removed, the respective cartridge pair
can be tilted.
• Install new filter cartridges accordingly. Tighten the
sealing nuts (2) (10 Nm).
• Screw the service flange (1) on (98 Nm).
1
2
4
5
6
7
OAC25112A
OAC14011A
3
Fig. 20: OAC series: Changing the filter cartridge
1
Service flange
2
Sealing nut
3
Centring piece
4
Filter cartridge
5
Upper guide bar
6
Connecting piece
7
Lower guide bar
Содержание F062H(P)
Страница 3: ...DB 300 9 3 8 Decommissioning 33 ...
Страница 35: ...DB 300 9 35 8 Außer Betrieb nehmen 65 ...
Страница 67: ...DB 300 9 67 8 Mettre hors service 98 ...
Страница 99: ...Notes ...


