background image

-­‐   13   -­‐   

T9


S

erver 

Installation


Guide   

6. Administering   Your   

S

erver

6. Administering   Your   

S

erver

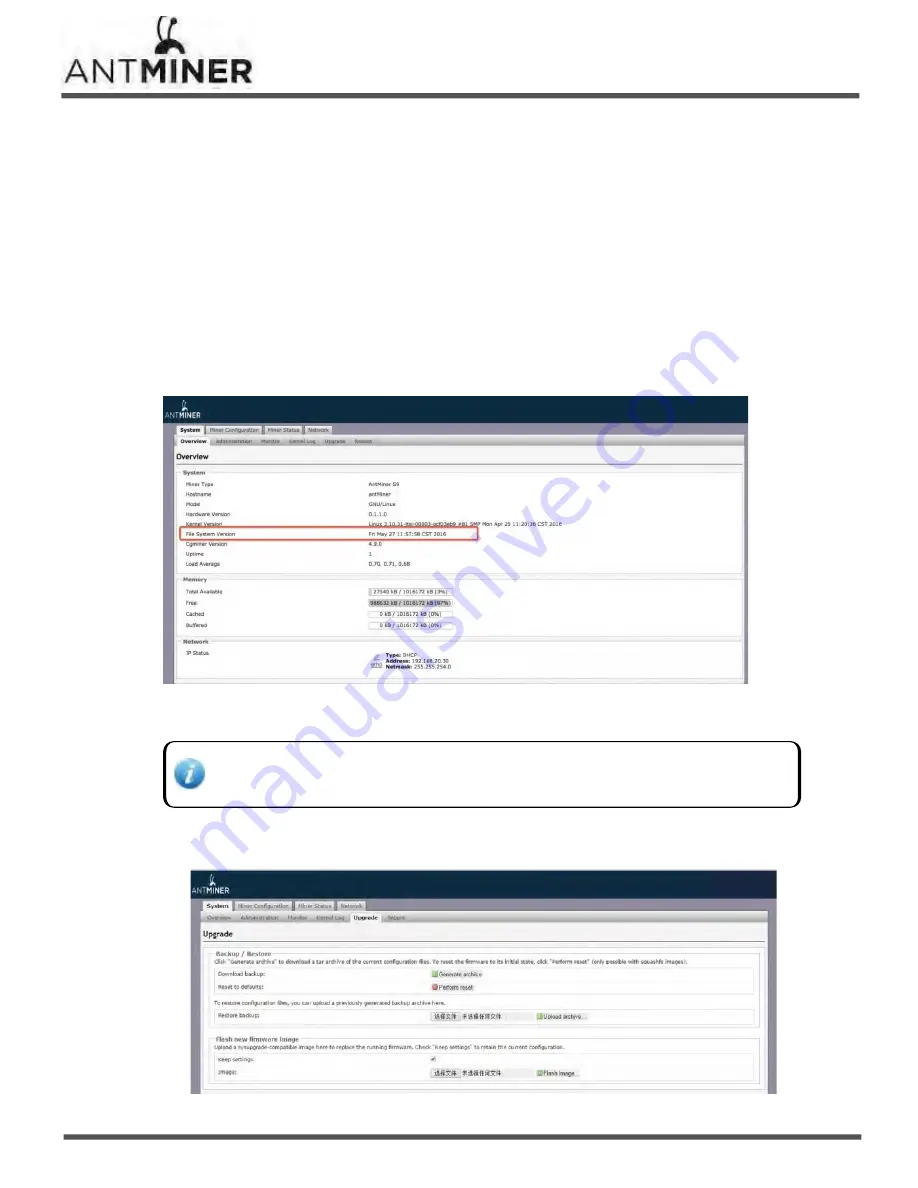
6.1   Checking   Your   Firmware   Version   

To   check   your   firmware   version:


1.

In   

System

,   click   the   

Overview   

tab.

2.

File   System   Version   

displays   the   date   of   the   firmware   your   

server

   use.   In   the   example   below,   the   

server

is


using   firmware   version   20170108.

6.2   Upgrading   Your   System   

Make   sure   that   T9   

server 

remains   powered   during   the   upgrade   process.   If   power   fails   

before   the   upgrade   is   completed,   you   will   need   to   return   it   to   Bitmain   for   repair.   

To   upgrade   the   

serv

er’s   firmware:


1. In   System,   click   

Upgrade

.

Содержание Antminer T9

Страница 1: ...roduct or service without notice Customers should obtain the latest relevant information before placing orders and should verify that such information is current and complete All products are sold subject to Bitmain s terms and conditions of sale supplied at the time of order acknowledgment Bitmain warrants performance of its products to the specifications applicable at the time of sale in accorda...

Страница 2: ...ts or other intellectual property of the third party or a license from Bitmain under the patents or other intellectual property of Bitmain Resale of Bitmain products or services with statements different from or beyond the parameters stated by Bitmain for that product or service voids all express and any implied warranties for the associated Bitmain product or service and is an unfair and deceptiv...

Страница 3: ...ponents 1 2 Specifications 2 Connecting the Power Supply 3 Setting Up the Server 4 Configuring the Server 5 M onitoring Your Server 6 Administering Your Server 13 6 1 Checking Your Firmware Version 13 6 2 Upgrading Your System 13 6 3 Modifying Your Pass word 14 6 4 Restoring Initial Settings 14 ...

Страница 4: ...T9 server is Bitmain s newest version in the T9 server series It boasts a state of the art BM1387 custom made chip using 16nm technology All T9 servers are tested and configured prior to shipping to ensure easy set up You must provide your own ATX power supply ...

Страница 5: ... 5 T9 Server Installation Guide 1 Overview 1 1 T9 Server Components The T9 server main components and controller front panel are shown in the following figure ...

Страница 6: ... 25 C ambient temperature 1349W 7 Rated voltage 11 60 13 00V Estimated wall outlet power efficiency with APW3 93 efficiency 25 C ambient temperature 0126J GH 7 Dimensions L x W x H 350mm x 135mm x 158mm Net weight 4 2kg Operating ambient temperature 0 40 C The server does not contain a DC DC converter therefore higher input voltage will cause higher Mining efficiency ...

Страница 7: ...onnect PSU power cable connectors to each of the nine PCI e connectors on the top of T9 server ensuring that each hash board is powered by the same PSU 2 Connect a PSU power cable connector to the T9 PCI e connector on the controller 3 Connect the network cable to the ETH port 4 To power up your T9 server connect the PSUs to the power wall outlet Each hashboard must be powered by the same PSU to p...

Страница 8: ... 8 T9 Server Installation Guide 2 Connecting the Power Supply Figure 2 1 PCI E Connectors Correct Connection Figure 2 2 PCI E Connectors Incorrect Connection ...

Страница 9: ...the following file IPReporter zip 3 Extract the file 4 Right click IPReporter exe and run it as Administrator 5 Select one of the following options Shelf Step Position suitable for farm servers to mark the location of the servers Default suitable for home servers 6 Click Start The file IPReporter zip is supported by Microsoft Windows only The default DHCP network protocol distributes IP addresses ...

Страница 10: ... it down until it beeps about 5 seconds The IP address will be displayed in a window on your computer screen 8 In your web browser enter the IP address provided 9 Proceed to login using root for both the username and password 10 In the Network section you can assign a Static IP address optional 11 Click Save Apply ...

Страница 11: ...Description Pool URL Enter the URL of your desired pool The T9 server can be set up with three mining pools with decreasing priority from the first pool pool 1 to the third pool pool 3 The pools with low priority will only be used if all higher priority pools are offline Worker Your worker ID on the selected pool Password The password for your selected worker 3 Click Save Apply to save and restart...

Страница 12: ...etting GH S RT Hash rate of each hash board GH s Temp PCB Temperature of each hash board C Applied only to server with fixed frequency Temp Chip Temperature of the chips on each hash board C ASIC status One of the following statuses will appear O indicates OK X indicates error indicates dead Note The T9 server with automatic frequency adjustment firmware will stop running when the Temp Chips reach...

Страница 13: ...b 2 File System Version displays the date of the firmware your server use In the example below the server is using firmware version 20170108 6 2 Upgrading Your System Make sure that T9 server remains powered during the upgrade process If power fails before the upgrade is completed you will need to return it to Bitmain for repair To upgrade the server s firmware 1 In System click Upgrade ...

Страница 14: ...of the following options Reboot to restart the server with the new firmware Go Back to continue mining with the current firmware The server will load the new firmware next time it is restarted 6 3 Modifying Your Password To change your login password 1 In System click the Administration tab 2 Set your new password then click Save Apply 6 4 Restoring Initial Settings To restore your initial setting...

Страница 15: ...T9 Server Installation Guide 15 ...

Отзывы: