5
How To Assemble Your Steam Mop
How To Use This Guide
This User’s Guide has been designed to help you get the utmost
satisfaction from your BISSELL Steam Mop bare floor steam cleaner.
You’ll find assembly and operating instructions, safety precautions,
maintenance and troubleshooting instructions. Please read this User’s
Guide thoroughly before assembling your Steam Mop.
Pay particular attention to the parts diagram, assembly instructions,
and part names. Locate and organize all parts before assembly.
Familiarize yourself with the parts and where they fit. Following
this User’s Guide will greatly enhance your ability to get the best
performance from your BISSELL Steam Mop for many years.
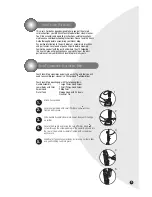
Your Steam Mop assembles quickly and easily. The only tool you will
need to assemble your cleaner is a Phillips Head Screwdriver.
Your Steam Mop is packaged with the following items:
Handle Assembly
1 Large Philips Head Screw
Lower Body with Filter
1 Small Philips Head Screw
Swivel Head
2 Mop Pads
Water Tank
Storage Hook with 2 Screws
Clean Out Pin
Attach Swivel Head.
Secure Swivel Head with small Phillips Head Screw.
Tighten until secure.
Slide Handle Assembly down into Lower Body until it will go
no further.
Secure the handle by placing the Large Phillips Head
Screw through the screw opening in the Lower Body and into
the rear of the Handle Assembly. Tighten with screwdriver
until secure.
Slide Water Tank onto Lower Body by lining up vertical glides
and gently sliding tank into place.
1.
2.
3.
4.
5.
1
2
3
4
5


