Page: 10 of 13
BIOCARE INTERNATIONAL
7.
USING THE SOFTWARE
(1)
Starting the application
The software application will start automatically, once the
Thermal Camera/Smart BOX is powered on. To enter the
application manually, use the provided Air mouse; once in
the homepage, look for the FS265 Pro application and
press the mouse’s “trigger” button to start the software.
When the smart BOX is used for the first time or if the
application has been re-installed, the software needs to get
new permissions. In this case, the software won’t start
automatically; please select the application manually and
allow it access permission.
You can exit to the homepage at any time, by pressing the
back button on the air mouse (
right button next to scroll
dial)
(2)
Setup
(2.1) Internet
Connect the Smart BOX to the Internet, as follows:
•
Go to the homepage by pressing the back button.
(
Right button, next to the scroll dial)
•
Hover over to the settings tab and click
“Settings”.
•
Select Wi-Fi, and select
ON
•
Look for your wi-fi network and enter your
password to connect.
(2.2)
Date & Time
•
Still in the settings page, scroll down to “Date &
Time”
and click on this tab
•
On the first line “
Automatic Date & Time
” should
be checked
•
A few lines down in “
Select Time-zone
”, check to
see it is in your correct time-zone, by clicking on the
tab, and selecting the time-zone of your city/area
•
Go back to the home-page by clicking the back
button
(right button next to scroll dial)
(3)
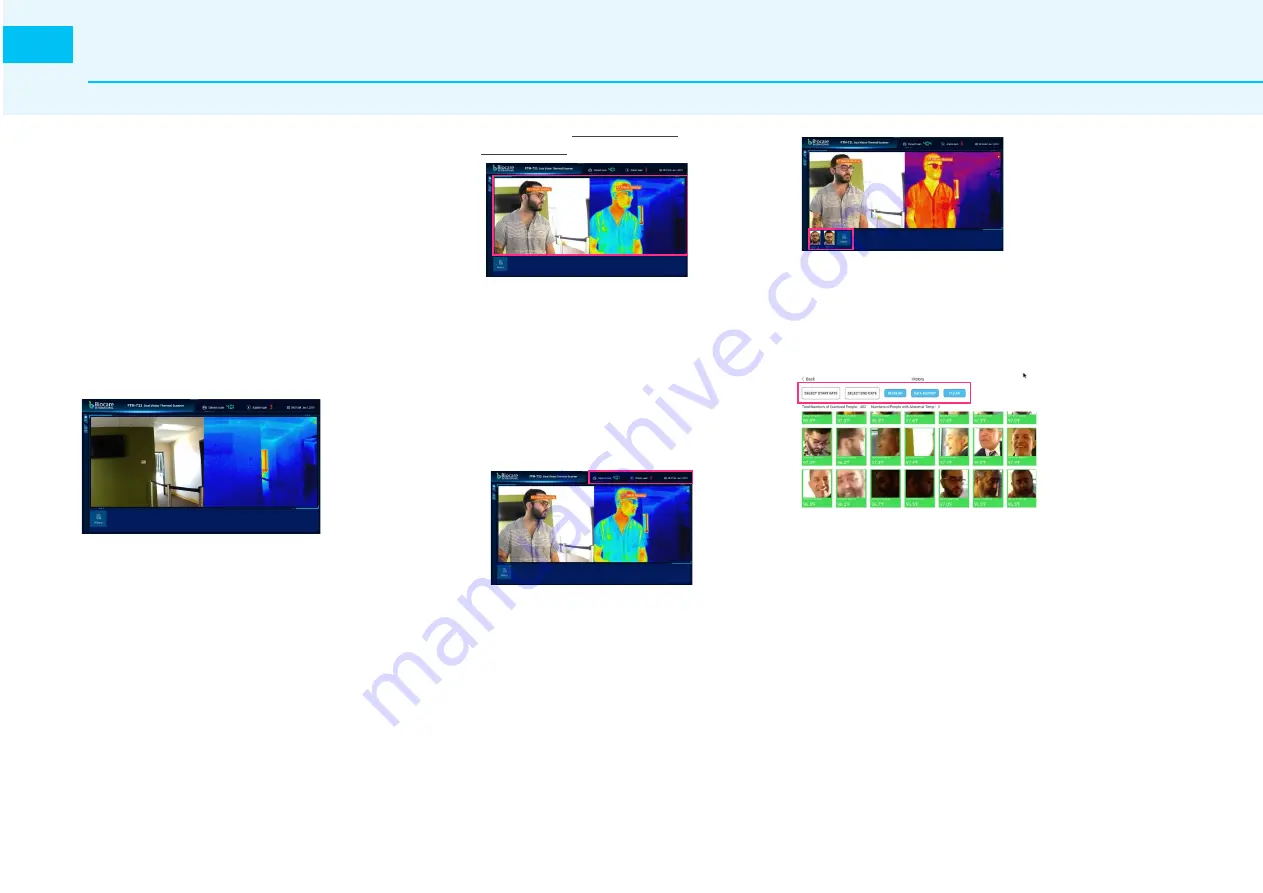
Side by side HD Visible Light, &
Infrared Light Real-time Images
The left half of the interface, is the real-time visible-light
image. The software will recognize the human face and
display real-time body temperature. The software
supports 10-face recognition simultaneously.
The infrared light real-time image is on the right side
(4)
Information Display of People Stream
Detected
On the upper right side of the interface:
•
“Detect num” - shows the total number of
people detected by the software in that day.
•
“Alarm num” - shows the number of people that
have triggered an alarm on that day (abnormal
temperature).
•
The rightmost shows the current date and time
(It cannot be set manually: automatic date & time
need to be setup in settings – See step#2)
(5)
History
The detected faces and their temperatures are displayed below the
main interface. Hover the mouse to “History” and press “trigger”
button. Here in the “History’s Interface”, all the recorded images are
displayed. The boxes in the green background have normal
temperatures, while those in red have abnormal temperatures.
(5.1)
Clearing the history
•
To clear the history, select “Clear”.
•
On the pop-up window, select “0” (# of photos retained) and
then “OK”
(5.2)
Data Filtering
•
In order to just filter the data or photos you want to view
for a determined date, select the “start date” and “end
date”
•
In the drop-down menu of temperature, three display
modes can be selected: total, normal, or abnormal.
•
Select “refresh” and the selected data will be displayed
(5.3) Exporting Data
•
Click “Data Export” to export all records, and the export
results are placed in the “FS256_export” file folder.
Содержание FTH-711
Страница 2: ...Page 2 of 13 BIOCARE INTERNATIONAL Biocare International ...
Страница 5: ...FTH 711 Dual Vision Thermal Scanner Page 5 of 13 ...
Страница 8: ...Page 8 of 13 BIOCARE INTERNATIONAL SECTION 02 SETUP ...
Страница 10: ...FTH 711 Dual Vision Thermal Scanner On off Battery Left Button Enter ESC MOUSE FUNCTION LAYOUT ...
Страница 14: ...Biocare International LLC Biocare International LLC Medical Device Solutions ...


