HOME anglais
Copyright BIO-UV
Page 1
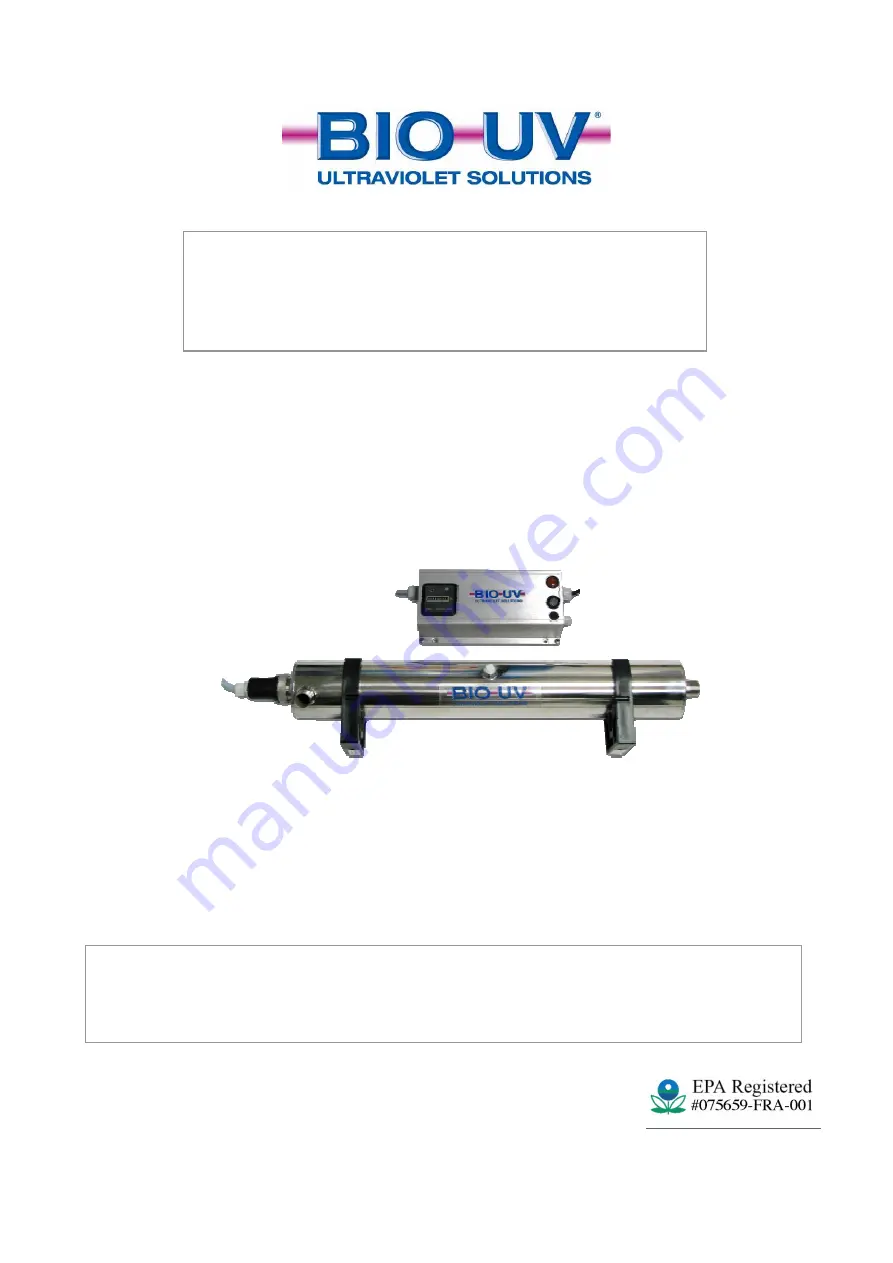
STERILIZERS
in the HOME range
INSTALLATION AND MAINTENANCE
MANUAL
Страница 1: ...HOME anglais Copyright BIO UV Page 1 STERILIZERS in the HOME range INSTALLATION AND MAINTENANCE MANUAL ...
Страница 2: ... products HOME range comply to the following standards NF EN 60598 1 A11 2001 CEM EN55015 Ed 00 A1 Ed 01 Number and year of EC stamp CG 03 006 du 29 01 2003 LS 03 51003 NL du 20 02 03 Benoît GILLMANN Chairman and Managing Director of BIO UV Société BIO UV SA ZAC La Petite Camargue 34400 LUNEL France Hotline 33 0 890 71 03 70 0 15 min www bio uv com Email info bio uv com ...
Страница 3: ...speed and ease of installation Their design also makes them easy to maintain Read these instructions carefully in order to optimise the operation of your sterilizer CONTENTS Pages A TECHNICAL CHARACTERISTICS 4 B WARNINGS AND SAFETY 5 C INSTALLATION TYPE 6 D STARTING UP 6 E ELECTRICAL DIAGRAMS 7 F BLOW UP VIEW DESIGNATION 8 G CLEARANCE DIMENSIONS 9 H CHANGING UV LAMPS QUARTZ TUBE AND O RING 9 I ASS...
Страница 4: ...mal Pressure 6bars 6 bars Weight 3 5 5 Kg Head Losses 0 01 bar 0 01 bar ELECTRICAL CABINET Material Aluminium Aluminium Dimensions 230x120x70mm 230x120x70mm Power supply 230V 50 Hz 230V 50 Hz Electrical 36W 61W Hour counter Electromécanic Electromécanic Fuse 1A 1A ON OFF SWITCH Yes Yes UV lamp indicator light Yes Yes UV LAMP Number of lamps 1 1 Power 33 W 55 W Type Hight Output Hight Output UVc Po...
Страница 5: ...he required power level See A Technical characteristics USE and MAINTENANCE The sterilizer must be turn on 24h 24 in order to disinfect the first liters of water at each opening of tap Never look at the ultraviolet lamps when lit This may cause severe injuries or burns and may even lead to loss of eyesight Do not touch the ultraviolet lamp with bare hands as these would leave impurities that short...
Страница 6: ...chlorine pellets or active oxygen in the reactor or if possible in the filter container located upstream of the sterilizer 5 Briefly open the draining points then close them again 6 Leave to act for 30 minutes 7 Set the ON OFF switch to the ON position 8 The UV lamp operation indicator lamp on the front of the electrical cabinet should light up The sterilizer automatically disinfects the water 9 O...
Страница 7: ...ME 3 REPERE REFERENCE DESIGNATION QUANTITE 1 ELE000839 Support of fuse 1 1 bis ELE001837 Fuse 5x20 1A 1 2 ELE000770 ON OFF SWITXH 1 3 BAL000024 Ballast 33 W 1 4 ELE002652 UV lampe indicator light 1 5 BAL000025 Ballast 55W 1 6 ELE000026 Hour counter 1 1 2 3 4 6 1 2 5 4 6 ...
Страница 8: ...EPERE REFERENCE DESIGNATION QUANTITE 1 VIS004279 Protection 1 2 ELE002603 Socket 1 3 USI004134 Nut 1 4 PIE000659 Flat washer 1 5 LPE000003 UV lamp 33W HO HOME2 1 5 bis LPE000004 UV lamp 55W HO HOME3 1 6 JTS000100 O Ringd25 1 7 QUA000016 Quartz Sleeve d25 1 8 ACC00410 Drain Plug 1 9 JTS000230 O Ring 1 1 2 3 4 5 6 7 8 9 ...
Страница 9: ...nnector 28 and gently withdraw the lamp upwards 4 As soon as the lamp is a few centimetres clear withdraw the connector take hold of the lamp s cap and disengage the lamp from the quartz sleeve keeping it correctly aligned with the axis Carry out this operation CAREFULLY 5 Do not drop the lamp in the quartz sleeve it may break and damage the quartz 6 Undo the stainless steel nut 25 and Remove the ...
Страница 10: ...t feels flexible pneumatic effect 12 Lubricate the new O ring with edible fat Put a new O ring at each change of lamp Position the O ring around the sleeve and push it fully home in its housing using your nail do not use tools 13 Place the plastic washer inside the stainless steel thread Re tighten the nut by hand tightening it normally 14 Put the installation back in pressure before the reassembl...
Страница 11: ...ower supply to the Pro3 Monitor box 2 Attach the Pro3 UV monitor box to the wall 3 Connect the electrical power supply to the Pro3 Monitor box 4 Calibrate the UV sensor Turn the UV lamp on The UV C lamps will increase in temperature to reach maximum radiation in two to five minutes depending on the temperature of the liquid to be processed It is now necessary to calibrate the cell depending on the...
Страница 12: ...ical evaluation Shipping costs will be shared between the retailer and BIO UV The guarantee runs from the day of installation this date must be notified to BIO UV by returning the guarantee validation form by post or fax If the instructions for installation and use are not followed BIO UV cannot accept responsibility and the guarantees will be considered null and void How to contact The BIO UV Tea...