background image


4.4.1   Record Search 


Set the Begin Date and End Date as follows: 


Click the button [Search record] to search the record. 


4.4.2   Export Record 

Set the export format, export file and time format. 


Export format: 3 formats optional: text file (.txt), CSV file (.csv), Excel files (.xls). 


64  

Содержание TC500

Страница 1: ... enterprises with its strong function and veracity Bio office is a sub brand of Anviz USA Bio office series fingerprint products combine fingerprint and traditional RFID technology All models come with powerful background time attendance management software which can support all kinds of complicated shift and generate various reports It is versatile convenient and multi functional Please read this...

Страница 2: ...tc the checking and calculation can be made in accordance with different time periods departments individual or combination due to various reasons for absence the report generation and printing function can be realized perfectly y Flexible Shift Maintenance The software supports shift on week basis rotation shifts etc Various shifts public holidays individual leave and overtime are available to me...

Страница 3: ...r schedule 6 Record collection 7 Exception management 8 Statistic report Set T A rule statistic rule company name and leaving class Add delete and modify departments Add delete and modify staffer Import and transfer staffer Set timetable and shift Allocate staffer shift or temporary shift Collect records from the unit or import the backup record file Deal with business leave asking for leave forge...

Страница 4: ...ed and downloaded between the unit and the computer Please refer to Background management for detailed information 7 There is always staff away for business asking for leave and forgetting clock happening in a company Once it occurs please deal with it in time in the software to ensure the correctness of the statistic report 8 After all the above mentioned operation is done the calculation of repo...

Страница 5: ...incorrect Checking and calculation of transaction records is incorrect 5 ...

Страница 6: ...ager Setup 12 2 3 6 Manager Clear 13 2 4 Setup 14 2 4 1 Device ID 14 2 4 2 Time 15 2 4 3 Language 16 2 4 4 Network Setting 16 2 4 5 Matching Precision 21 2 4 6 Volume 21 2 4 7 Lock Delay Ring Delay 22 2 4 8 Auto Off 22 2 4 9 Auto Update 23 2 4 10 Log setup 23 2 4 11 Re Verify time 24 2 4 12 Hardware Test 25 2 5 System info 27 2 6 T A status setting 27 2 7 T A 27 2 8 U pen driver operation guide 29...

Страница 7: ... Terminal Information 42 4 1 4 3 Open the door via software 42 4 1 4 4 Message Management 42 4 1 5 Synchronize Time 45 4 1 6 Initialize Unit 45 4 1 7 Terminal parameter settings 45 4 1 8 Ring settings 47 4 1 9 Time zone Group settings 48 4 1 10 Download new record 49 4 1 11 Download all record 50 4 1 12 Clear record 50 4 1 13 Backup Staffer 50 4 1 14 Resume staffers 51 4 2 Record Supervision 52 4 ...

Страница 8: ...ecord 67 4 5 4 Management PWD Setting 68 4 5 5 Database linking setting 68 4 5 6 Exit system 69 4 6 User interface configuration 70 4 6 1 Interface skin color 70 4 6 2 Change the software language 70 4 6 3 Set quick access button 70 4 7 U disk management program 70 4 7 1 Read the data from the U disk 71 4 7 2 Modify the data in the U disk 72 4 7 3 Export data from the database 73 5 Background Mana...

Страница 9: ...107 5 6 1 Import Staffer List 107 5 6 2 Import Attendance Record 108 5 6 3 Clear Obsolete Data 108 5 6 4 Compress Database 108 5 6 5 Backup Database 109 5 6 6 Initialize System 109 5 7 External Program Management 109 5 7 1 External Program Management 109 5 7 2 Connect to Time Attendance Machine 110 6 FQA 112 6 1 Fingerprint has enrolled but often gets failure in identification 112 6 2 The machine ...

Страница 10: ...7 1 Interface Illustration 115 7 2 Illustration for pressing fingerprint 115 V ...

Страница 11: ...Chapter1 Introduction The main theme of this chapter is the advantage of this T A as well as function introduction 1 ...

Страница 12: ...lligent fingerprint template update is one of the most efficient and stable fingerprint algorithm in the world TC500 TC550 is a wall mounted 128 64 white LCD fingerprint T A and access control system can be used offline or online It can control locks also records time and attendance transactions 1 1 1 Product Feature y USA TI 300MHz high speed processor y USA BioNano core fingerprint algorithm of ...

Страница 13: ...y Standard USB RS485 communication dry contact output Wiegand26 output Standard TCP IP module and RFID card reader for T550 y Optional RFID Mifare HID card reader y Identification method fingerprint only card only ID password ID fingerprint y Fingerprint capacity 2000 Record capacity 50000 y Identification speed 0 5 second y Size 126mm W 189mm H 35mm D 3 ...

Страница 14: ...Chapter2 Operation Guide This chapter is mainly about appearance illustration and relevant system settings such as how to add and delete users etc 4 ...

Страница 15: ...l key 3 OK OK Power key 4 Y Direction Up select key Z Direction Down select key 5 Bell Key 6 0 9 Number key 2 2 Time attendance status Plug 12V power adaptor to power on machine While machine startup there will be voice prompt system start with sensor LED indicator and LCD displaying Bio Office In 09 00 26 02 16 09 Mon In this status we can start user T A status setting entering management mode an...

Страница 16: ... key Press OK button to enter the sub menu 2 3 1 User enroll In User menu Enroll Press OK to enter user registration interface Input user ID i e 8101 Press OK to continue Enroll FP 1 2 Password Card Esc ESC Set OK Enroll ID 008101 Esc ESC Set OK User fEnroll Delete Verify Mode Menu fUser Setup System info Fingerprint registration Press Y or Z key to select 1 or 2 1 is to register the 1st FP 2 is t...

Страница 17: ...e the same finger on sensor scanner After scanning successfully the system will prompt Press OK key to save fingerprint Press C key to user registration interface The 2nd finger registration is the same step as above Password registration Press Y or Z key to Password option Press OK to continue Pass Enroll PWDID Esc ESC Set OK FP Enroll 008101 1 Ign ESC Sav OK FP Enroll Press Finger 2 7 ...

Страница 18: ...o Card option Press OK and continue Swipe one ID card one time The system will get card number and enter save interface Card Enroll 008101 C Ign ESC Sav OK Card Enroll Punch card Pass Enroll 008101 P Ign ESC Sav OK Pass Enroll PWDID Confm Press OK to save card number Press C to exit and enter user registration interface 2 3 2 User Deletion When there are staff leaving or staff info changing we nee...

Страница 19: ...ly Press C to cancel Prompt staff deletion will delete all info of the staff and can t resume Please take caution When machine has no such staff ID the system will prompt User Delete No Enroll User Delete 008101 No ESC Yes OK User Delete ID 000000 User Enroll fDelete Verify Mode 2 3 3 Verify Mode Setting verify mode of the staff there are four modes SEPT RF PW PW FP and RF FP In User menu press S ...

Страница 20: ...D press OK to enter setting interface Verify Mode 008101 SEPT Yes OK Setting staff s verify mode through S T key and press OK key to confirm and enter save interface Verify Mode 008101 RF PW Ign ESC Sav OK Then press OK key to save this setting Press C key to cancel this operation 2 3 4 Group Setup Group is based on time zones One group can set max 4 time zones so max 32 time zones can be set Norm...

Страница 21: ...group ID or press OK to input user ID and group ID manually Group Setup f008101 G00 008102 G00 Esc ESC Set OK Group Setup ID 000001 After input user ID press OK to enter group interface Group Setup 008101 G01 Yes OK Group number can be input through S T key or number key Max group number is 16 Press OK key to confirm and enter save interface Group Setup 008101 G03 Ign ESC Sav OK Then press OK key ...

Страница 22: ...ation In User menu press S T key to select Manager Setup option Menu Group Setup fManager Setup Manager Clear Press OK key to enter Manager Setup interface Manager Setup Esc ESC Add OK Press OK to start adding manager Manager Setup ID 000000 Input the user ID i e 8101 Press OK key to enter manager setup save interface Manager Setup 008101 No ESC Yes OK Press OK key again to confirm saving After ad...

Страница 23: ...nu The interface is as following Manager 09 0026 09 02 16 MON 2 3 6 Manager Clear Choose Manager Clear option in User menu Menu Group Setup Manager Setup fManager Clear Press OK to enter manager clear interface Manager Clear f ID 008101 ID 008102 Esc ESC Clr OK Press S T key to choose the manager ID to be deleted i e 8102 Manager Clear ID 008101 fID 008102 Esc ESC Clr OK Press OK key to confirm he...

Страница 24: ...nager 8102 Then exit to manager clear interface Manager Clear fID 008101 No ESC Yes OK Press OK key to delete manager continuously Press C key to exit manager clear interface as well 2 4 Setup Setup menu mainly includes system setup and log setup Enter management menu press Y or Z key and shift to Setup option Menu User fSetup System Info Press OK key to enter Setup sub menu Press Y or Z key to sh...

Страница 25: ...s Y or Z key and shift to Time option System Dev ID 1000 fTime Language ENG Press OK key to enter time setting interface Time MON 2009 02 16 14 58 Set ESC Next OK You can press the OK key to shift the year month day And adjust the time After setting completed press C key and enter system time save interface Time THU 2008 11 07 15 30 Save No ESC Yes OK Press OK key to save system time Press C key t...

Страница 26: ...ench Spanish Portuguese and Italian And then press OK to confirm Then you can continue to do other function settings And press C key to enter setting save interface Set Save No ESC Yes OK Press OK key to save system setting Press C to cancel and exit to upper menu 2 4 4 Network Setting Network setting main includes IP address subnet mask MAC address gateway far end IP and far end limit settings In...

Страница 27: ...IP address setting interface IP address 192 168 000 218 Set ESC Next OK Press Y or Z key or number key to input IP address Press OK key to shift between the 4 segments After setting completed press C key to enter IP address save interface IP Address 192 168 000 219 Save No ESC Yes OK Press OK key to save the modification Press C key to cancel Subnet mask Press Y or Z key and shift to Subnet mask o...

Страница 28: ... completed press C key to enter subnet mask save interface Subnet Mask 255 255 255 001 Save No ESC Yes OK Press OK key to save the modification Press C key to cancel MAC address Press Y or Z key and shift to MAC address option Net IP Address Subnet Mask fMAC Address Press OK key to enter MAC address setting interface MAC Address 051 247 188 066 084 215 Set ESC Next OK Press Y or Z key or number ke...

Страница 29: ...ion Net fGateway IP Far end IP Far limit No Press OK key to enter gateway IP setting interface Gateway IP 192 168 000 001 Set ESC Next OK Press Y or Z key or number key to input gateway IP Press OK key to shift between the 4 segments After setting completed press C key to enter gateway IP save interface Gateway IP 192 168 000 219 Save No ESC Yes OK Press OK key to save the modification Press C key...

Страница 30: ...g completed press C key to enter far end IP save interface Far end IP 192 168 000 222 Save No ESC Yes OK Press OK key to save the modification Press C key to cancel Far end limit Press Y or Z key and shift to Far end limit option Net Gateway IP Far end IP f Far limi No Press OK key to enter far end IP limit setting interface Net Gateway IP Far end IP fFar limit No Press Y or Z key to select Yes or...

Страница 31: ...ows Press Y or Z key and shift to Far end IP option System Net fPrecision 1 Volume 5 Press OK key to enter precision setting interface System Net fPrecision 1 Volume 5 Press Y or Z key or number key to adjust the precision Press OK key to confirm Then press C to save the setting 2 4 6 Volume Volume 0 is mute 1 is the min volume Volume will be higher if the number increases Press Y or Z key and shi...

Страница 32: ...ion System fUnlock 5 Auto off 10 Auto Update NO System fRing 5 Auto off 10 Auto Update NO Press OK key to enter delay time setting interface System fUnlock 5 Auto off 10 Auto Update NO System fRing 5 Auto off 10 Auto Update NO Press Y or Z key or number key to input delay time Press OK key to confirm Then press C to save the setting 2 4 8 Auto Off Auto off is the time period from the last operatio...

Страница 33: ...cess This enables the sensor to maintain high quality data at all times saving the user from repeated authentication attempts Press or key and shift to Auto off option System Unlock 5 Auto off 10 fAuto Update NO Press OK key to enter auto off setting interface System Unlock 5 Auto off 10 fAuto Update NO Press Y or Z key to choose Yes or No and then press OK key to confirm Then press C to save the ...

Страница 34: ...umber Press OK key to confirm Then press C to save the setting 2 4 11 Re Verify time The Re verify time is the time interval in which you make continuous records with the same finger 1 250 minutes and then the device will only save the first record If the re verify value is NO it means that you every record saved in the device In Log Setup menu press Y or Z key and shift to Re Verify option Log Se...

Страница 35: ...ct Hardware test option in Setup menu Setup System Log Setup fHardware Test Press OK to enter setting interface as following Hardware Test fKeypad LCD Voice Press Y or Z key to choose testing option and press OK key to start Keyboard press Y or Z key to select Keyboard option and press OK to enter keyboard testing interface Then press any key to start keys testing i e press key 3 if interface show...

Страница 36: ...and press OK to enter sensor testing interface Sensor LUM 130 Esc ESC Flash press Y or Z key to select Flash option and press OK to enter flash testing interface Two steps 1 Erase all data 2 Check Step 1 Erase All Data Continue Esc ESC Step 2 Check 10 After checking completed the interface will show the checking result Flash Flash OK Esc ESC After each testing is finished press C key to exit 26 ...

Страница 37: ...ingerprints number Select it and press OK key and you can check the same password and card enrollment number Prompt display info will be based upon different device configuration Firmware version the firmware version of program which write in EROM or EPROM Programmable read only memory So called firmware is firm program saved in integrated circuit firmly responsible for controlling and dealing wit...

Страница 38: ...ator will be on with voice prompt Access denied And interface displays as following FP Verify Input Again ID Password mode In T A status input staff ID through number keypad i e 8108 Pass Verify ID 8108 Press OK key to confirm ID and input password following prompt Input staff password and press OK key to confirm If verification passes green LED indicator will be on with voice prompt Access grante...

Страница 39: ...oice prompt Access granted Else red LED indicator will be on with voice prompt Access denied Card only mode Swipe user card after a beep di system will prompt as following Card verity ID 008101 Verified 2 8 U pen driver operation guide Plug U pen drive into USB port Interface will enter U pan module operation menu fNew Rec Backup All Rec Backup User Backup User Recovery Press Y or Z key to select ...

Страница 40: ...ecord file is BAK KQ located in G 00000001 Prompt G is the disk name on PC of U pen drive 00000001 is T A machine serial number 2 8 2 All records backup Download all time attendance records saved in device memory to U pen drive Press Y or Z key and shift to All Rec Backup option New Rec Backup fAll Rec Backup User Backup User Recovery Press OK key to start backing up all time attendance records Al...

Страница 41: ...ice to U pen drive Press Y or Z key and shift to User Backup option New Rec Backup All Rec Backup fUser Backup User Recovery Press OK key to start backing up user info User Backup Backup 0 After back up process bar shows 100 press C key to exit and back to upper menu User Backup OK 100 Esc ESC User backup file is BAK YG and BAK ZW located in G 00000001 User info file is located 2 8 4 User Recovery...

Страница 42: ... Recovery option New Rec Backup All Rec Backup User Backup fUser Recovery Press OK key to start recovering user info User Recovery Backup 0 After recovery process bar shows 100 press C key to exit and back to upper menu User Recovery OK 100 Esc ESC 2 9 Shut down In time attendance status keep pressing OK key until interface shows as following Shutdown 17 30 46 02 16 09 Mon Then device will shut do...

Страница 43: ...Chapter3 System Installation This chapter mainly discusses the installation and un installation of T A software as well as the hardware and operation system requirement 33 ...

Страница 44: ...um 100M hardware space COM Port CD ROM CD ROM needed in installation VGA support 800 600 resolution and above Operating system Microsoft Windows 2000 XP recommended Microsoft Windows Vista 3 2 System Installation Please insert T A disc into CD ROM and the disc will automatically run the installation program If not please run setup exe in the root directory of the disc The following window will pop...

Страница 45: ... Next to continue installation see the picture below Click Back and installation will return to the previous screen and re select target directory Click Next and the installation will start as the following picture shows The installation will be done after seconds see the picture below 35 ...

Страница 46: ...rogram for Windows XP and then click Finish to install the driver the driver installs wizard window will pop up Click Next button the interface will show as following Choose I accept the terms of the license agreement button Click Next button to install driver After installation completed the following window will show as below 36 ...

Страница 47: ...ow The shortcut of Fingerprint Attendance System Time and Attendance machine Management and U Disk Module Management are included in Bio office Fingerprint Attendance System 3 3 Uninstall the software Click Uninstall Bio office Fingerprint Attendance System in the above picture click Next and the program will be uninstalled automatically Please note All the files and data will be deleted after uni...

Страница 48: ...Chapter4 Communication The chapter is mainly about how to add delete and set communication between PC and terminal 38 ...

Страница 49: ...If the time attendance software s login password is not empty you should enter the password firstly Enter the password and click the button OK to login If you enter the wrong password 3 times the software will automatically close When you enter a wrong password a message box pops up as follows Click the button OK And then try to enter the correct password 4 1 T A Machine Management 39 ...

Страница 50: ...are in the device If you set it as ON Duty all the records status which is from this machine will be On duty USB Connect the terminal via USB cable RS485 The default value is COM1 TCP IP Input the terminal s IP address The default IP address is 192 168 0 218 Click the button OK to save the information Can see a saffron yellow terminal icon Please move the cursor to the terminal icon it displays as...

Страница 51: ...e software following message box pops up Click the button OK to set the Unit information again 4 1 3 Delete Unit Choose the T A unit and then click the button Delete Unit Following message box pops up Click the button OK to delete or click the button Cancel to cancel 4 1 4 Right Key Menu Select All Select all the terminals Reverse Selection Select the terminals which are not selected Cancel the te...

Страница 52: ...e button Retrieve to retrieve the terminal information Click the button Cancel to close the window If failed to retrieve the terminal information it prompts 4 1 4 3 Open the door via software Open the door via software If you click the item Open the door via software you can see the information in the main interface as follows 2009 03 18 13 35 58 1 Head office Open the door via software successful...

Страница 53: ...ere are two kind of message type Private message and public message Private message need the staffer ID If you do not input the staffer ID following message box pops up Click Add Message following window will popup Click Read message you will see the message in the Message List as follows 43 ...

Страница 54: ...OK to confirm deletion Click Cancel to cancel the deletion Click Delete All Messages if you want to delete all the messages One window pops up as follows Click OK to confirm deletion Click Cancel to cancel the deletion If you click OK it prompts Click OK to confirm The message displays on the terminal s LCD as follows 44 ...

Страница 55: ...ormation displays in the main interface as follows 2009 03 18 13 49 24 Synchronizing time 2009 03 18 13 49 25 1 Head office Synchronization successful 4 1 6 Initialize Unit The device will resume to factory settings All data will be cleaned up Attention should be taken for this operation Click the button Initialize Unit Following message box pops up Click the button OK to confirm or click the butt...

Страница 56: ...panish or Portuguese Date format There are three kinds date format yy mm dd mm dd yy dd mm yy Time format There are two kinds time format 24 hour and 12 hour Matching precision There are three kinds Normal Good and Exact The default value is Good Record Alarm Threshold Values If the rest memory space for the record is less than the threshold value the machine will alarm Time period between repeate...

Страница 57: ...ed Wiegand Mode Wiegand26 Anviz wiegand Fixed wiegand area code 0 254 If you upload one fingerprint to two terminals the same fingerprint s wiegand outputs are different in the different terminals If the two terminals wiegand area codes are same the same fingerprint s wiegand outputs are same in these two terminals Lock Relay time 0 15seconds The door open delay Click the button OK to save the set...

Страница 58: ...OK to confirm or click the button Cancel to cancel Click the button OK to save the settings Following operation information displays in the main interface 2009 03 18 13 57 32 Setting ring time 2009 03 18 13 57 33 1 Head office Set the ring time successfully Notice The ring time function is only for TC500 or TC550 4 1 9 Time zone Group settings This function is only for the terminals which have the...

Страница 59: ...uccessfully Group settings Select the group number and then you can see which time zones are arranged in this group If you want to modify the group settings you can just change the timezone number and then click the button Set to save 2009 03 18 15 06 42 Setting the group 2009 03 18 15 06 43 1 Head office Set the group successfully Notice The time zone group function is only for TC500 and TC550 4 ...

Страница 60: ...15 13 24 1 Head office Read the records completed Records 6 Read successfully 6 4 1 12 Clear record Click the button Clear record Following message box pops up Click the button OK to confirm or click the button Cancel to cancel Following information shows on the main interface 2009 03 18 15 14 15 Clearing time attendance records 2009 03 18 15 14 16 1 Head office Clear time attendance records succe...

Страница 61: ... 18 15 15 08 1 Head office Backuping fingerprints 2009 03 18 15 15 08 1 Head office Backup staffers and fingerprints completed Notice You can stop back upping the staffer by click the button on the right bottom corner Following message box pops up Click the button OK to confirm or click the button Cancel to cancel 4 1 14 Resume staffers Upload the staffer information and staffer s templates from t...

Страница 62: ...ffice No such ID existed recovery failed 2 You can stop recovering the staffer by click the button Stop on the right bottom corner 4 2 Record Supervision Get the records from the terminal real time 4 2 1 Activate real time Click the Activate real time button the status bar shows message Reading attendance records Now the software is beginning to supervise the terminal and then collect the records ...

Страница 63: ...hich includes the Staffer ID Name Department and Position pops up 4 2 2 Prohibit real time Click the button Prohibit real time to stop the real time monitoring You can see the begin time and end time of the real time monitoring in the Real Time Monitoring Records Information as follows 4 3 Staffers management Staffer management interface is as following 53 ...

Страница 64: ...r Click Add staffer button open Add modify staffer info window which includes 2 pages Basic info and fingerprint registration as follows Basic info Input staff info in Basic info You can also add pictures for staffs 54 ...

Страница 65: ...sive as well as the first digit cannot be 0 There are two ways to add pictures 1st way Click button choose staffer s picture stored in PC and open Edit picture window as following Click the button View to choose one photo 55 ...

Страница 66: ...tion and then click the button Save to save as follows 2nd way You can install camera to take pictures and edit then save Make sure there is camera equipment installed in your PC Click button open Pictures shooting window as following 56 ...

Страница 67: ...to delete the staff photo Fingerprint registration Use the external USB fingerprint reader OA99 to enroll the fingerprint The sentence Connect to the fingerprint sensor reader successfully means that the OA99 is connected successfully Place the fingerprint on the terminal s fingerprint scanner window and then click the button Enroll to enroll the fingerprint 57 ...

Страница 68: ...he staffer from the database Choose staffer from staff info list you can choose some or all the staffers by using the button Shift or Ctrl on your computer s keypad Click Delete staffer and the following window pop up Click the button OK to confirm or click the button Cancel to cancel 4 3 4 Transfer department Choose the staffers and then click the button Transfer department The window Staffer Tra...

Страница 69: ...uthorized terminal Choose the staffers from staff info list you can choose some or all the staffers by using the button Shift or Ctrl on your computer s keypad Click the button Set privilege The Set privilege window pops up Choose the terminal and then click the button OK to save You can find the staffer s authorized terminal in the column Unit as follows 59 ...

Страница 70: ...f info list you can choose some or all the staffers by using the button Shift or Ctrl on your computer s keypad Click the button Copy Privilege The Copy Function and Privilege window pops up Input the one staffer s ID And then you can click the button to browse the staffer s privilege in the Set privilege as follows Click the button Cancel to exit the Set privilege 60 ...

Страница 71: ...ox pops up Click the button OK to confirm or click the button Cancel to cancel The operation nformation shows on the main interface as follows 2009 03 18 16 18 44 Download fingerprint 2009 03 18 16 18 44 Download fingerprint 1 Head office 2009 03 18 16 18 44 1 Head office Can not connect to the T A machine 4 3 8 Upload staffer FP Upload the staffer information and fingerprints to the terminal Choo...

Страница 72: ...lick the button Delete from Unit Following message box pops up Click the button OK to confirm or click the button Cancel to cancel The operation information shows on the main interface as follows 2009 03 19 15 11 21 Delete the staffer from the device 2009 03 19 15 11 21 Delete the staffer from the deviece 1 Head office 2009 03 19 15 11 22 1 Head office Delete the staffer from the device completely...

Страница 73: ...ck Modify dept The Input Department Name window pops up Input the department name Click the button OK to confirm or click the button Cancel to cancel Delete dept Choose the department which is going to be deleted Click the right button of your mouse and then click the Delete dept Following message box pops up Click the button OK to confirm or click the button Cancel to cancel Remark Right button m...

Страница 74: ...in Date and End Date as follows Click the button Search record to search the record 4 4 2 Export Record Set the export format export file and time format Export format 3 formats optional text file txt CSV file csv Excel files xls 64 ...

Страница 75: ...l to separate fields Space symbol length space symbol bit After setting completed click Export record button open Save as window choose save file directory input file name click Save button The system prompts as follow Click the button OK to confirm Here is an example for the export file 4 5 System settings Click the icon on the top left corner the menu pops up as follows 65 ...

Страница 76: ...meout is larger than Communication delay time software will automatically exit In real time monitoring voice prompts Department name During real time monitor if staff is access granted the software will voice prompt staff department and name Clear the data after downloading After downloading records completed delete the record downloaded from machine automatically Click the button OK to confirm or...

Страница 77: ...ding Record The Timing Downloading Record window pops up Enable this function by choosing the Run Timing Download Record You can set 5 time point Please use the button to set a time And then click the button Add to add the time to the Downloading Time Click the button OK to confirm or click the button Cancel to cancel If setting successfully it prompts If you have not set any time it prompts 67 ...

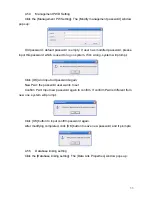
Страница 78: ...wrong system will prompt Click OK and input old password again New Pwd the password user wants to set Confirm Pwd Input new password again to confirm If confirm Pwd is different from new one system will prompt Click OK button to input confirm password again After modifying completed click OK button to save new password and it prompts 4 5 5 Database linking setting Click the Database linking settin...

Страница 79: ...it to Data link properties interface If database set ID and password input ID and password in 2 Enter information to log on to the database After completed click Test connection to test the connection correctness of the database and system prompts Click OK button and it goes back to Data link properties interface Click OK button and system prompts 4 5 6 Exit system 69 ...

Страница 80: ... 3 Set quick access button Move the cursor to the icon Synchronize time Click the mouse s right button It prompts Click the item Add to Quick Access Toolbar And then you can see the quick access button on the toolbar as follows Move the cursor to the quick access button And then click the mouse s right button It prompts Click the item Remove from the Quick Access Toolbar 4 7 U disk management prog...

Страница 81: ...Success 12 13 05 43 Finished Click button after Read the staffer information from the U disk And then select the file BAK YG from the U disk Click the button Start to download the data from the U disk to the software s database The operation information shows on window as follows 13 17 14 Reading the staffer information Staffer Information 8 Success 8 13 17 14 Finished Click button after Read the ...

Страница 82: ...lick the button to choose the staffer information file BAK YG from the U disk Click the button Analyse Select the staffers and then click the button Update the selected staffers name to copy the staffers information from the software database Att2003 mdb And you can analyse the file BAK YG again to check the staffers information The operation information shows on window as follows 72 ...

Страница 83: ...s to the file to copy the staffer information and the fingerprint template from the software database Att2003 mdb to the file BAK YG and BAK ZW in the U disk The operation information shows on window as follows 13 58 32 Exporting Save the staffer information to H 00000001 bak yg Save the fingerprint templates to H 00000001 bak zw 13 58 32 Finished Tips The filename extension of the staffers inform...

Страница 84: ...The main theme of this chapter is how to collect attendance records from different terminals with management software and generate different reports The background software can manage staff information set rules of attendance etc 74 ...

Страница 85: ... 5 1 Log in System Double click the icon on the desktop to start the attendance background management program The log in interface will pop up as follows The default administrator s name is Admin and password is empty Log in system and the following interface will be displayed The main interface includes three parts 1 System menu Include the whole function module information 2 Shortcut button Shor...

Страница 86: ...e deemed as the head of departments list A working day count as how many minutes is the base for time attendance calculation which will be the transition standard to calculate the late to work early to leave free overtime items minute is the good transition standard of hours and working day Late for work as how many minutes can be set when no clock in on duty early to leave as how many minutes whe...

Страница 87: ...ation unit is 1 day if the accumulated time is 1 1 days or 1 9 days the result of calculation is 1 day Round up Add one unit regardless the decimal is For example if the minimum calculation unit is 1 day if the accumulated time is 1 1 days or 1 9 days the result of calculation is 2 day Round off If the decimal is equal to or over 0 5 add one unit or else abandon it Notice the setting of stat Rules...

Страница 88: ...f leave class and color and click Save to finish Delete leave class Select the name of leave class which one need to be deleted click Delete and click OK to finish Field definition Click page Field definition in pic5 1 following shows This page add the corresponding value for Nation Specialty Position Education in menu Staffer maintenance 5 2 2 Administrators Click System Administrators following ...

Страница 89: ...he Items operable list in above picture such as Staffer maintenance Shifts settings Calculating and Report we can set different privileges for different administrators so as to divide and manage the task systematically 2 After you add a new department you must modify the privileges of the Department operable for the administrators select the new department in the Department operable list and save ...

Страница 90: ...nter the new password in New Pwd enter again in Confirm Pwd and click OK to finish 5 2 4 Modified Record Log Click menu System Modified Record Log following springs Select department staffer ID and time range and click Search and those records which match the above condition will be displayed as follows 80 ...

Страница 91: ... s record that has been revised incorrectly before it can be recovered by selecting this record and clicking Restore Click Close to exit 5 2 5 Managing Log Click menu System Managing Log following springs This log records all the operations of every administrator Select Administrator 81 ...

Страница 92: ...mdb under the main setup directory You can set up the database linking again according to the actual conditions When the following mistake appears you should link database again Click Database Linking in system menu the following springs Input the database name or click the button to select the correct database file Notice you can click Test connection to test the connection correctness of the dat...

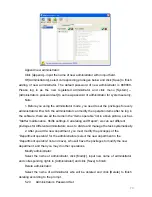
Страница 93: ...ment you need to set the privilege of modifying the new department for the administrator in the administrator set first choose the new department you just added in the Department operable Department modification Choose the department click Modify and input the new department name then click Save Delete the department Choose the department click Delete and then click OK to complete Notice repetitio...

Страница 94: ...be no statistical result for this staffer in the report If checkbox Calculate Overtime is not checked the statistical result of overtime of this staffer will be 0 unless he had Temporary Shifts which defines as overtime working If the checkbox of Rest On Holiday is not checked holidays will make no effect on the shifts for this staffer if the checkbox of Rest On Holiday is checked thus for those h...

Страница 95: ... same time Import staffers Click Import staffer importation window springs for importing staffers Staff s department shifting Choose the staff you want to shift the department click Transfer and following window will pop up Select the new department and click OK to complete Export Staff Right click on staff list and the following window pops All displayed fields in staff info list can be defined t...

Страница 96: ...e Click Save to confirm the operation Notice Exported Excel file can be used as backup information and can be imported again 5 4 Attendance Management Click Attendance in the main menu following springs 5 4 1 Holiday List Click Holiday List in Attendance menu The following appears Add festivals or holidays Click Append then input the festival or holiday name and the rules Click Save when ready 86 ...

Страница 97: ...e working hours be 08 00 12 00 and 13 00 17 00 so 08 00 12 00 and 13 00 17 00 are two timetables If such a shift needs to be setup these two timetables should be setup first Here we use time table morning to indicate 08 00 12 00 and time table afternoon to indicate 13 00 17 00 so two timetables have been setup Please refer to the following chapter for details of how to add time tables and then we ...

Страница 98: ...lock in Time and End Clock in Time setup the valid time period for clock in Records out of this time range will be treated as invalid ones For instance Begin Clock in Time is 07 00 and End Clock in Time is 13 00 If clock in record is 07 01 or 12 59 they are valid records but if clock in record is 06 59 it is invalid Besides Begin Clock in Time and End Clock in Time can be more than one day meaning...

Страница 99: ...new information clicks Save when finished The timetable Deletion Select the timetable you want to delete click Delete and click OK to make sure Please note Begin Clock in Time and End Clock in Time makes the valid time range for Clock in Clock in out of this time range will be treated as invalid records It is the same with Clock out time Please setup in accordance with practical situations Example...

Страница 100: ... 3 below For instance select the timetable Day shift and select from Monday to Friday and then click OK back to this window and click Save to complete Please refer to the example for details Pic5 3 Add a timetable Delete the timetable select the timetable you want to delete and click Delete Clear the timetable clear all the timetables of the shift Arrange the shift automatically when a staffer has...

Страница 101: ...lick Save to complete Delete a shift Select the shift to be deleted and click Delete Example Three shifts Add Three shifts Shift Please note It is assumed that the shift goes around every week cycle every three weeks and staff is on holiday every Saturday and Sunday Step 1 Click Append enter Three shifts in Shift Name set Cycle to 3 and Cycle Unit to week Please see the picture below Step2 Add cor...

Страница 102: ...he setting of the first week The second week afternoon shift from Monday to Friday Click Add make corresponding operation in the springing window see the result below Click OK to complete the working hour setting for the second week The third week night shift from Monday to Friday Click Add make corresponding operation in the springing window see the result below 92 ...

Страница 103: ... the third week After the completion of above steps please don t forget to click Save and the setup of three shifts will be done see the picture below 5 4 3 Staffer Scheduling Click Staffer Scheduling in Attendance menu The following window appears 93 ...

Страница 104: ...nge shifts click Arrange the following window appears Pic5 5 Add a new shift Add a new shift Select the corresponding shifts for instance The commencement date and deadline of this shift of normal class click Add button and then click OK in Pic5 5 to finish the adding of new shifts 94 ...

Страница 105: ...e a Temporary Shift When one or many staff s working time needs to be changed temporarily you can arrange a temporary shift Click Add Temporary the following window appears Click OK and the temporary scheduling can be operated Then click Add and the following window will pop up Click OK and the timetables will be saved Click Save and the temporary scheduling will be saved Delete Delete the selecte...

Страница 106: ...nning and ending time that need to inquire about then click search you can get the corresponding attendance record Attendance record report form preview Click Report when the window displays the attendance inquiry records you can get the report form automatically 96 ...

Страница 107: ...he data inquired File format txt xls Click Modify Log and the log modifying window will be called for reviewing the modification log of time and attendance records 5 4 5 Attendance Calculating and Report Inquiry of report form Click Attendance Calculating and Report in Attendance menu the following window appears 97 ...

Страница 108: ...Shift Exceptions Display Staff s attendance result in the scheduled time period Other Exceptions Display Staff s leave out and overtime etc Calculated Items Display all Staff s calculated items such as normal actual late early absent overtime etc Please note When dealing with Out calculation there should be Out back and only Out and Out back in one shift can be calculated Working hours in the repo...

Страница 109: ... attendance record list to a file in txt or xls format Create report for current grid Generate report based on the data in the current attendance record list for preview and print Change state Change the selected attendance record to a new state Manually deal with the attendance record according to the practical situation Delete selected Mark the record as manual deleting deleting when save it Can...

Страница 110: ...play all fields in Columns Please note We can manually modify the record as stated above to assure the veracity of the report according to the practical situation If there is disoperation the records can be recovered through Modified Record Log in System Right Click in Shift Exceptions the following shortcut menu will pop up Other Exceptions Calculated Items the following shortcut menu will pop up...

Страница 111: ... Daily Report Calculate staff s daily attendance record General Report Calculate all staff s attendance items such as normal actual late early absent overtime etc 101 ...

Страница 112: ... Exceptions Report Calculate staff s out overtime business leave personal leave etc Create a Report for Current Grid Print preview of the current displayed grid For example Attendance Report 102 ...

Страница 113: ...nd click Open to see the report Save report to file Select the directory to save the report to enter the file name and click Save to complete the backup of the report for future check or copying to another computer for printing extension file name is frp Print Report Close Preview Data Export In picture 5 6 click Export and the displayed data of grid in the current window will 103 ...

Страница 114: ...r some staff first please check whether there is leave or forgetting Clock in or Clock out for this staff If there is please deal with the records through above menu Please refer to the next chapter for more details 5 5 Deal with Exceptions Click Exception on the main menu following springs 5 5 1 Away on Business Leave When the staff can t punch in out because of going out on business or asking fo...

Страница 115: ...k Save when ready Deletion of staff away on business or leave Select the appointed staff and the relative information you want to make this deletion and click Delete 5 5 2 Append Record If a staffer didn t punch in because of special reason you can use this function to append the forgetting attendance record Click Append Record in Exception menu the following window Springs Select the relative ite...

Страница 116: ...then select punching in or out and the time click OK to finish 5 5 4 Dealing with Collectively Late Leaving When collectively coming late leaving early takes place for some allowable reasons you can use this function Click Dealing with Collectively Late Leaving in Exception menu The following springs Steps as follows 1 Click Dealing with Collectively Late Early 2 Select time range for ignore clock...

Страница 117: ...up the following window Click to select the personnel list file for importing Select the right file which can be in txt or MS Excel xls formats then click open to get back to above window click OK to start The definition of txt data format as follows This format of file only can import the staffer info of ID Name and department The format of data must follow Staffer ID Tab Name Tab Department 107 ...

Страница 118: ...rting and click OK to start 5 6 3 Clear Obsolete Data Click Clear Obsolete Data in Data Maintenance menu springs the following window After your system is used for a long time you will get a large number of obsolete data in the database It ties up the hard disk space and influences your system operation speed At this moment you can use this function to clear these useless data Select the ending da...

Страница 119: ...s initialized all information will be lost the system will get back to the state when just installed Please make sure that you want to initialize the system 5 7 External Program Management Click External on the main menu following springs 5 7 1 External Program Management We can append external program into time attendance program for convenient operation Click External External Program Management...

Страница 120: ...ion interface between the software and the machine which can control the current machine connected with the computer it can collect the records from the machine upload and download staffer info clear the old data modify the time on the machine Find detail on clause Time and attendance management communication 110 ...

Страница 121: ...Chapter6 FAQ Frequently asked questions and answers 111 ...

Страница 122: ...ean sensor surface Adhesive tapes recommended Place the finger evenly on the sensor with moderate pressure 8 Not enough finger pressure 9 Influence by fingerprint image change Enroll fingerprint again Please refer to illustration of pressing finger 10 Fingerprint not enrolled yet Place enrolled finger 6 2 The machine cannot connect with PC Reason Solution 1 Communication method not set correctly S...

Страница 123: ...int mode to verify Reason Solution 1 Wrong ID entered Enter the right ID 2 This user has no right to use 1 1 identification method Set 1 1 identification method for this user 6 6 The unit beeps automatically when no one punches in out Reason Solution 1 Direct sun light or too bright light Avoid direct sun light or other bright light 2 Latent fingerprint on the surface of sensor Clean sensor surfac...

Страница 124: ...Chapter7 Appendix The main theme of this chapter is the additional information of this T A including access control cable connection and way of pressing finger 114 ...

Страница 125: ...s better for each user to register two finger prints in case of one finger can not work 2 Place finger flatly and the center of the finger is on the center of scanner window and press a little hard on scanner so it can scan as large finger area as possible to extract enough minutia 3 Keep the angle and direction of finger the same each time placing on scanner 4 If your finger has sweat or water pl...

Страница 126: ...7 You d better register the thumb first and then index finger or middle finger to increase the precision 116 ...

Отзывы: