


+420 608 411 090
REPLACEMENT MANUAL
www.BimmerJakes.com
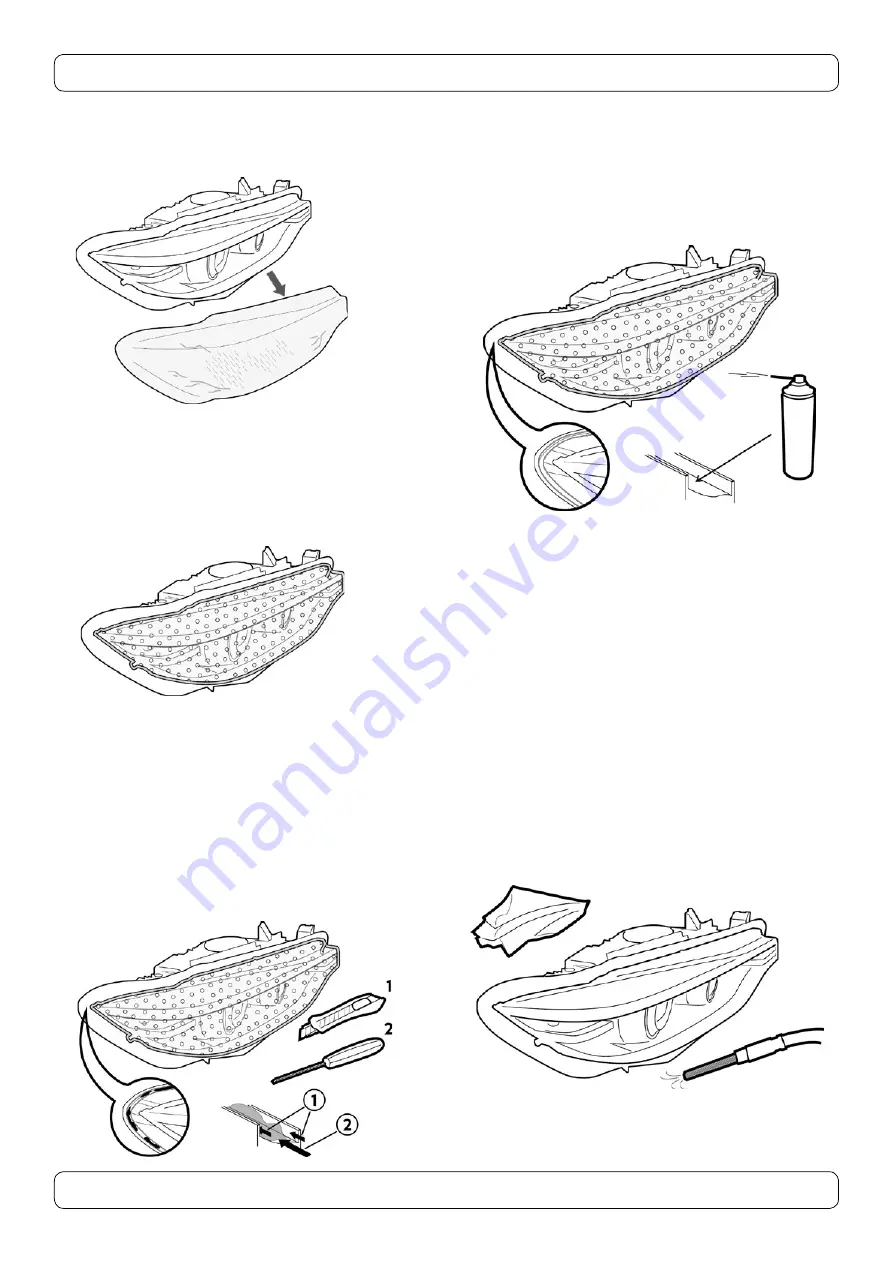
3 Removing the old cover
Do this step carefully and check twice to avoid damage
of lights.
4 Parabolas protection
The process continues with dismounting the parabolas
or covering them, to avoid the damage during further oper-
ations. The best way to cover parabolas is by using bubble
foil and adhesive tape. It might be a problem to dismount
the parabolas for some types of lights, so covering them
is often the better option
5 Cleaning the gripping grove
Next step is to clean the gripping grove. The first type of seal
-
ant is relatively easy to clean, but it is quite difficult to clean
the second type. The best way how to remove the second type
is to cut it on the sides by using knife blade and the undercut
the gripping edge by using chisel (6 mm). Dishwasher deter
-
gent also might be useful. Dishwasher detergent decrease ad-
hesion of materials and unlike others chemical agents is not
detrimental to health. The gripping grove has to be cleaned
carefully so it fits to the bottom properly (same like the origi
-
nal one). This is the most difficult part of the process.
6 Removing grease
Following step is to degrease clean gripping grove by using al-
cohol cleaner. Alcohol cleaner unlike others aggressive clean-
ers will not damage the plastic parts.
7 Cleaning the new cover
The space around the headlight is often full of dirt and re-
mains of materials after the process of dismounting.
The best way how to clean this space throughly is to use the
vacuum cleaner. The suitable vacuum cleaner is available
on www.bimmerjakes.com. The use of wet napkins is also
an option, but it is necessary to avoid the chrome parts,
wich could be damaged by napkins. It is also required to turn
the light up side down and shake it to spill out remaining dirt.
Do not forget to clean also the back side of every part. The
perfect cleaning process is necessary for succesful result.
Subsequently control the new cover if it is clean. The protec-
tive foil must cover the whole area of the cover until whole
process is done, to avoid damage.


