29
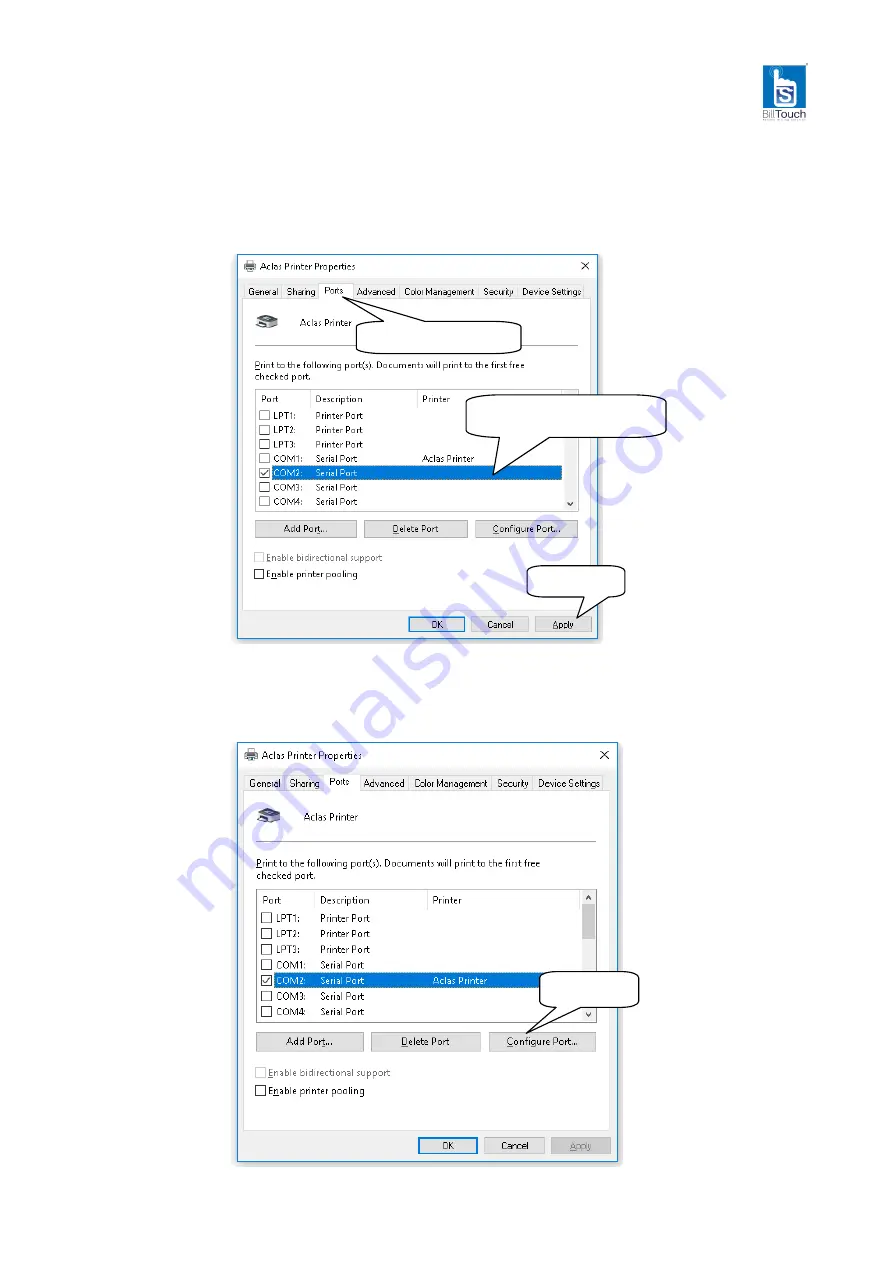
Step 2: Choose connecting port
Choose the connecting port that you have known from Chapter 8.2. For example, the connecting port of the
printer known from Chapter 8.2 is COM2, so you should choose COM2 in the following interface.
Step 3: Configure port
Note: USB printers could skip this step, and go to step 4 directly.
Click it.
Choose this item.
Select the connecting
port.
Click it.
Содержание PP7M31HX
Страница 1: ...BillTouch PP7MX PRINTER USER S MANUAL www billtouch in ...
Страница 17: ...14 Click OK ...
Страница 21: ...18 The second method Then click Send the printer will print a page You can also input contents here ...
Страница 24: ...21 Click OK Choose Hardware Click Install ...
Страница 25: ...22 Type 2 Choose TCP Click OK Input the IP which is in the same network segment of the printer Click Install ...
Страница 31: ...28 Click View devices and printers Right click BillTouch Printer choose Printer properties ...
Страница 36: ...DPP7M01INV0 BILL 01 ...


