10
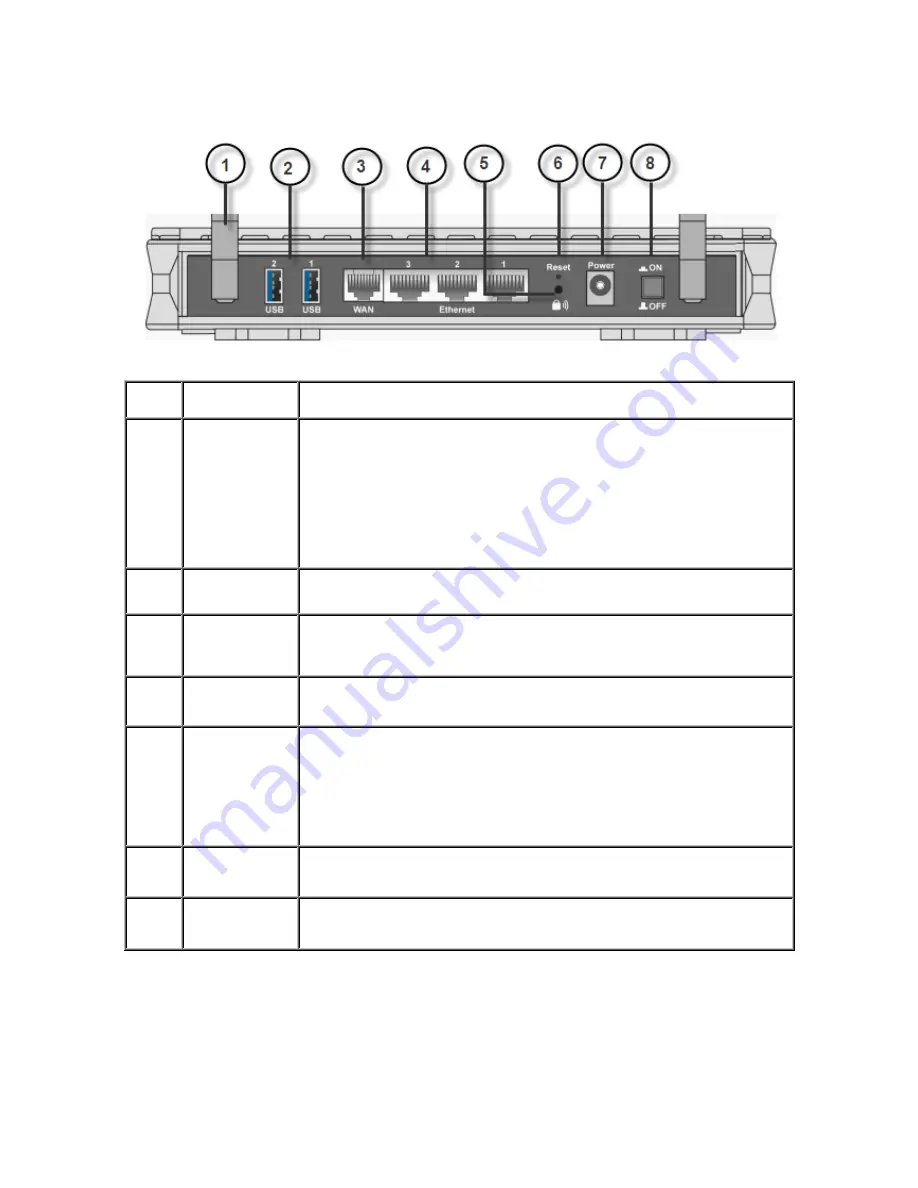
The Rear Ports
1 Antenna
Connect the detachable antenna to this port.
2 USB
Connect the USB cable to this port.
3G/ HSDPA USB modem backup for Internet access,
can also
connect with printer, Webcam and HDD serve as multi-function
servers with to help set up your own network.
(
The function of USB1 is the same with USB2
)
3
WAN
WAN 10/100M Ethernet port (with auto crossover support);
connect Cable modem here.
4
Ethernet
Connect a UTP Ethernet cable (Cat-5 or Cat-5e) to one of the
LAN ports when connecting to a PC or an office/home network of
10Mbps or 100Mbps.
5 WPS
Push WPS button to trigger Wi-Fi Protected Setup function.
6
RESET
To be sure the device is being turned on press RESET button for
6 seconds and above: restore to factory default settings. (Cannot
login to the router or forgot your Username/Password. Press the
button for more than 6 seconds).
Caution: After pressing the RESET button for more than
6 seconds, to be sure you power cycle the device again.
7
Power
Connect it with the supplied power adapter.
8 Power
Jack
Device is power on/off.
Содержание BiPAC 6200NXL
Страница 61: ...57 the parameters on both Wireless Configuration and Wireless Security Configuration page are as follows...
Страница 88: ...84 When you are authorised you will access to the router Congratulations You have successfully logged on...
Страница 91: ...87 3 Choose the directory which you want to delete then click Delete to romove this directory...
Страница 92: ...88 Samba Server...
Страница 97: ...93 Set up of Printer client Step 1 Click Start and select Printer and Faxes Step 2 Click Add a Printer...
Страница 98: ...94 Step 3 To continue click Next Step 4 Select network printer and apply Next button...
Страница 100: ...96 Step 7 Click Finish to complete the add printer...


