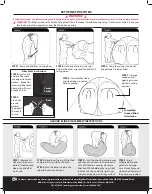
STEP 1:
Remove all
stakes and tie downs.
close all windows and
doors. Lay blind flat
on its side.
STEP 2:
Stand over the top of the blind
and grasp firmly with both hands.
STEP 3:
Fold the blind in half so the
top and bottom ends meet.
STEP 4:
Twist the blind by rotating your
right hand in a clockwise direction and
your left hand in a counter clockwise
direction. While holding the rings tight
tuck the left ring under the right ring
and push downward until they are flat.
To view a short video on the set-up instructions, please visit www.BigGameTreestands.com, click on the HB0100 Ground Blind
BGHA, Inc. All rights reserved. Manufactured by BGHA, Inc., P.O. Box 382, Windom, MN 56101
507.831.4350 | www.biggametreestands.com | 800.268.5077
STEP 5:
Insert
collapsed blind and
poles into carrying
case. Store all ground
stakes and tie downs in
the pouches provided.
SETUP INSTRUCTIONS
WARNING!
Read all instructions and safety warnings and follow them thoroughly. Failure to follow these instructions may result in serious injury or death!
WARNING!
This Blind is made with a Deluxe Spring Steel Frame that opens forcefully during set up. Use Extreme Caution - Keep your
face, body and other people away from the blind when opening.
STEP 1:
Remove blind from carrying bag.
STEP 2:
Hold one of the outside rings.
Release the other rings and the blind will
spring open.
STEP 3:
Grasp the spring steel bands
and pull apart to open blind.
GROUND BLIND DISASSEMBLY INSTRUCTIONS
STEP 6:
Use available stakes
and stake loops to secure
blind to ground.
STEP 4:
Insert each
end of a fiber pole
into opposite corner
pockets. Repeat for
remaining fiber pole,
fiber poles will cross
at peak of roof.
Fiber Poles Instructions
STEP 5:
Tie a knot
around
poles at
the peak of
the roof to
secure.
STEP 7:
Arrange
windows and
openings to your
desired hunting
positions.
Completed
Ground Blind
Installation
PLEASE NOTE: Images used are for demonstration purposes only and may not depict the actual product.
Ameristep® Inc. 901 Tacoma Ct. • P.O. Box 189 • Clio, MI 48420 (810) 686-4035 www.ameristep.com
Fiber Poles:
Included are 2 fiber poles to arch the roof.
Insert one end of each pole into opposite
pockets inside the blind. The poles will
cross at the peak of the roof.
The pockets are located:
either at window areas
or
bottom corners
in all 4 corners of blind
.
Secure poles to blind
using tie at the peak of roof.
Page 2
FIBER POLES
Window Location
Corner Pocket Location
Secure Fiber Poles at Peak of Roof
©2008
(rev 4/08)
Corner
Roof


