Qt X Controller
Accessory Installation Guide
page 5
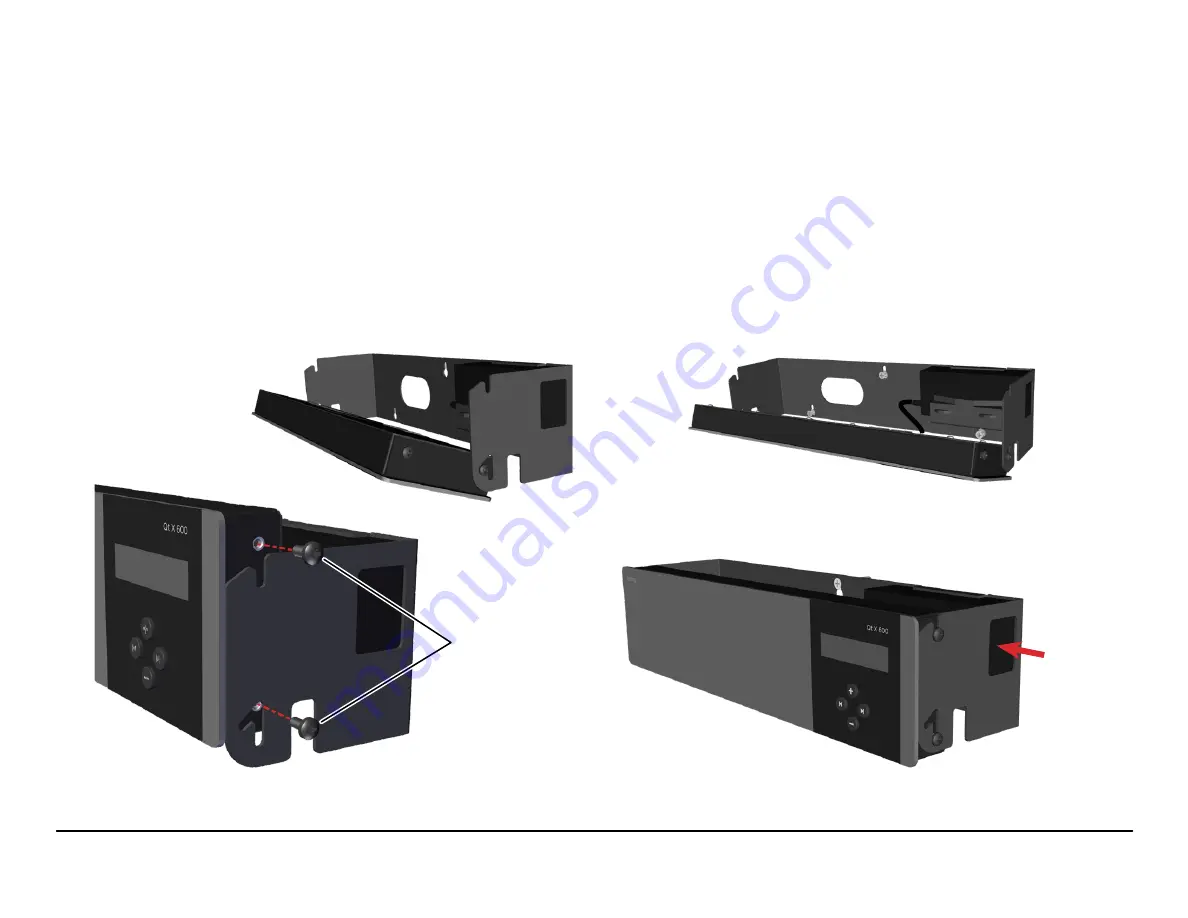
Figure 9.
Mount unit to wall bracket and rotate down
4. Place the wall bracket where it is to be mounted and mark the hole locations.
If installing into drywall/sheet rock, drill the mounting holes with a 1/4" drill bit
and insert plastic mounting anchors into the drywall/sheet rock.
Important:
If using the wall mount bracket as a template to drill into the wall, do
not connect it to the control unit until after the wall has been drilled. This prevents
dust and debris from getting into the Qt X connectors and ports.
5. Attach the controller to the wall bracket by aligning the lower holes on either
side with the angled slot. Install the lower screws, but do not tighten, allowing
the bracket to move. Loosely install the upper screws without capturing the
upper slots in the bracket (Figure 9). The control module rotates forward for
wall mounting and cable installation.
Install Wall Mount Bracket
(continued)
Figure 10.
Mount unit / wall bracket
Figure 11.
Controller in operating position
Plug power
cord into
power supply
6. Install the screws into the plastic anchors leaving enough room for the bracket
to be hung on the screw heads (Figure 10). Place the bracket so the screw
heads fit into the keyholes and then move the bracket down to capture the
screws. Tighten the screws to secure the bracket to the wall.
NOTE:
Keep the controller rotated down to make it easier to tighten the mounting
screws.
7. Connect all wiring/cabling as described in the Qt X Installation & Operation
Guide. Rotate the Qt X up and move down into the operating position to lock
into place. Tighten the side screws to secure it to the bracket (Figure 11).
TIP:
Use cable ties to constrain extra cable lengths for a neat appearance and to
reduce tangles.
M4 Screws


