


23
Changing Masking Level Using MCS
Follow these steps to update the parameters within the masking level block:
1
Review – selecting the REVIEW button will allow the user to select a zone and see the current
configuration. Click on the zone on the left side of the Operations Section.
2
To modify a zone, start by clicking the MODIFY button.
3
Select the zones to modify by checking the checkbox of each zone of interest on the left side of the
Operations Mode screen
4
To set the masking level, use the multi-select for MAX and MIN settings in the middle box.
5 Select Submit to commit the values
NOTE:
Only modify one block at a time and then click the related Submit button. If you modify both Apply to
Zones masking and Time of Day block settings, then click a Sumbit button, only one block’s modification is
updated The suggested volume setting is discussed earlier in the Introduction section
If a small area within a zone exhibits a perceived volume louder than the rest of the zone, due to a difference in
acoustics, use the adjustable rocker switch on the back of each related emitter to turn the volume down (by 3,
6, or 9 dB from the value set at the controller). See emitter spec sheet for more details.
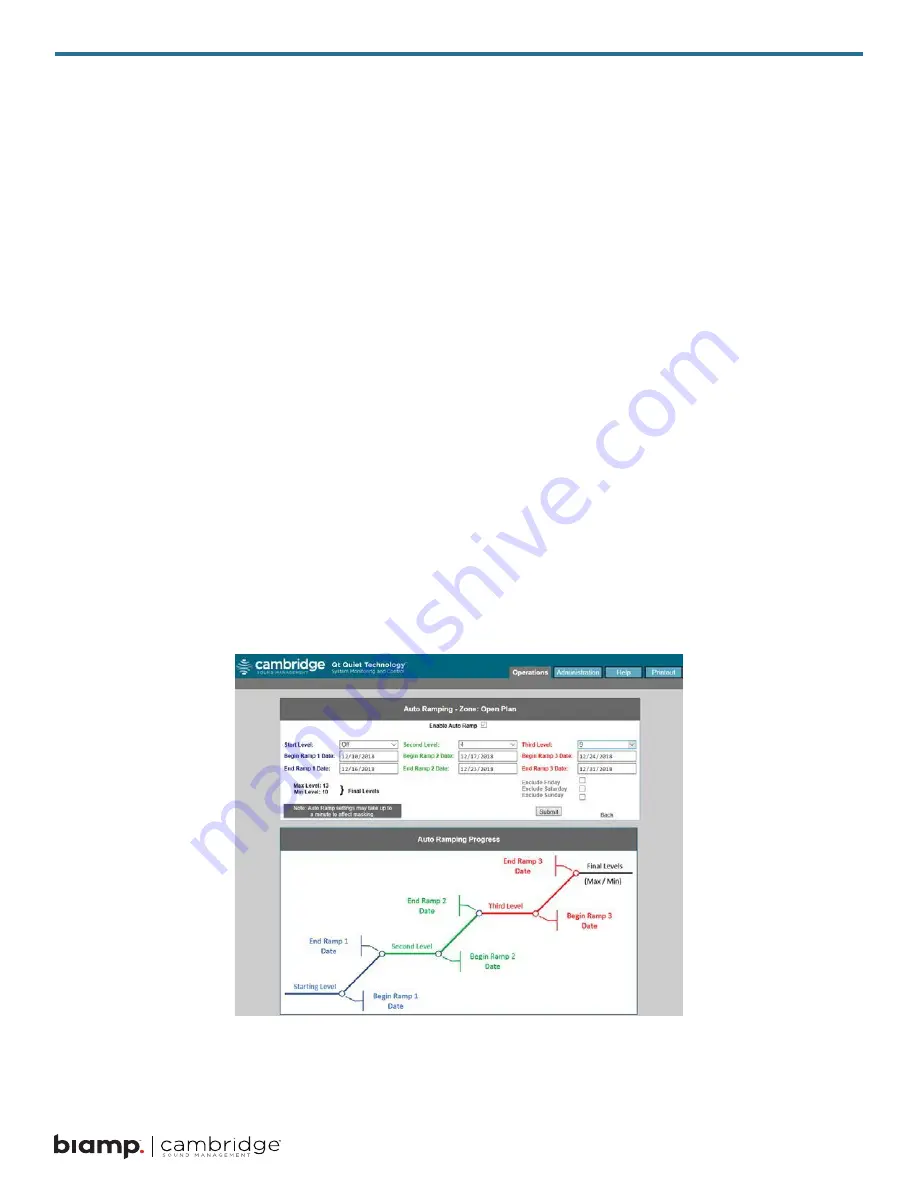
Auto Ramping
The Auto Ramping function is typically used once, when the system is first installed. The Auto Ramping
function is used to introduce sound masking into an occupied space gradually. The Auto Ramping function
allows the user to program 6 calendar dates and 3 masking levels used during the Auto Ramp for up to 3
ramps and 3 constant levels
Содержание Cambridge Qt 300
Страница 1: ...Qt 300 600 Installation and Operations Guide ...
Страница 2: ......
Страница 3: ...3 ...
Страница 4: ...4 ...
Страница 37: ...37 ...


